Build Farm with Agents
This tutorial explains how to install OneDev agents on multiple machines to get a build farm. Agent is designed to be maintenance free: the server will push updates to agents automatically when it is upgraded.
How to Set Up
Let’s go through an example to see how to set up the build farm:
- Start OneDev server with below command on Linux or Mac (this command is for demonstration purpose, follow installation guide for production use):
docker run --rm -v /var/run/docker.sock:/var/run/docker.sock -v $(pwd)/onedev:/opt/onedev -p 6610:6610 -p 6611:6611 1dev/server
-
Open browser to visit http://localhost:6610 to complete the setup
-
Visit agent management page, click the add agent button, and show the docker command to run agent:
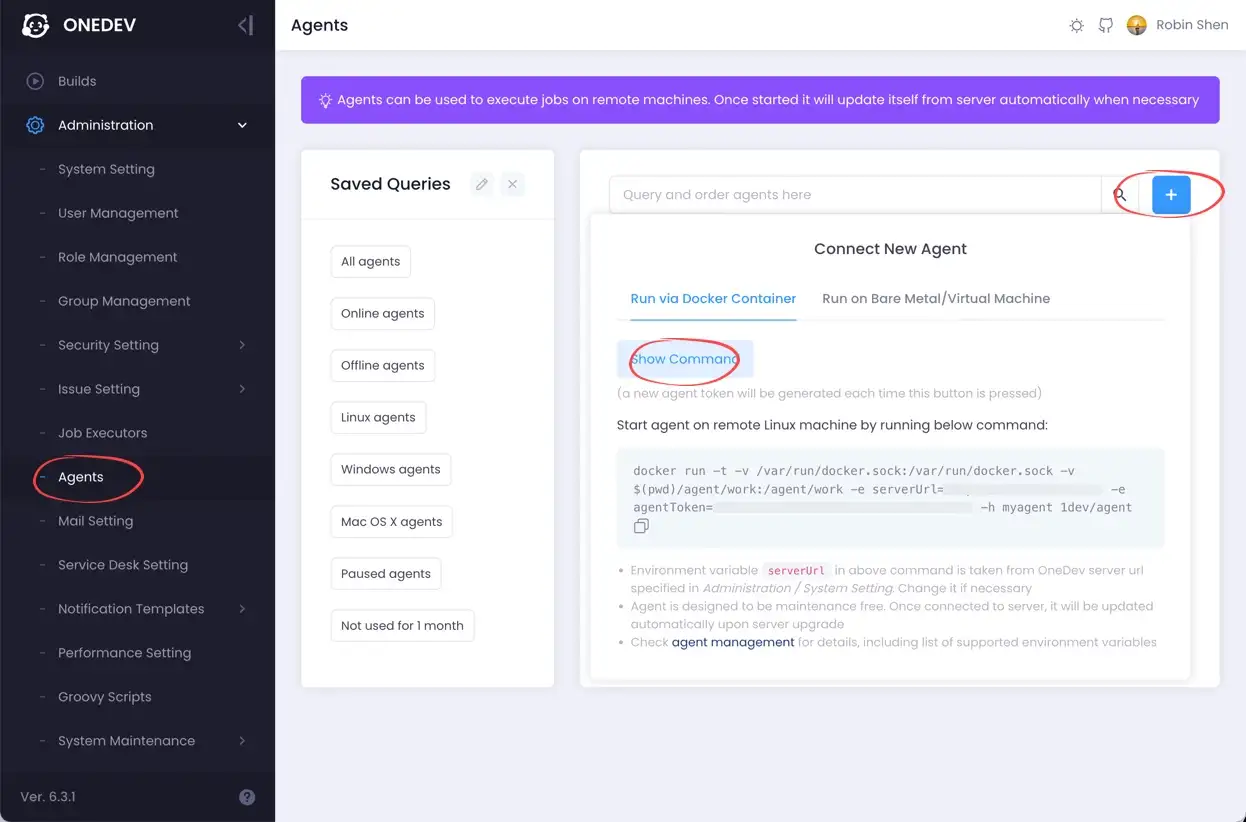
-
Copy the command to your terminal (Linux/Mac), change serverUrl environment to
http://<ip address of OneDev server>:6610(do not use localhost here as otherwise OneDev agent running inside container can not access OneDev server), and run the command to start agent. If connected, the agent will be online in agent management page like below: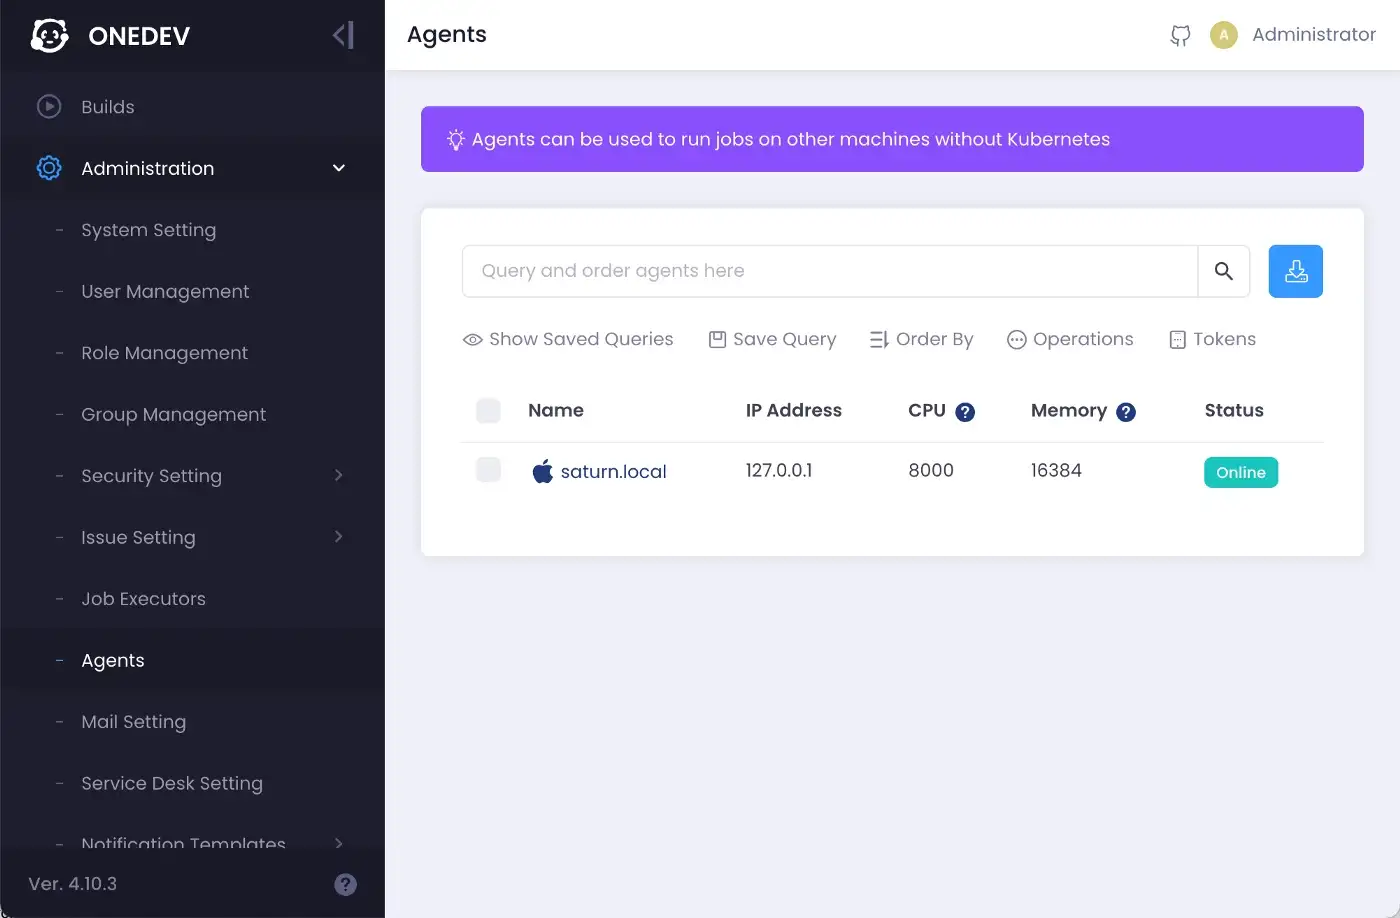
-
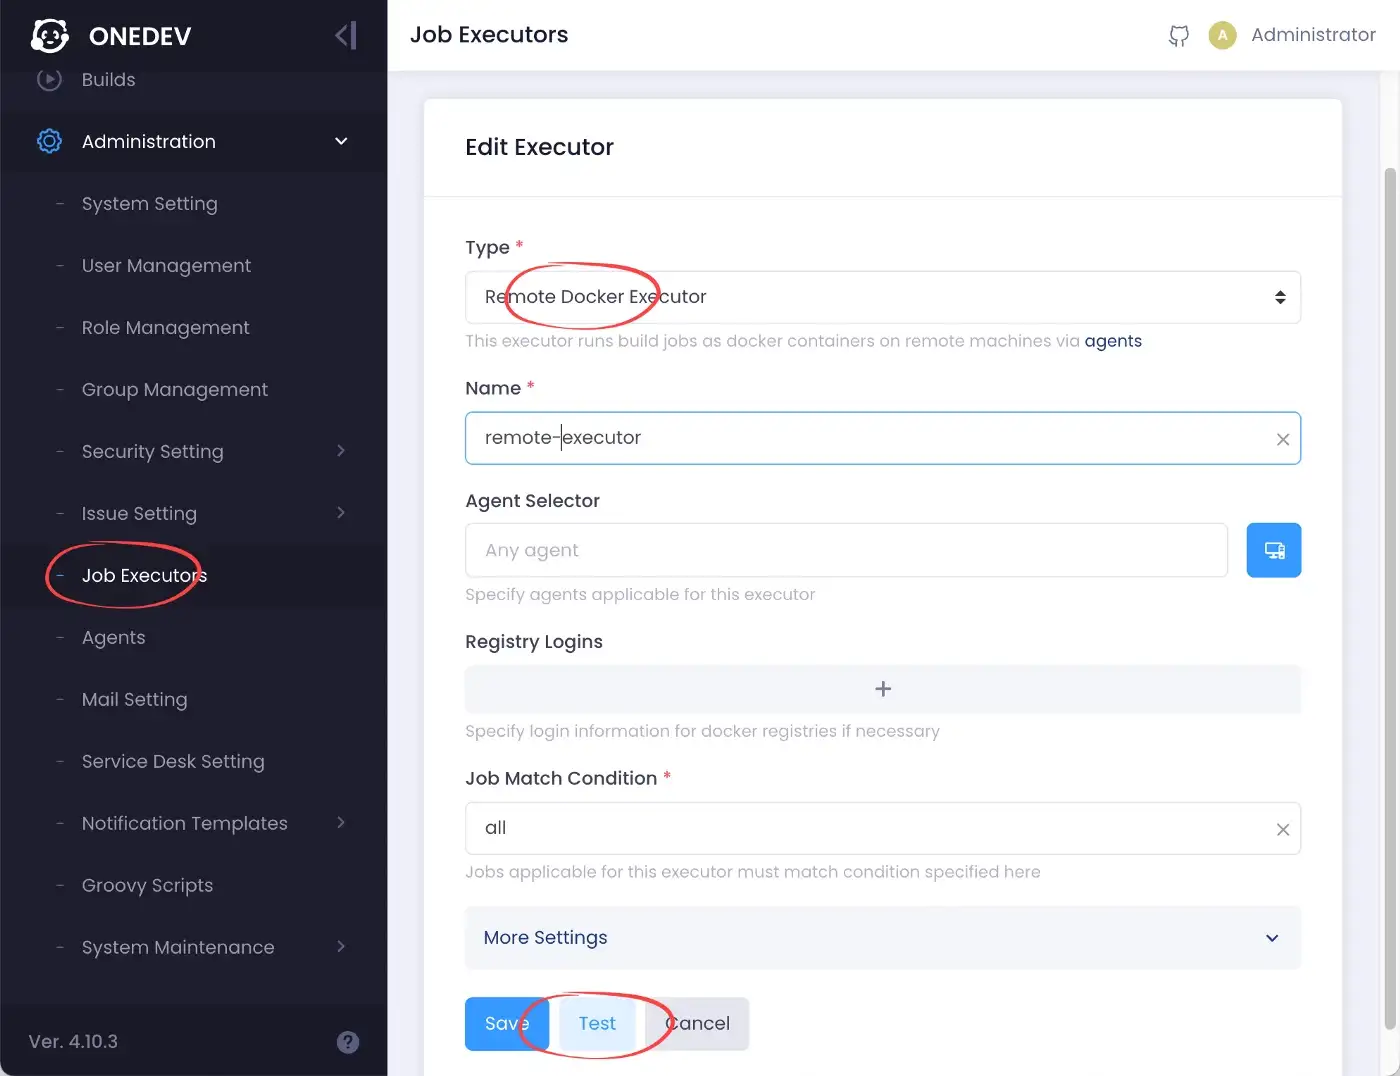
Now let’s create a job executor to use the agent. Switch to job executors page, delete the default auto-discover executor, and create an executor of type Remote Docker Executor, give it a name and leave others as default. Test and save the setting:
-
Create a test project, define CI spec with a simple job, and run the job. You will see that the job is running on the agent:
When OneDev dispatches jobs to agents, it choses the best one based on agent cpu/memory capacity and job cpu/memory requirement. If no agents satisfies the requirement, the job will be in waiting state.
Thanks for reading!