Single Sign On with Okta
This tutorial explains how to set up single sign on with Okta, and authorize users based on Okta group membership information
Single Sign On with Okta
-
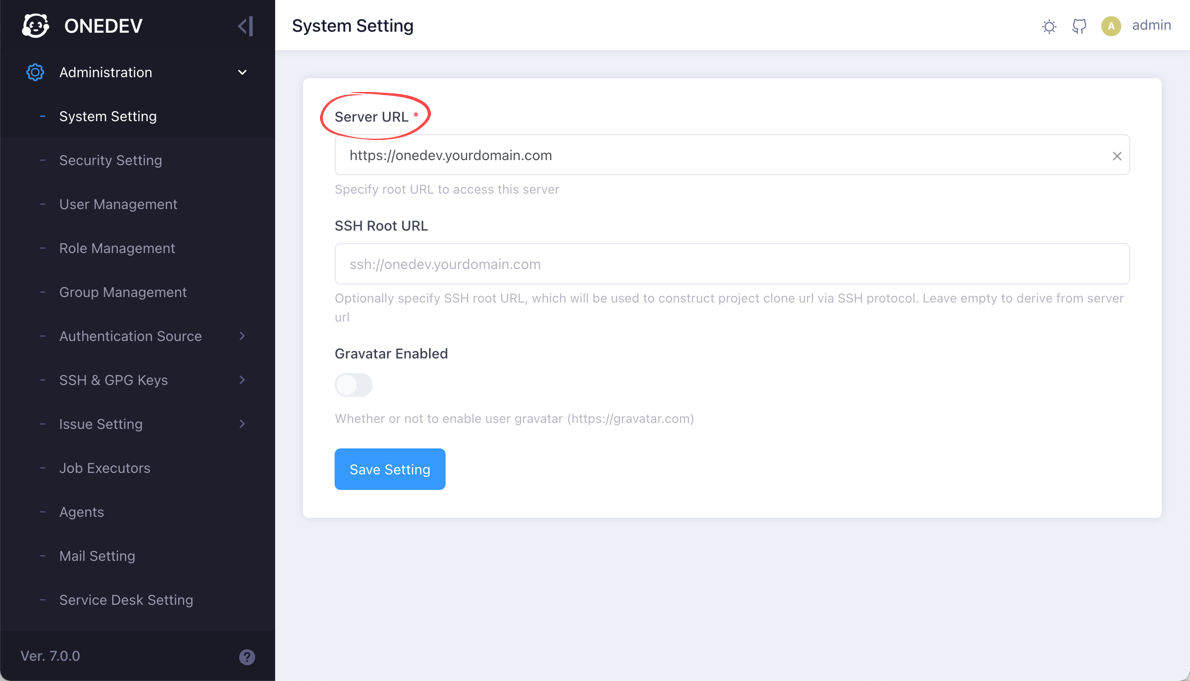
Make sure your OneDev instance can be accessed publicly, and configure the public server url in Administration / System Setting
-
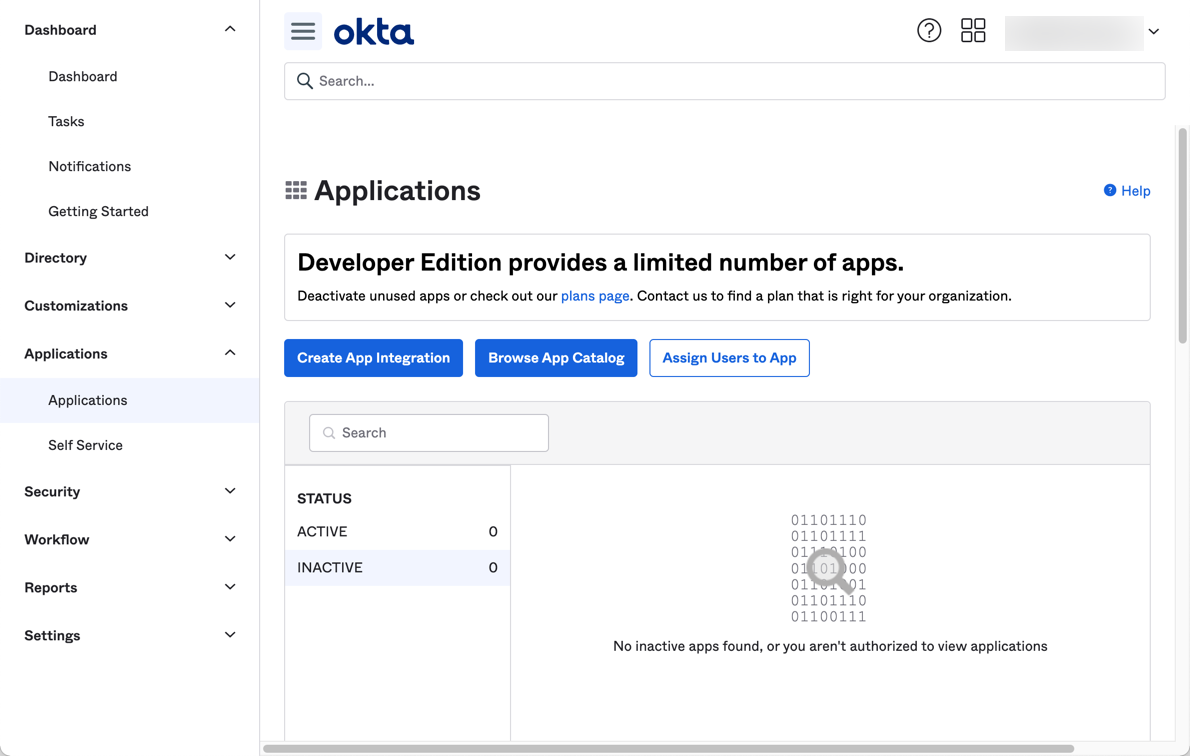
Login to Okta to manage the applications
-
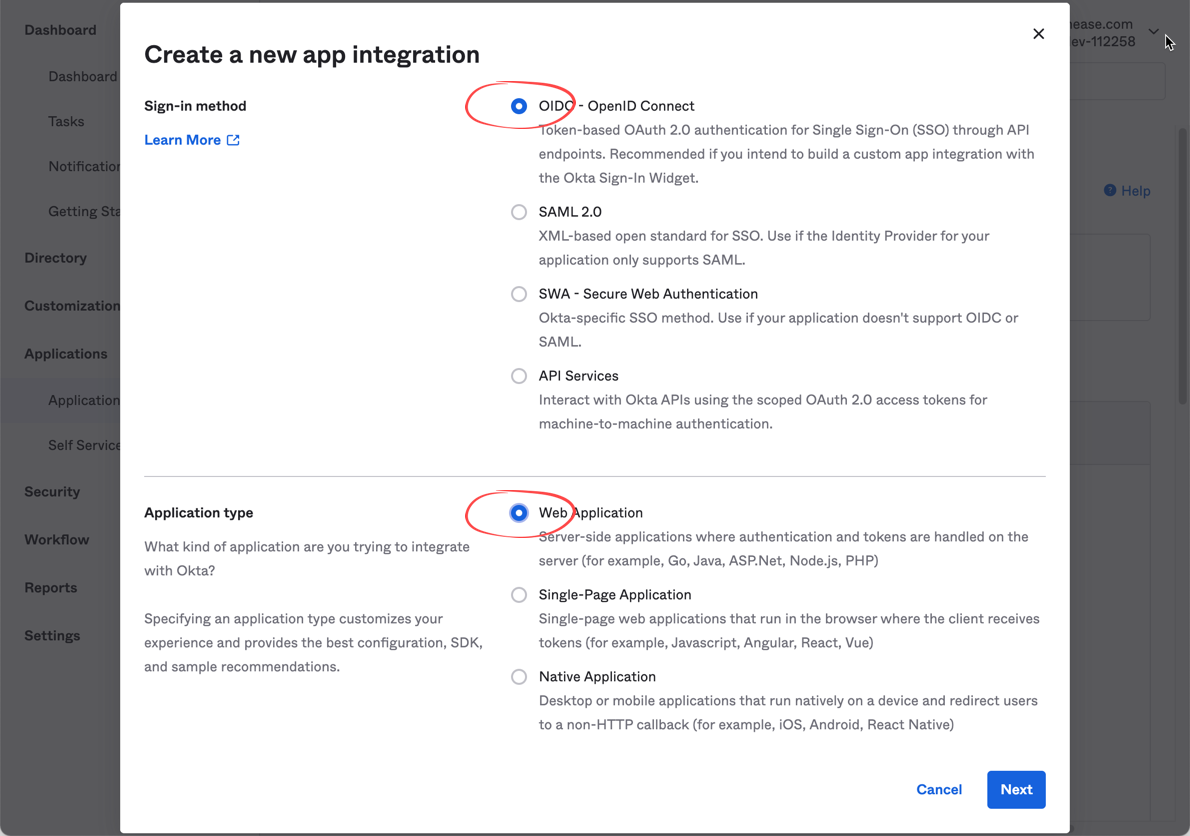
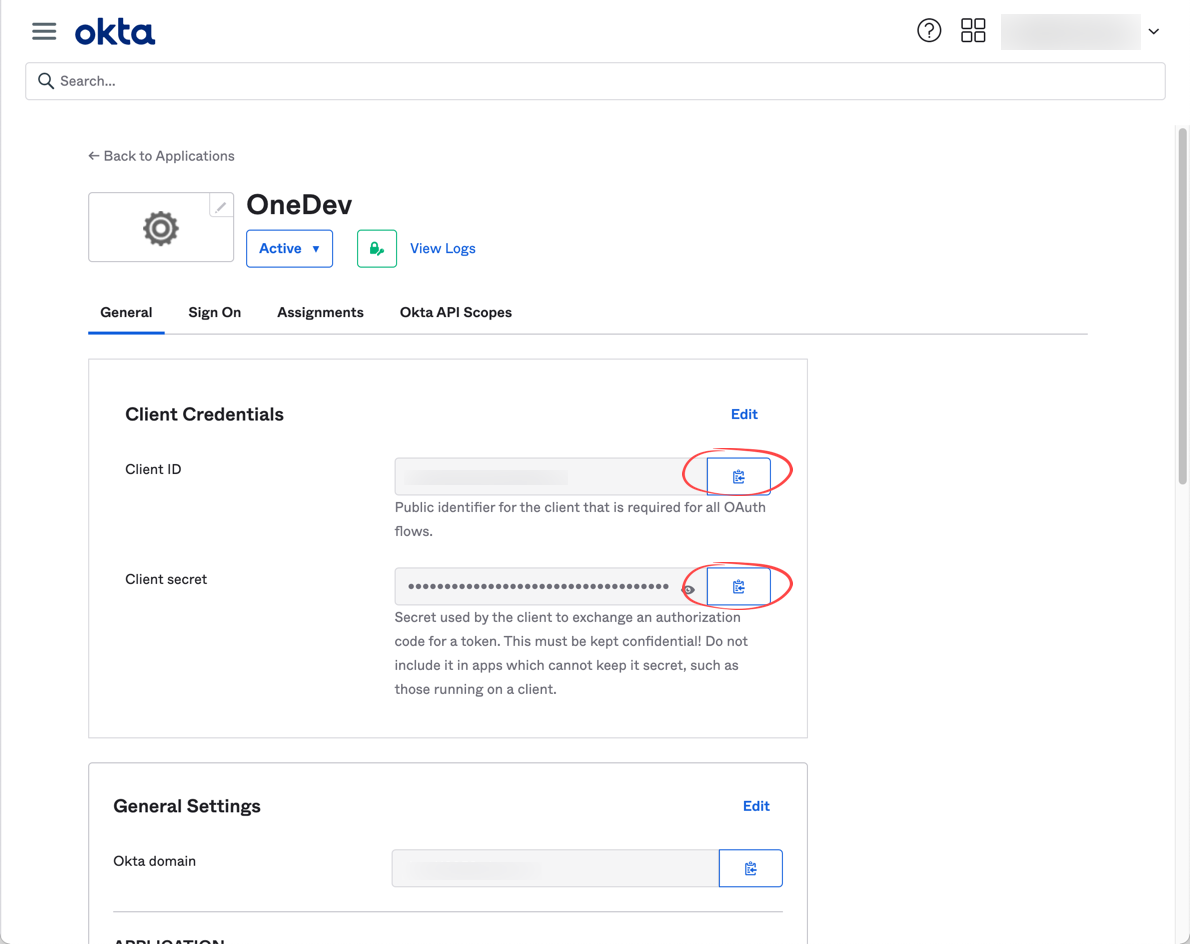
Add OneDev as a web application to get the client id and secret
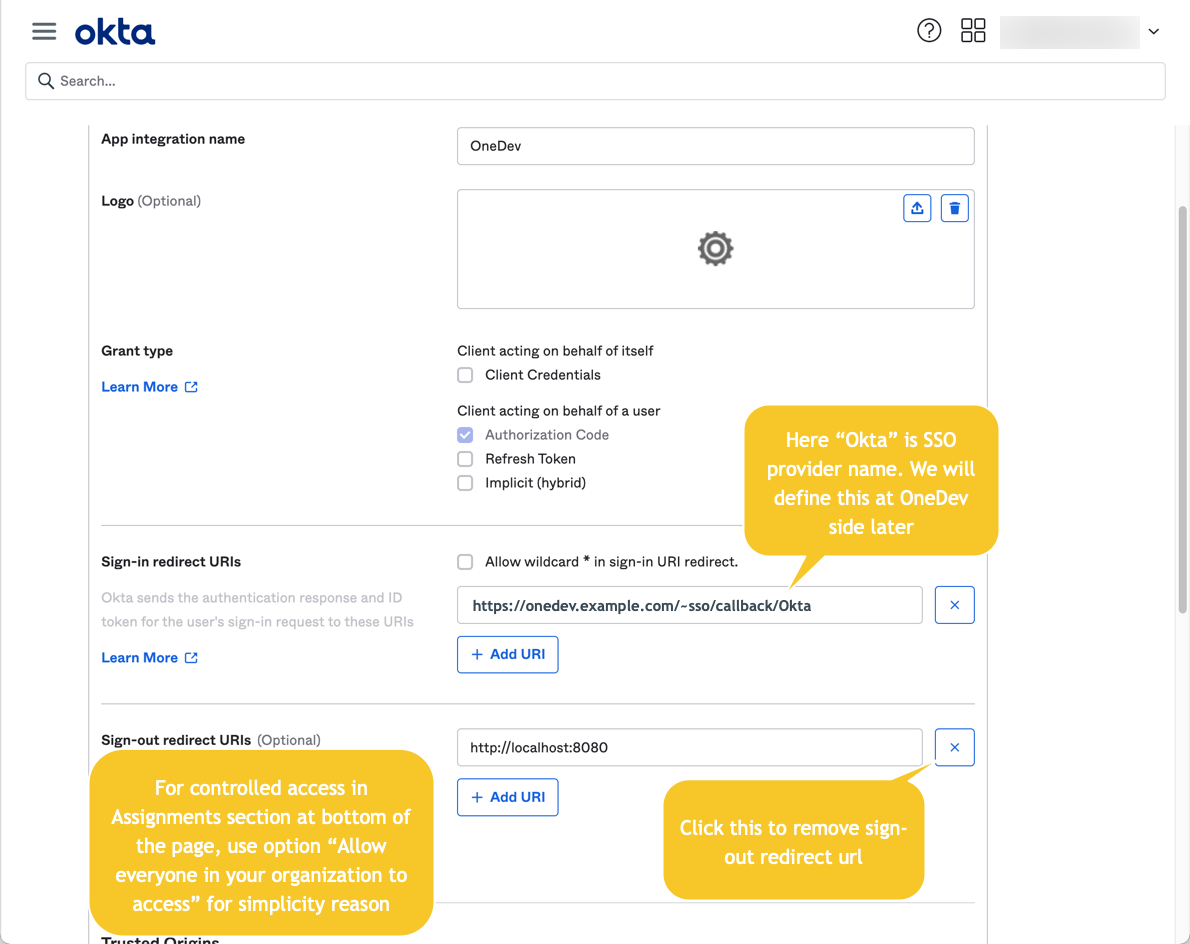
For versions before 7.8, use https://onedev.example.com/sso/callback/Okta instead of https://onedev.example.com/~sso/callback/Okta for Sign-in redirect URI
-
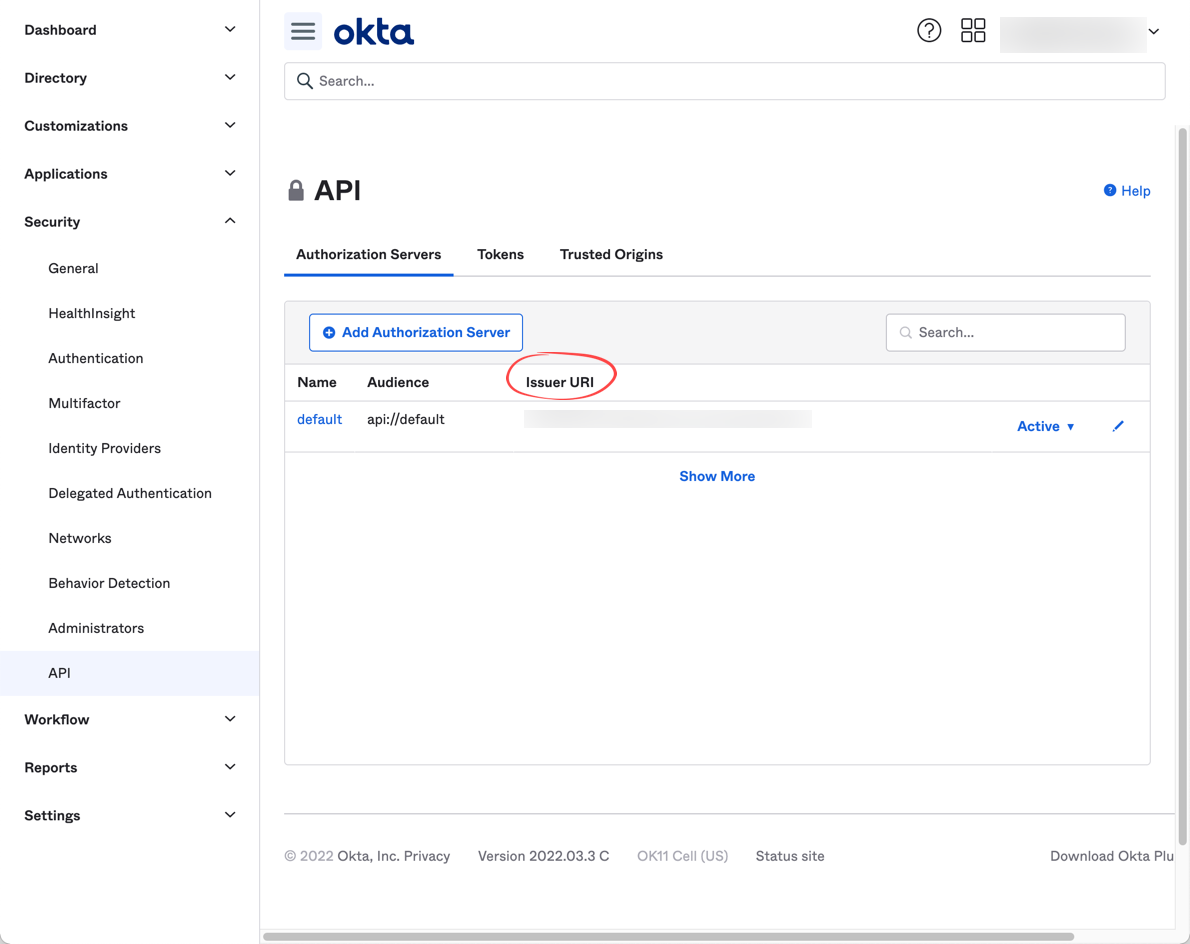
Switch to api/authorization servers to get the default issuer URL
-
At OneDev side, switch to page Administration / Authentication Source / Single Sign On, add a provider of type OpenID , with information from previous steps
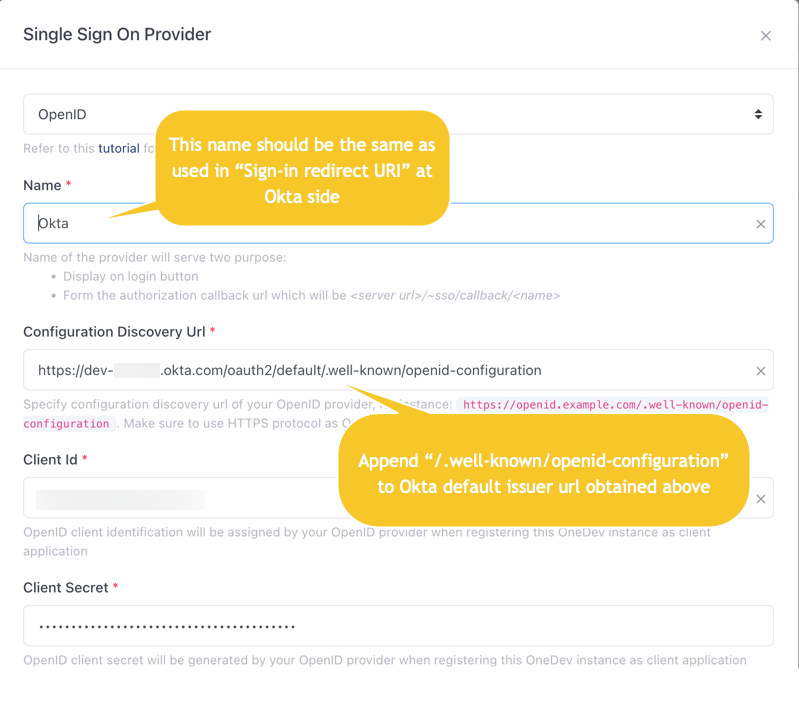
For versions before 7.9, you will see issuer url instead of configuration discovery url. In that case, fill with default issuer url obtained in above step directly.
-
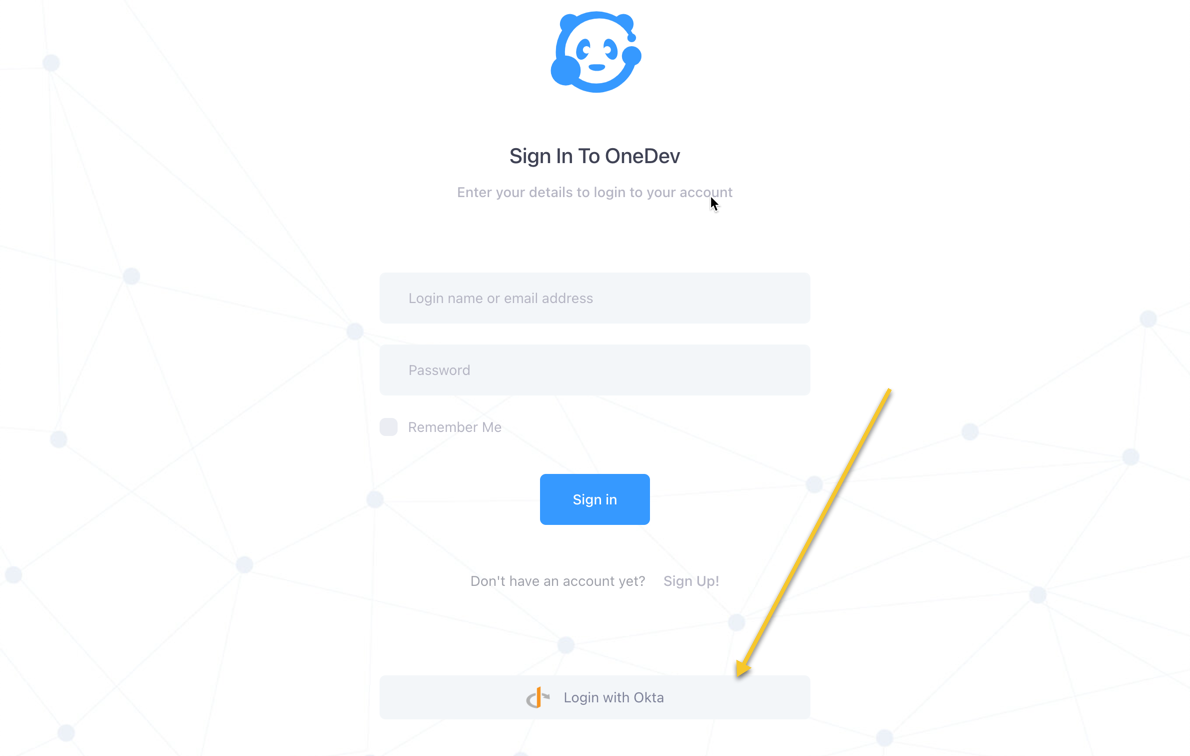
Now sign out and a button Login with Okta will appear at bottom of the login page. Anyone in your Okta organization assigned to OneDev application will be able to login via this button
Authorize Users Based On Okta Group Membership Information
-
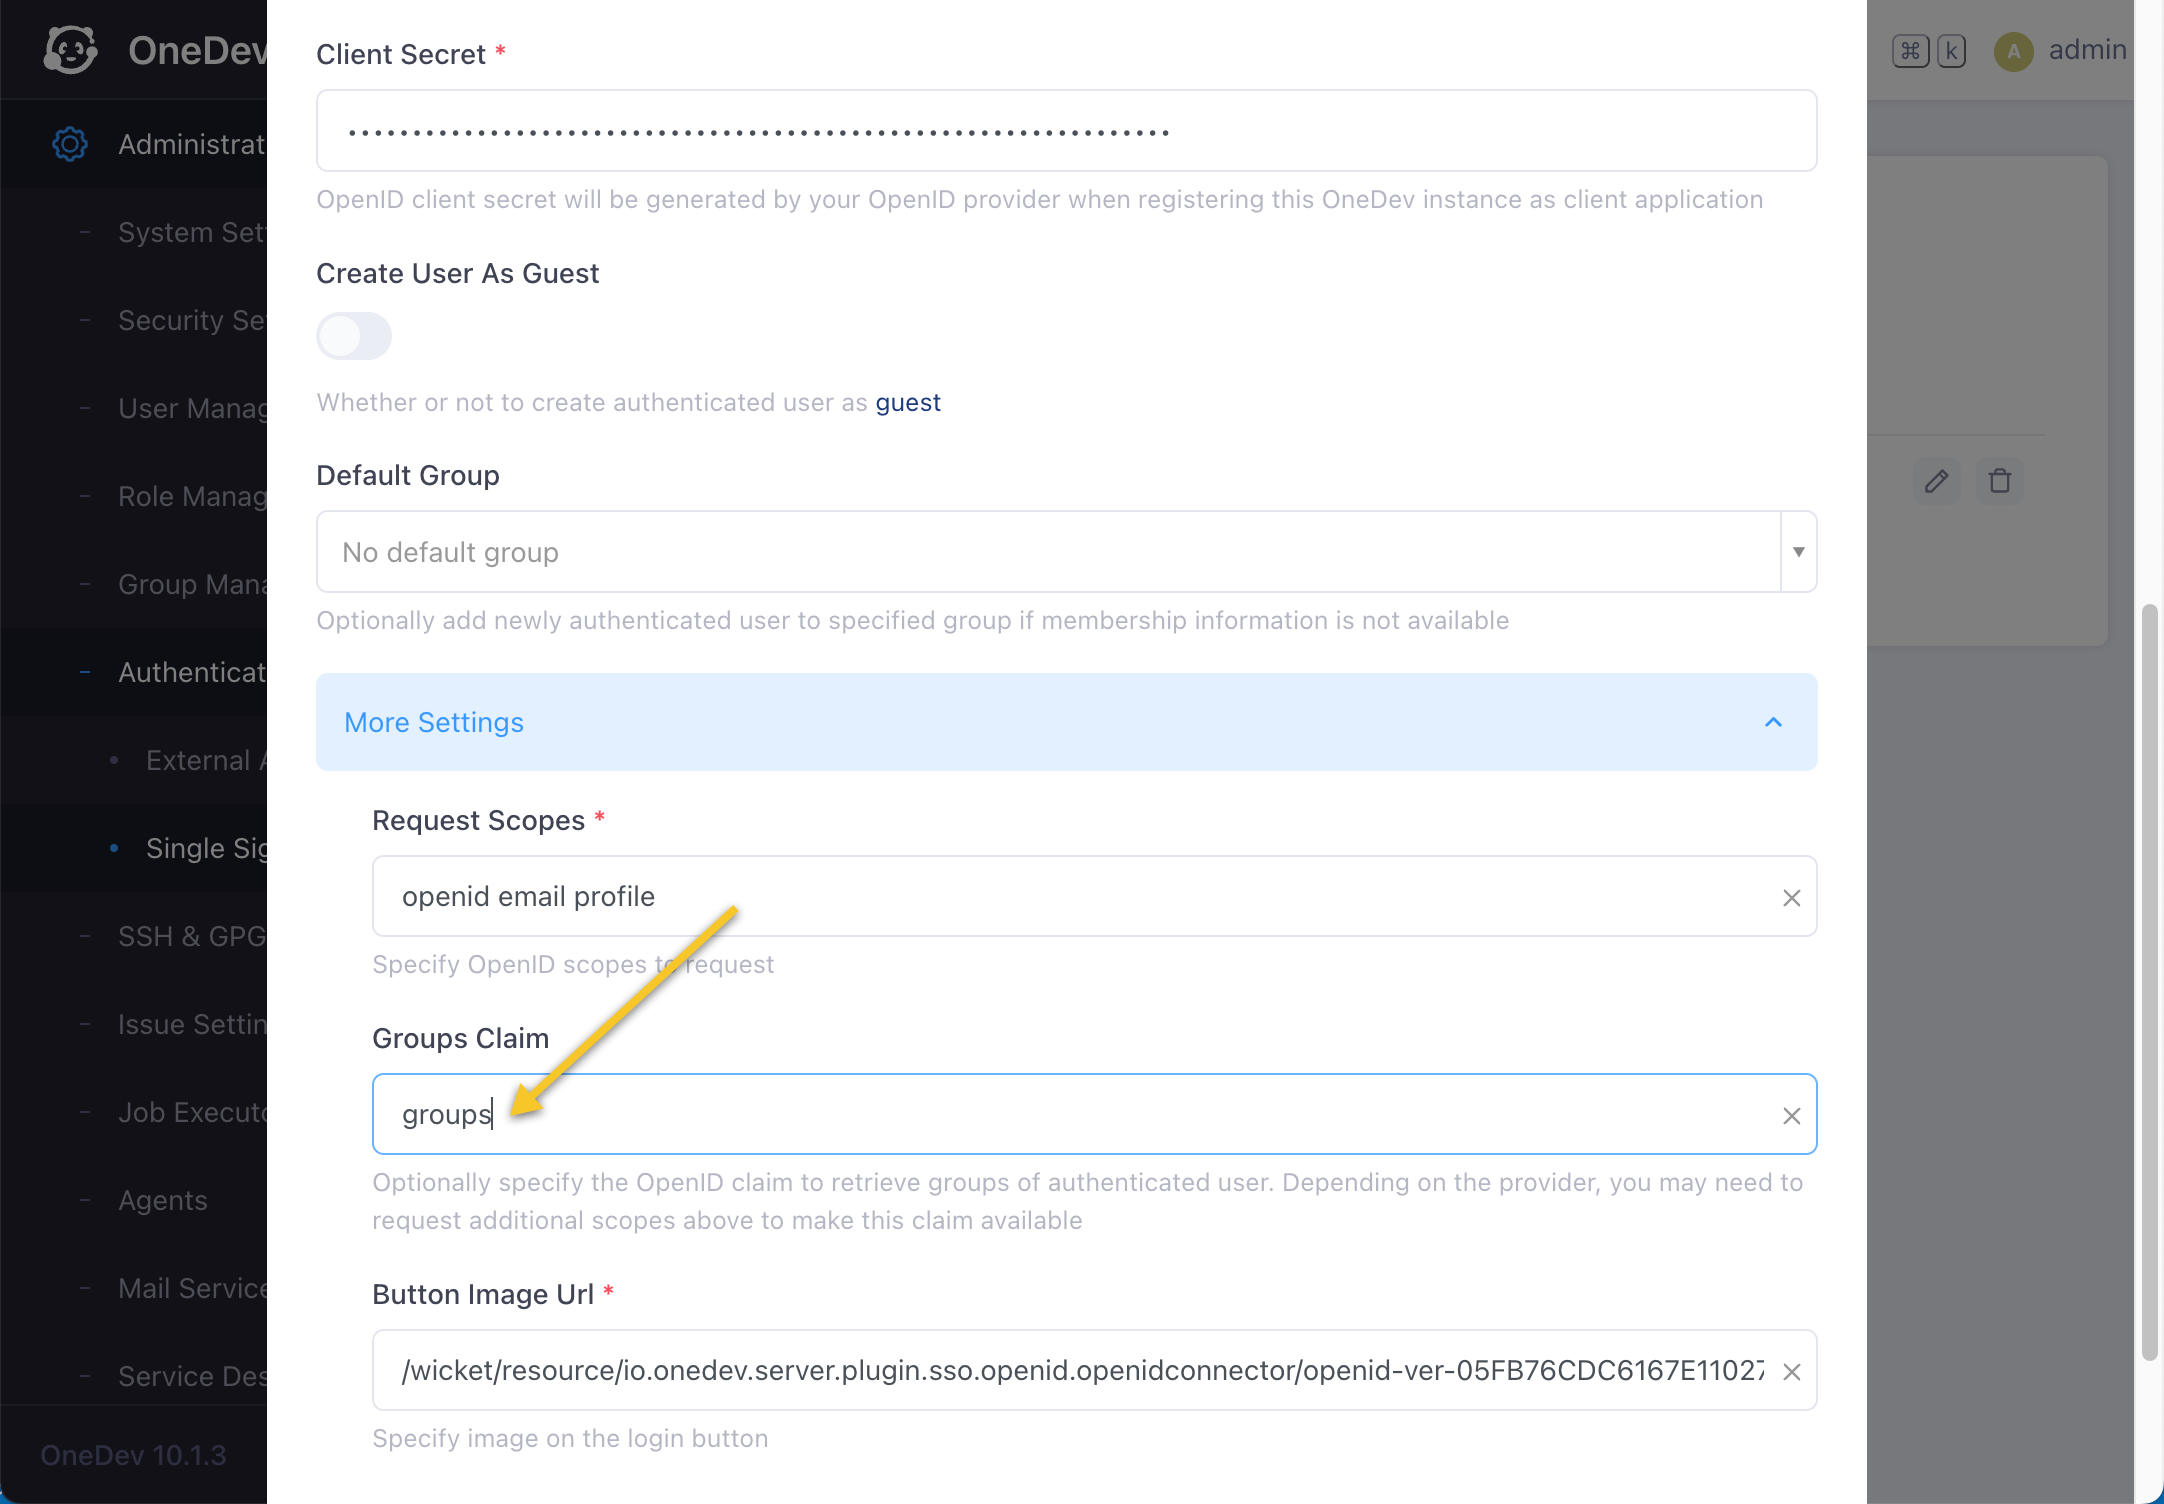
At OneDev side, edit Okta single sign on provider, and specify groups claim as groups
-
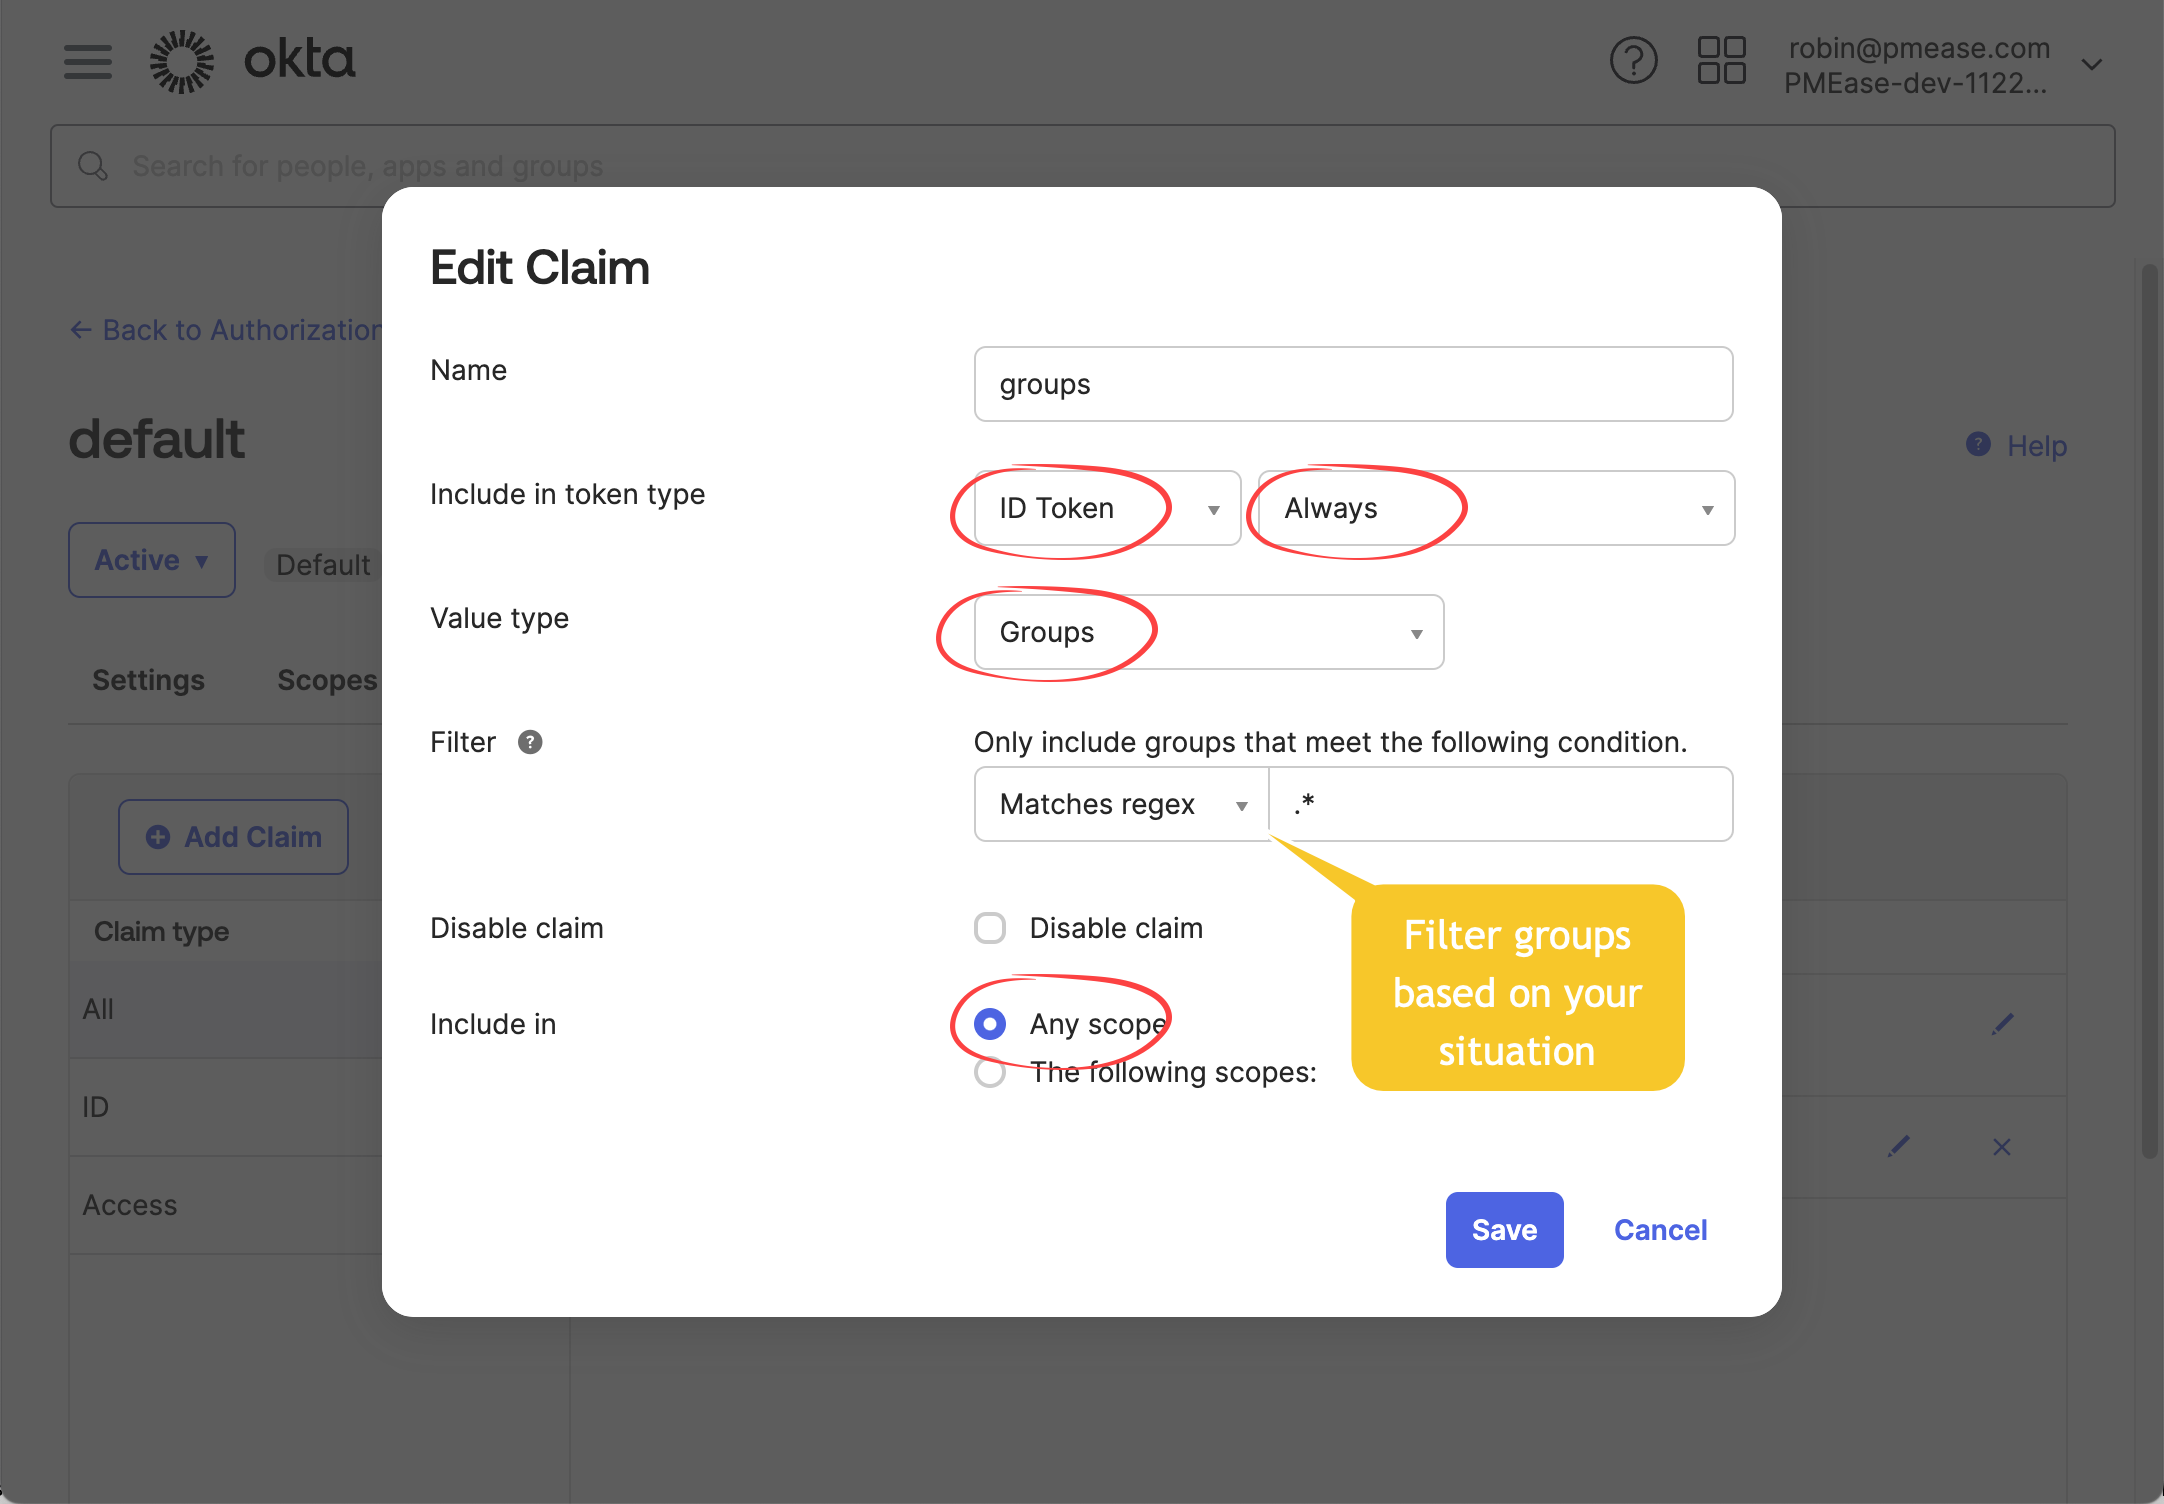
At Okta side, switch to page api / authorization servers, select default authorization server to add groups claim like below
-
At OneDev side, switch to page Administration / Group Management, add necessary Okta groups (same name) and assign appropriate permissions
-
Now users signed in via Okta will be added to corresponding groups at OneDev side to get appropriate permissions
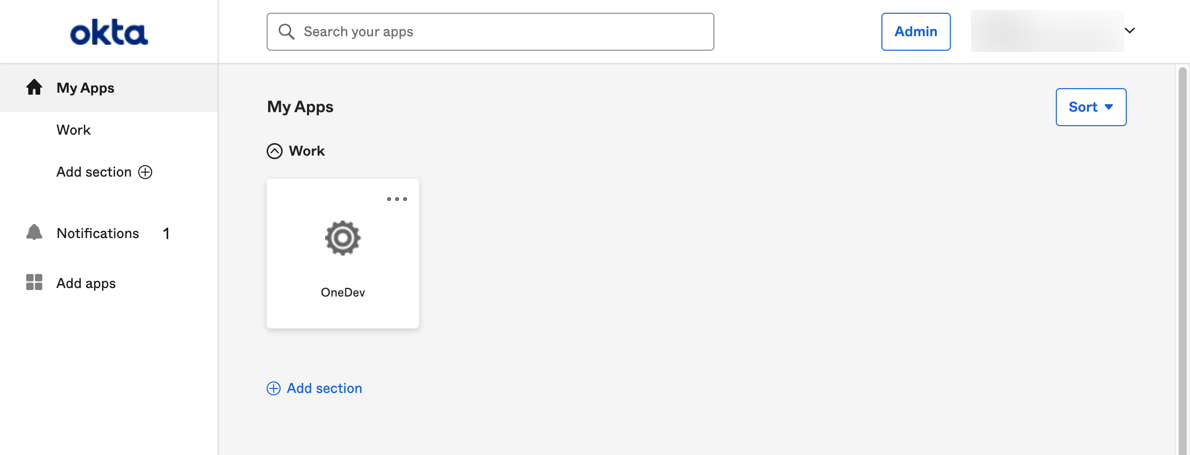
Access OneDev from Okta Side
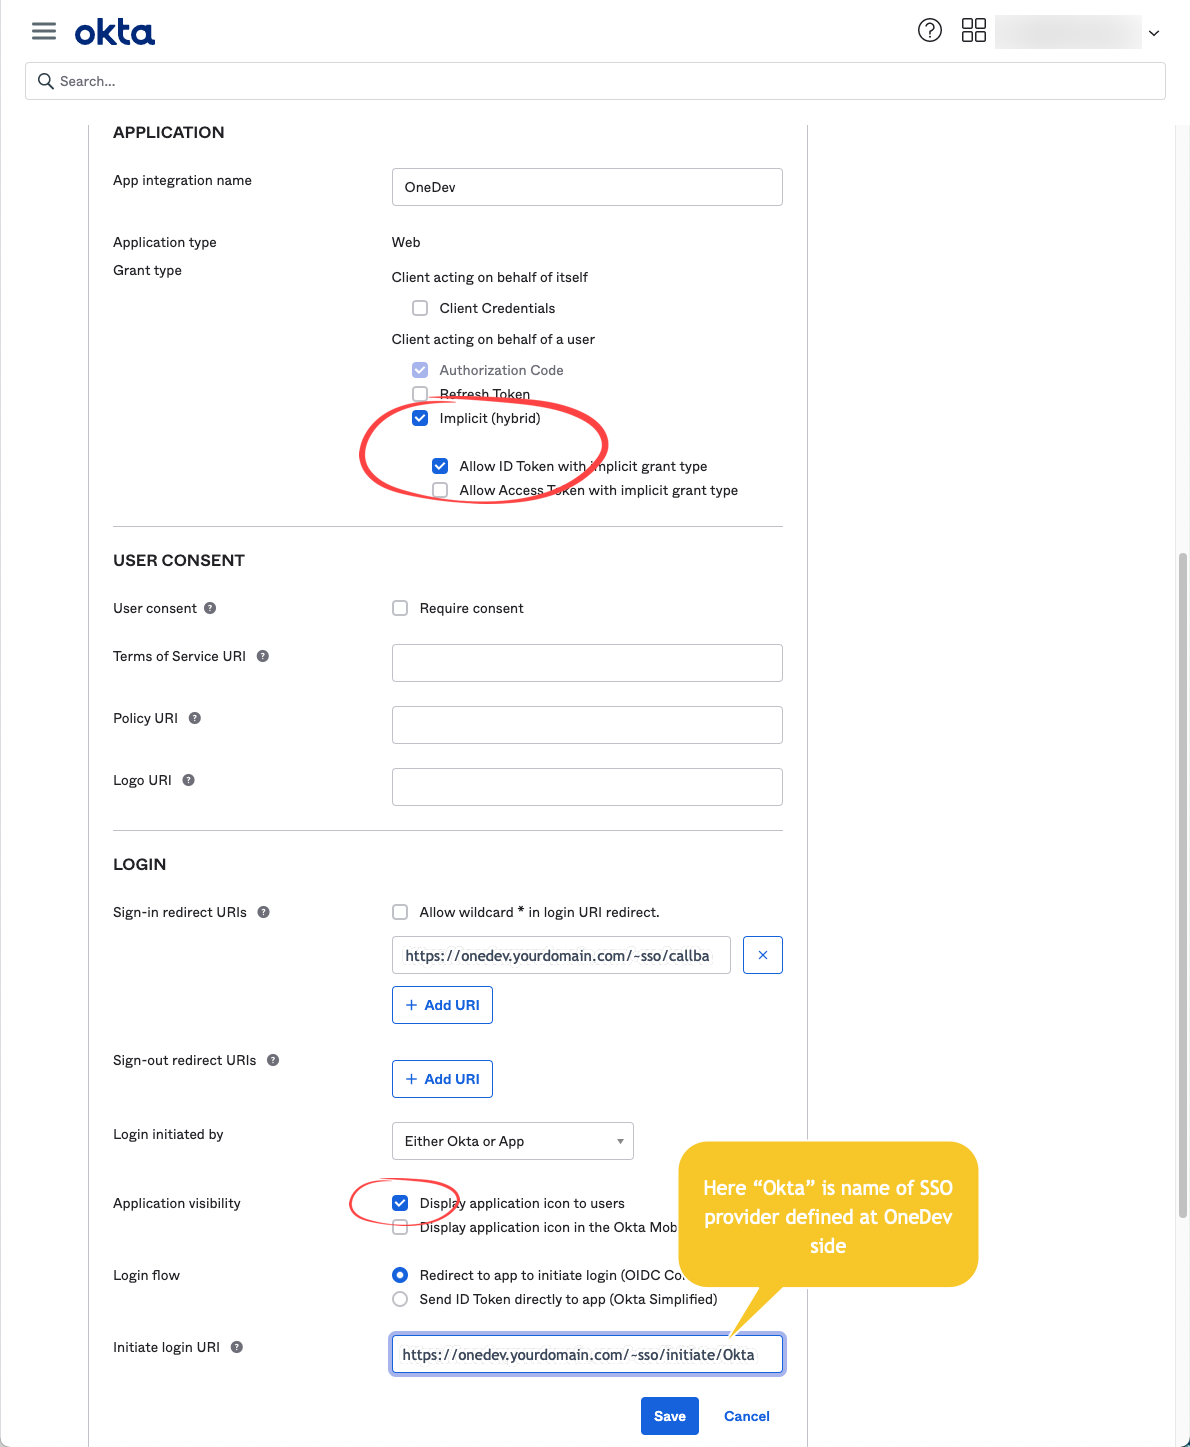
To access OneDev from Okta side, edit the application to enable implicit grant type, tick the option display application icons to users, and configure initiate login url as below:
Then for all users added to the application, they will be able to access OneDev directly from their Okta dashboards: