OAuth with Office 365 Mail Service
OneDev can be configured to send various notification emails via SMTP protocol, or create issues/comments from incoming emails via IMAP protocol. Basic authentication is used when connect to mail server via these protocols, and it will send password directly to mail server for verification which is considered insecure.
Due to this, office 365 is stopping basic authentication support for its mail services. This tutorial guides how to configure OneDev to authenticate to office 365 mail service via OAuth.
App Registration for OneDev
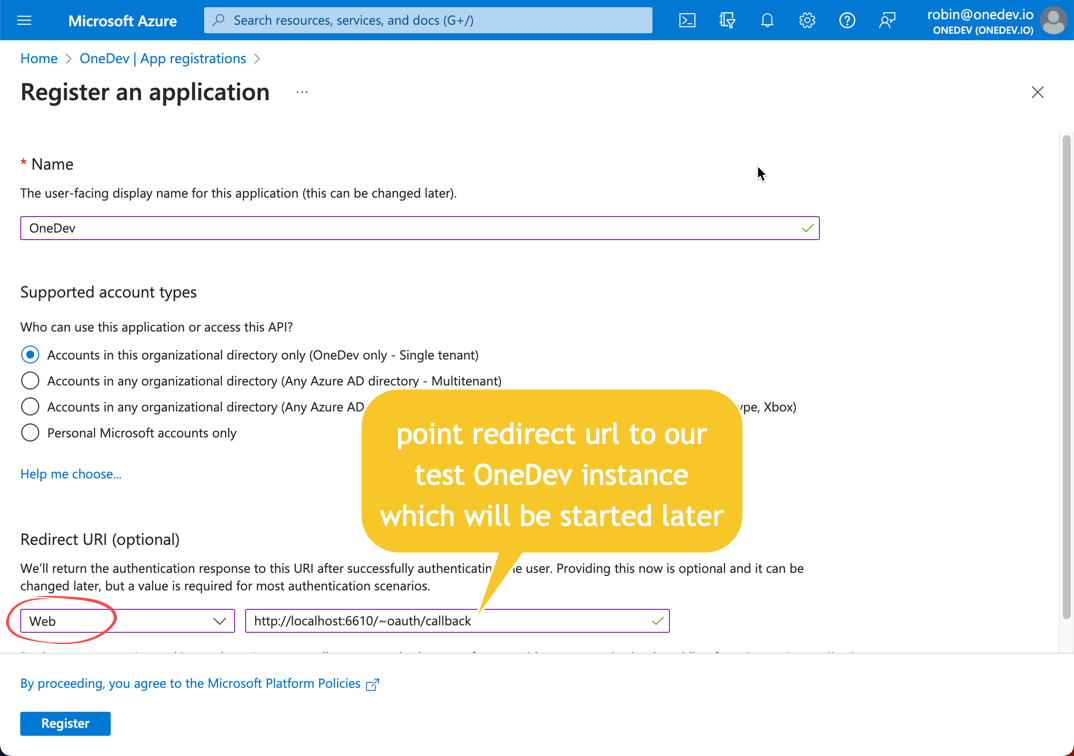
Firstable, we need to register OneDev as an app in Azure Active Directory. To do it, login to portal.azure.com, open Azure Active Directory, navigate to app registrations, and add a new app:
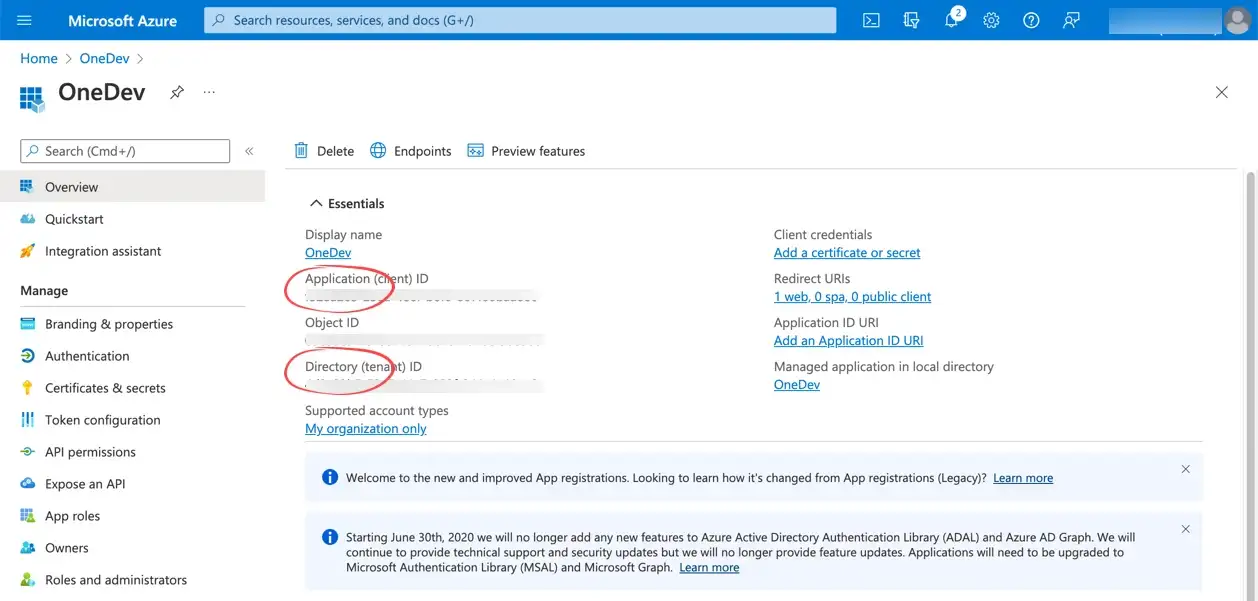
Finish register the app, copy Application (client) ID and Directory (tenant) ID from overview page:
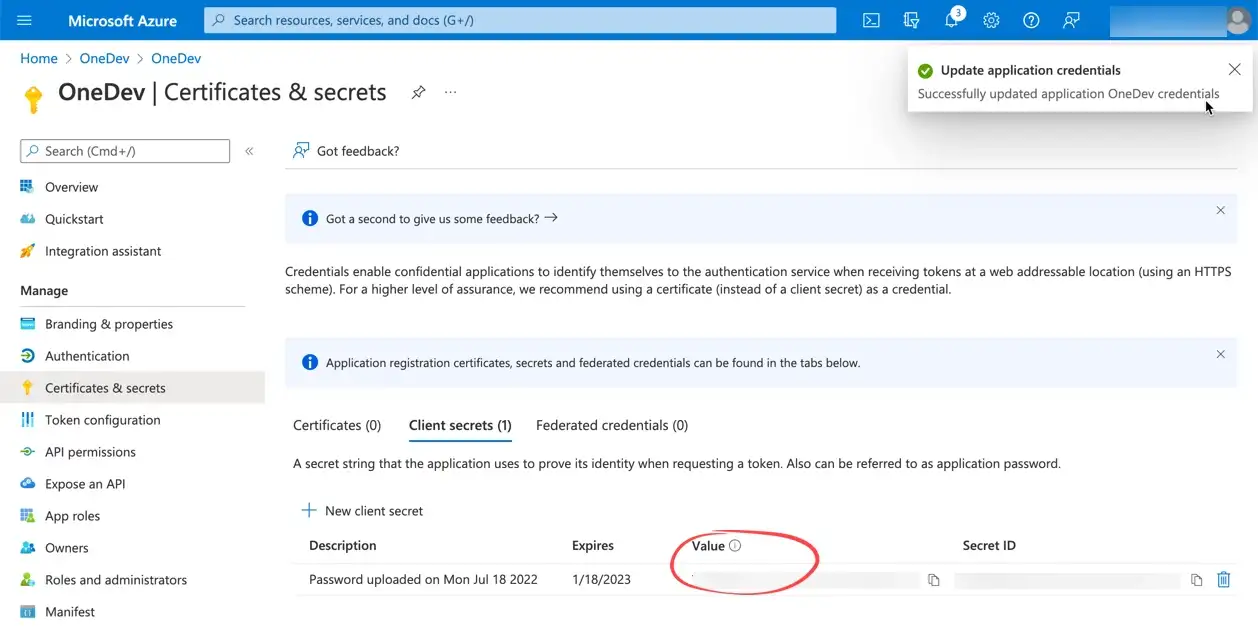
Navigate to Certificates & secrets from left side to add a new client secret and copy the client secret value:
Use Office365 as Mail Provider
Run below command to start a test OneDev instance:
$ docker run -it --rm -v $(pwd)/onedev:/opt/onedev -v /var/run/docker.sock:/var/run/docker.sock -p 6610:6610 -p 6611:6611 1dev/server:7.4.8
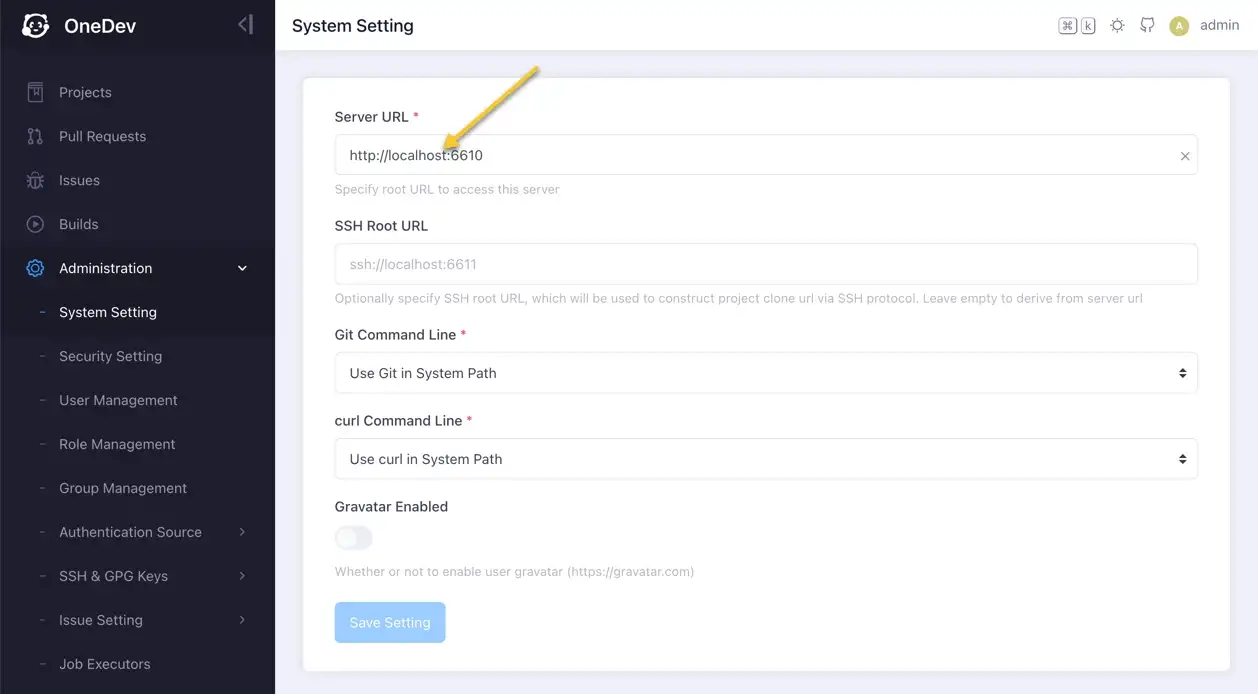
Visit http://localhost:6610 to set up server, make sure server url in system setting is specified as http://localhost:6610. This is key to our testing as office 365 OAuth redirect uri requires either a https url or a localhost url to deliver authorization code securely:
Switch to mail setting page to specify provider as office 365:
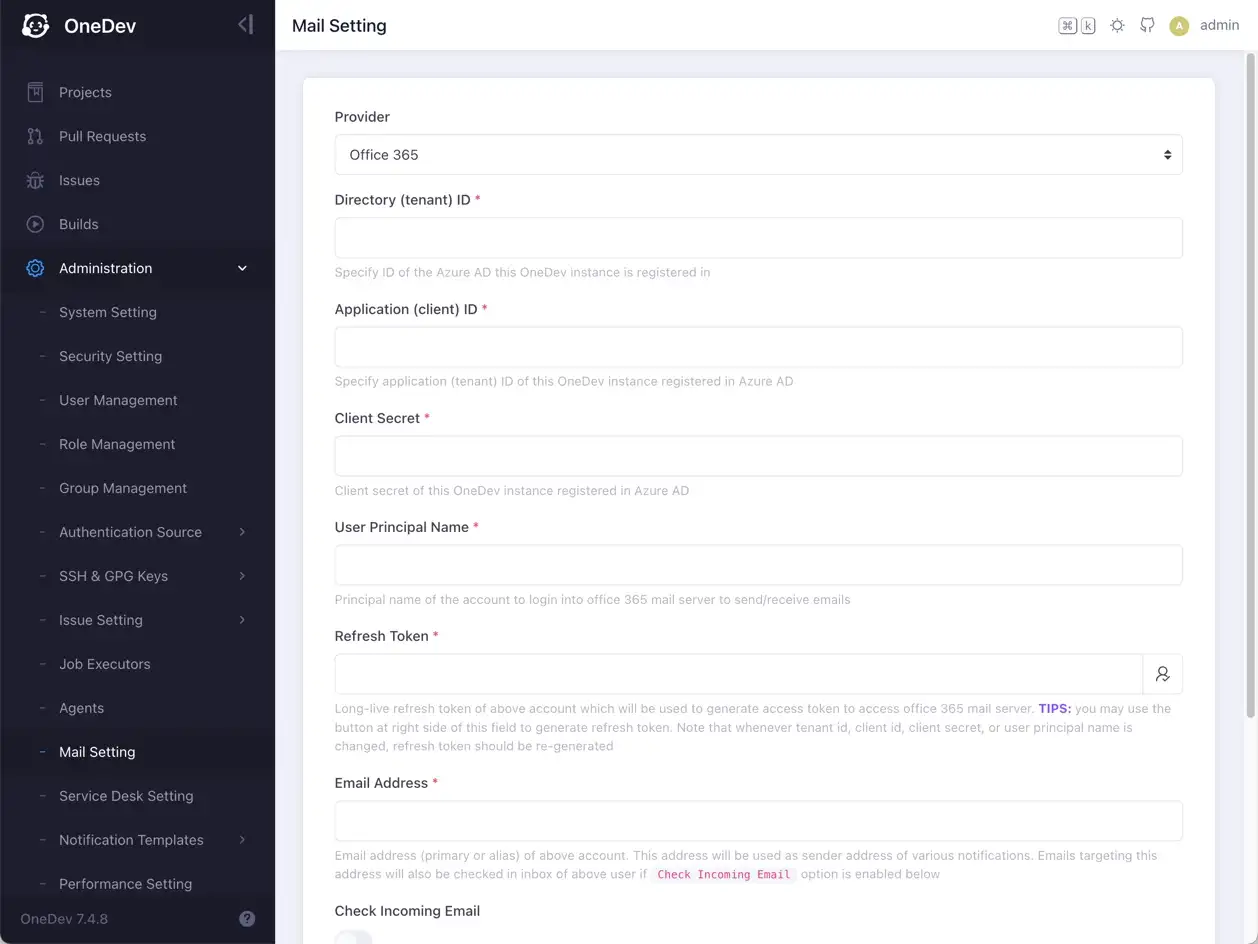
In this screen:
-
Directory (tenant) ID, Application (client) ID and Client Secret
Should be be filled using corresponding value in app registration page
-
User Principal Name:
Should be filled with login name of an azure account, which will be used to send/receive email. It is normally an email address
-
Refresh Token
Should be filled with OAuth2 refresh token. You may generate this token via the icon at right side of the field:

Upon clicking this icon, office 365 login screen will be shown:
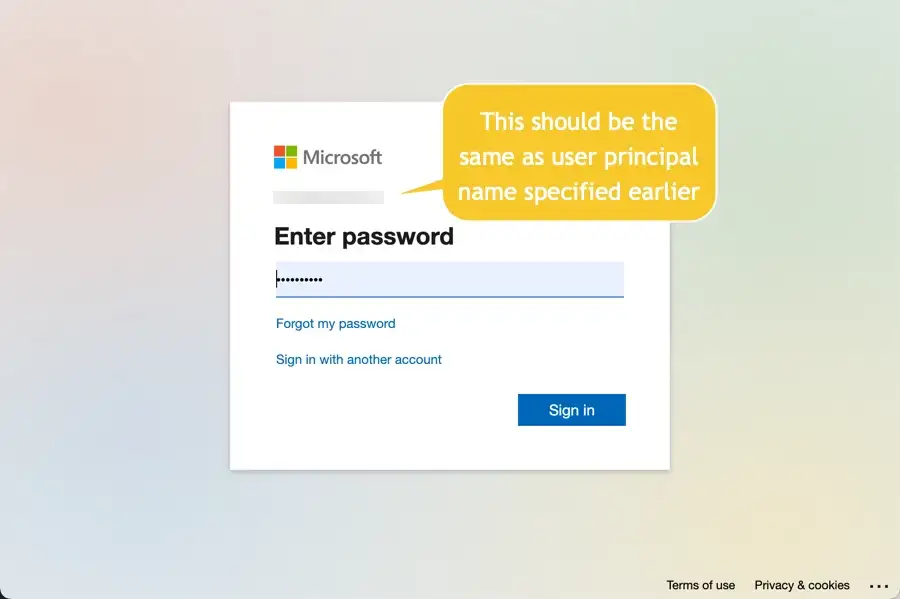
Sign in and continue to accept permissions requested by OneDev:
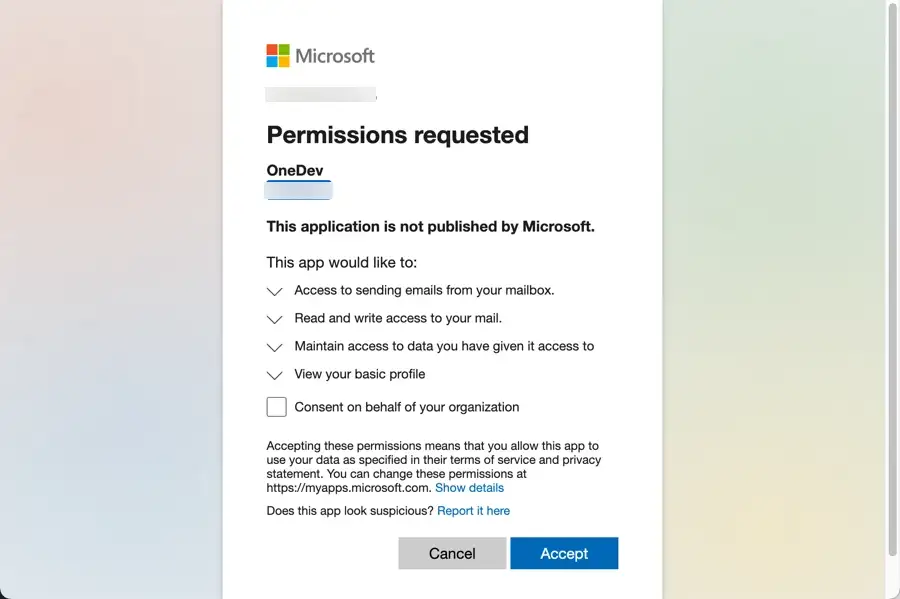
Then refresh token will be filled. In case user password is changed, refresh token is revoked, or refresh token expires, you will need to re-generate this token.
-
Email Address
Email address (primary or alias) of above account. This address will be used as sender address of various notifications. Emails targeting this address will also be checked in inbox of above user if Checking Incoming Email option is enabled below.
-
Check Incoming Email
Enable this option if you want to open issues or post comments from email. Subaddressing of above email address needs to be enabled in this case.
Now test the setting to make sure email can be sent/received correctly. Save the setting and setup is completed.
That’s all. Thanks for reading!