Set Up Issue Labels
Use a multi-valued Enumeration custom field to attach labels to issues. You need administrator access to define the field, and permission to edit issues to assign labels.
-
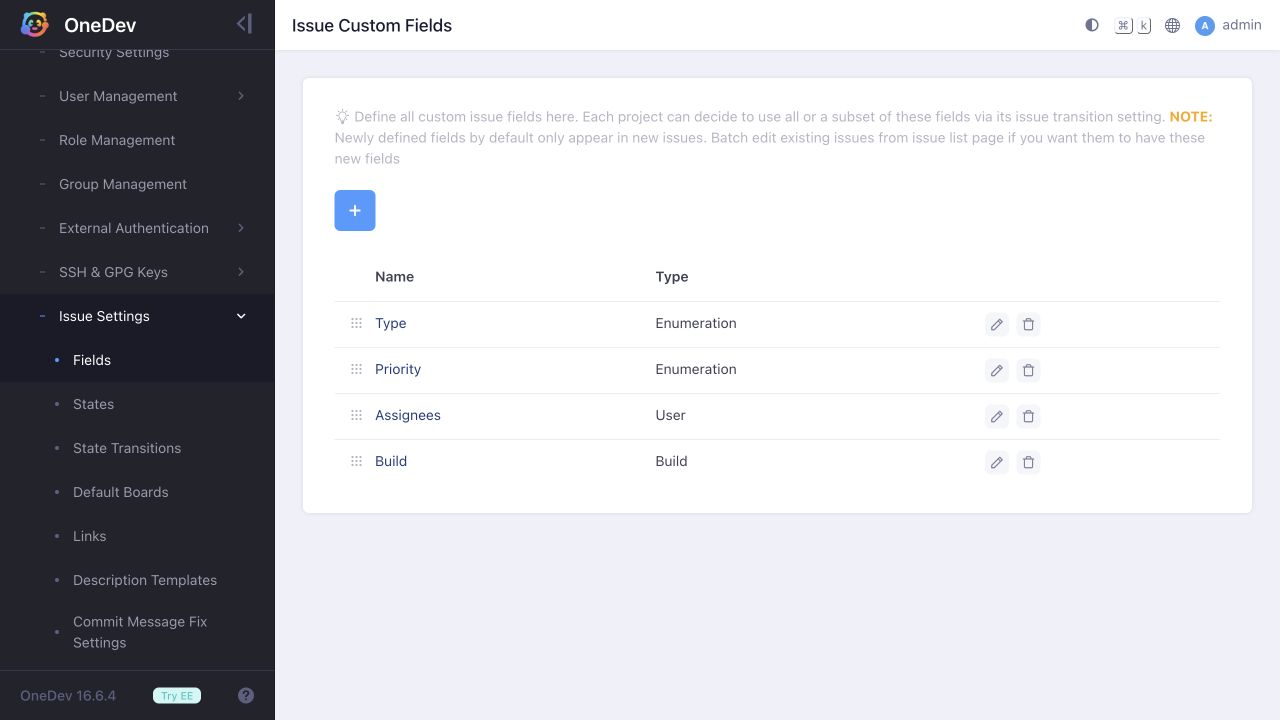
Sign in as an administrator and open Administration > Issue Settings > Fields. Add a custom field.
-
Set Type to Enumeration, name it Labels, and enable Allow Multiple. Enable Allow Empty Value if unlabeled issues should be allowed, and set Name Of Empty Value to
No labels.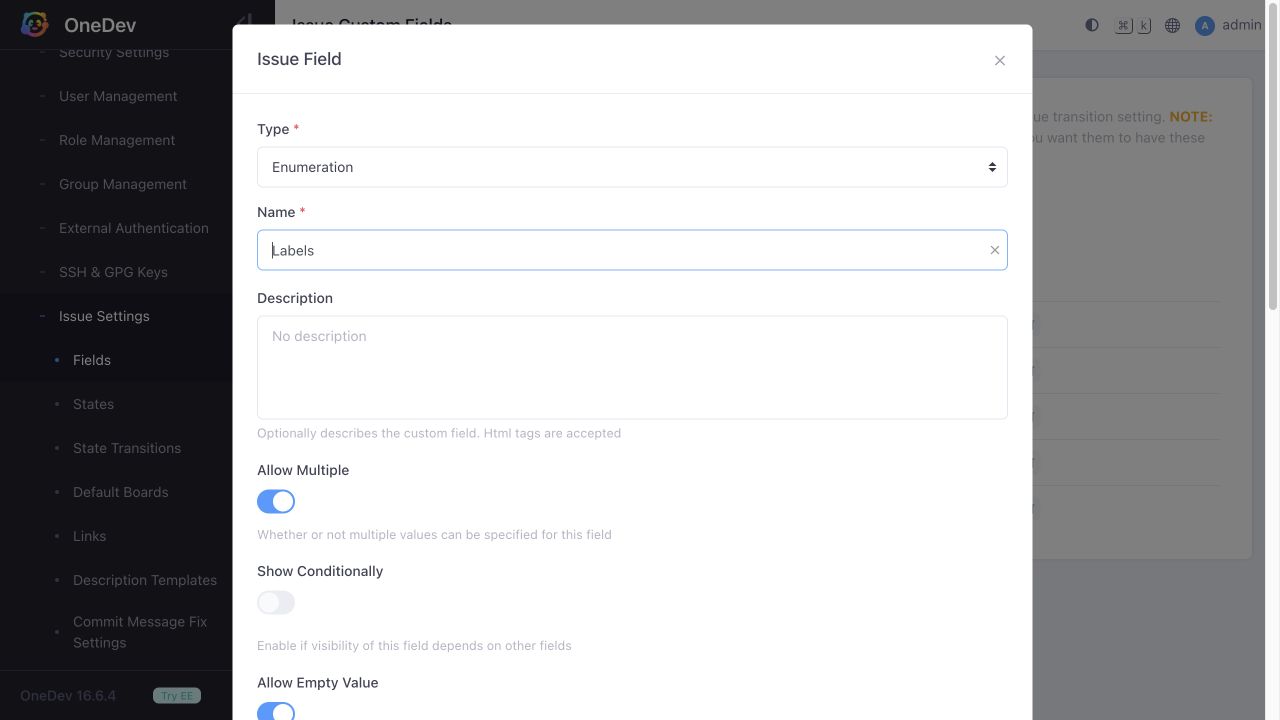
-
Under Available Choices, choose Use specified choices. Use the plus button to add each label, such as
documentationandneeds-review, and choose its color. At least one choice is required. Enable Include When Issue is Opened. Set the field's Applicable Projects to your project, or leave it empty for all projects, then save.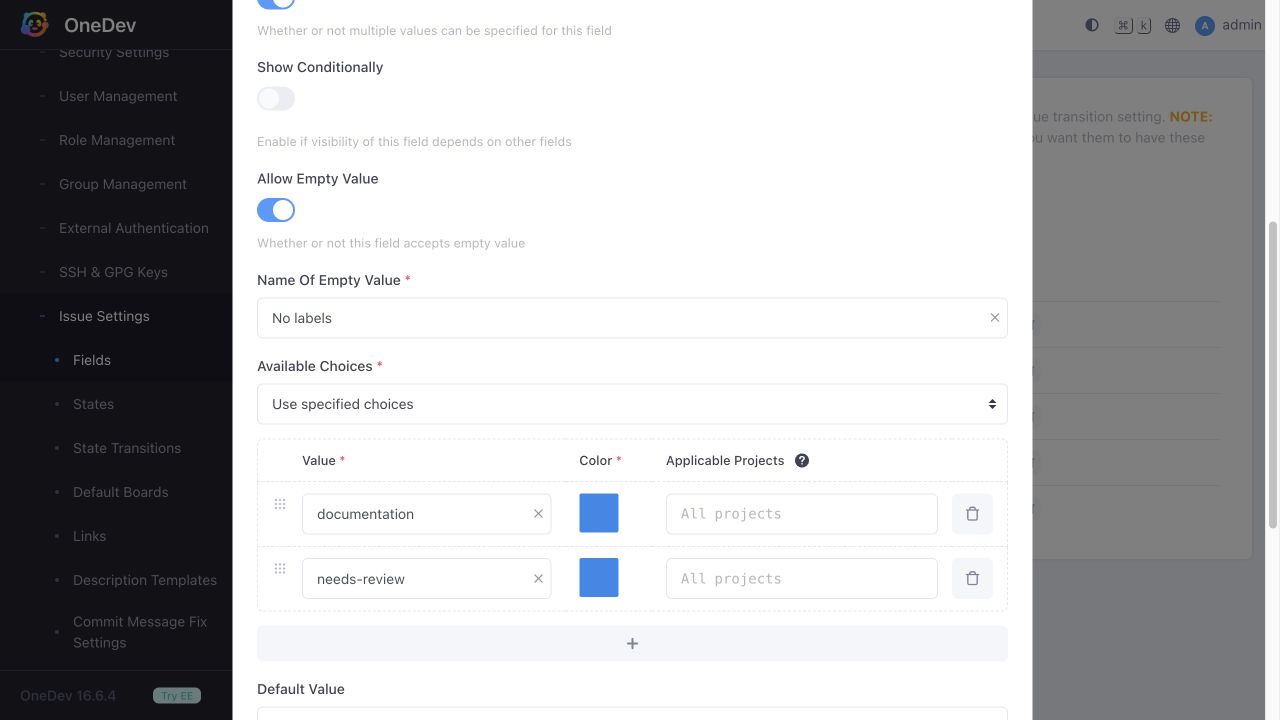
-
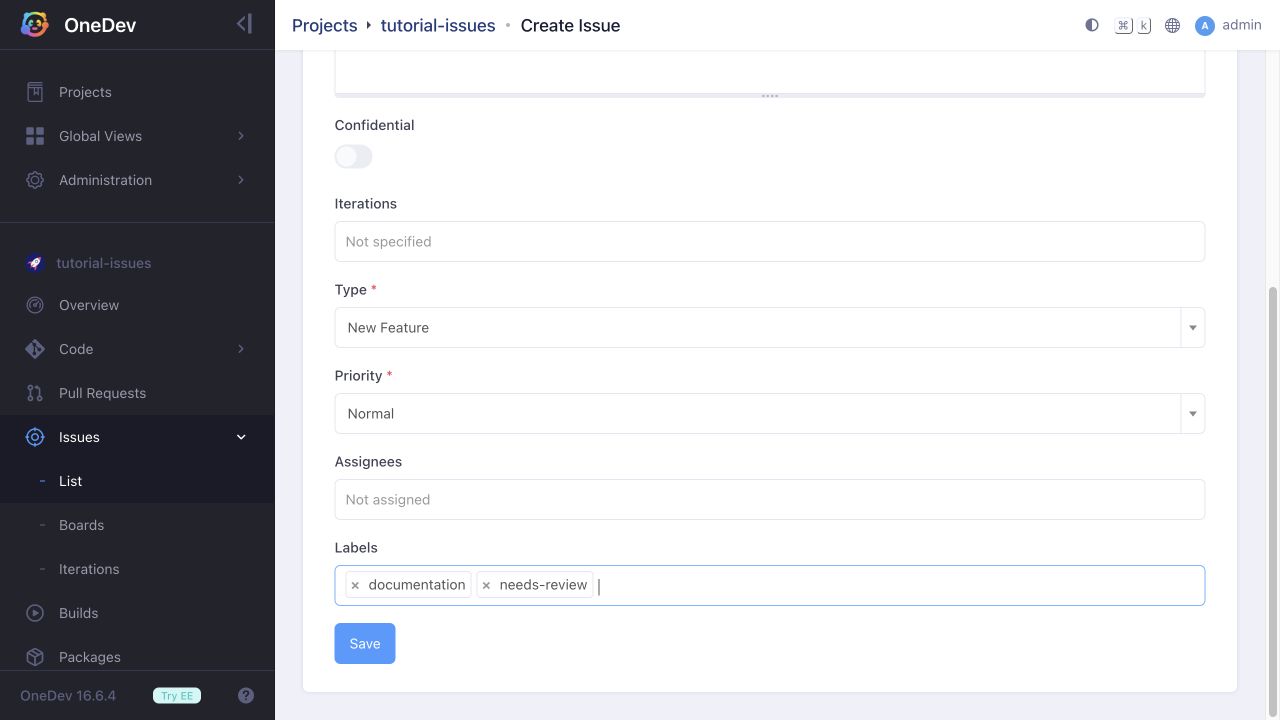
In that project, create an issue. Select one or more values in Labels and save. The labels appear in the issue's details. You can also leave the field empty when empty values are allowed.
-
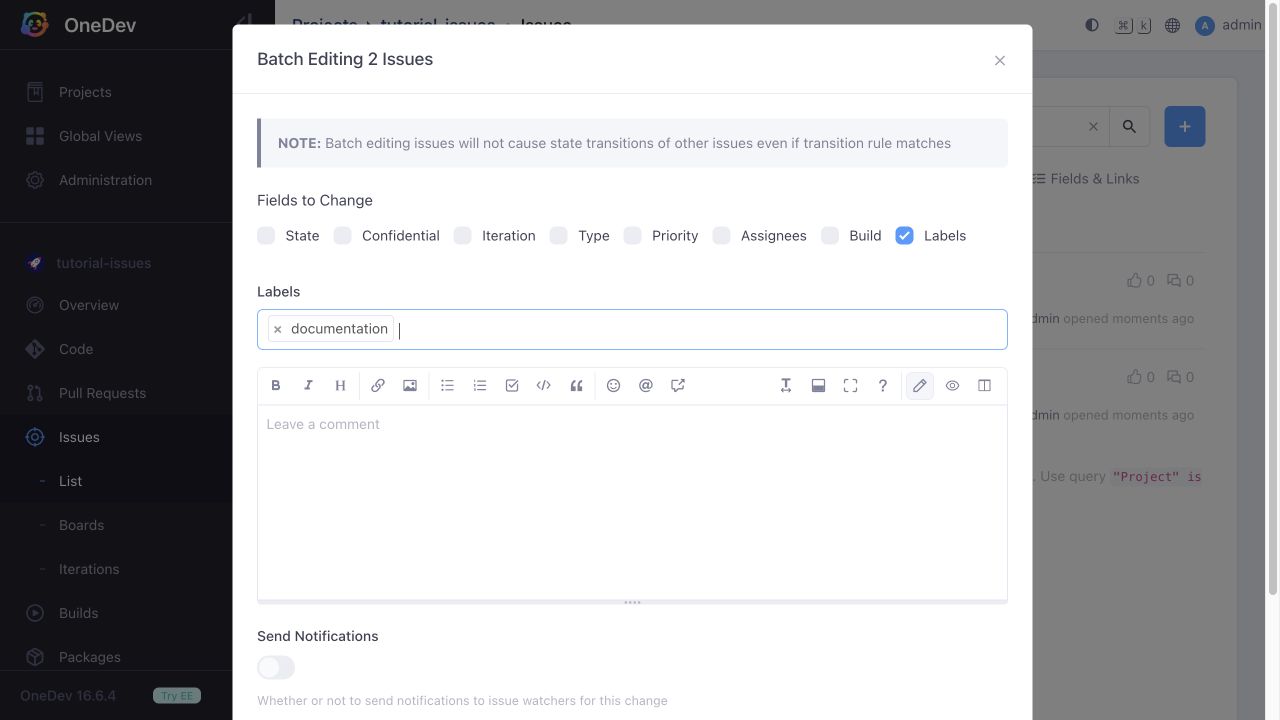
To label existing issues, select their checkboxes in Issues > List, then choose Operations > Batch Edit Selected Issues. Check Labels under Fields to Change, choose the values, and save. This replaces the label set on every selected issue; include every label you want them to retain.
-
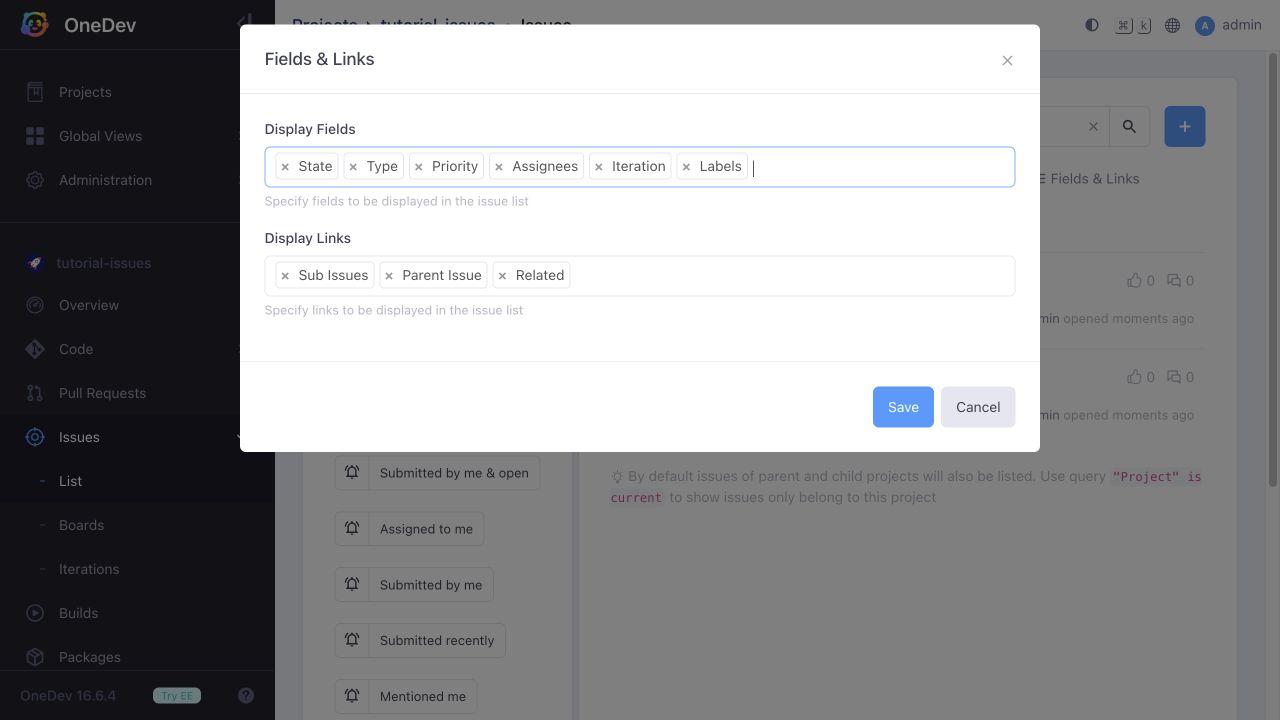
To show labels in the issue list, open Fields & Links, add Labels to Display Fields, and save.
-
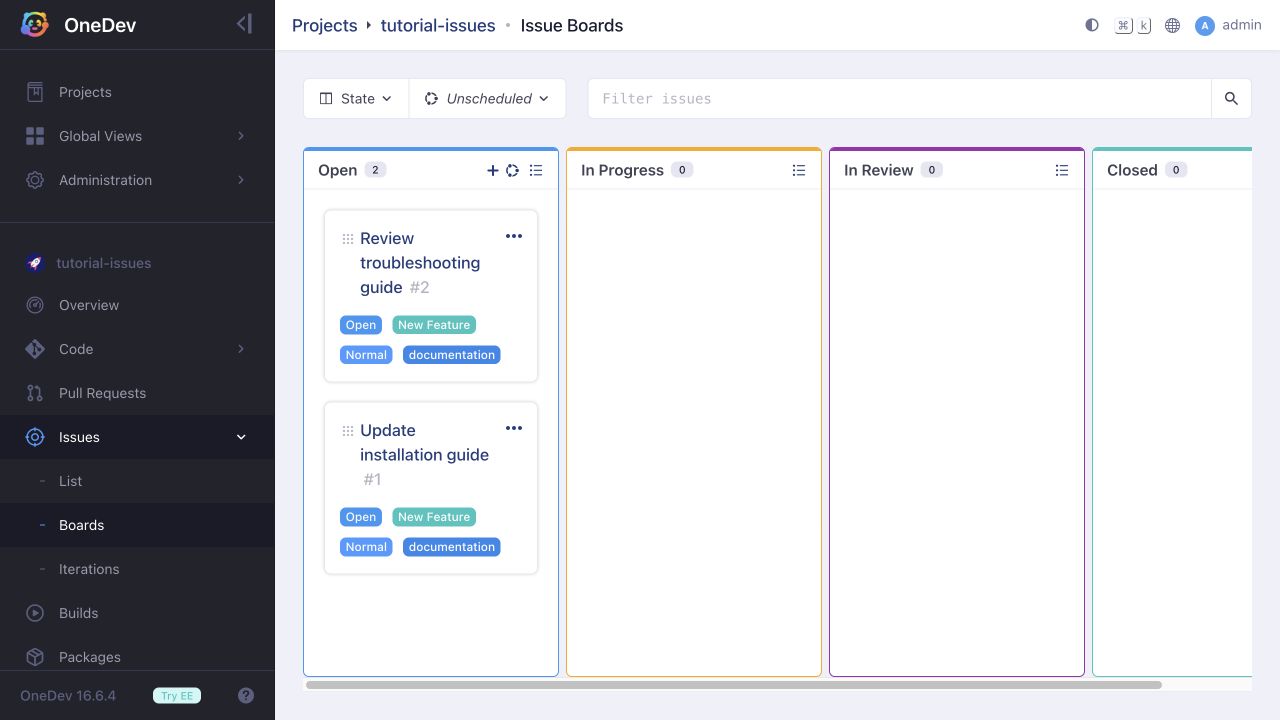
Board display fields are configured separately. Open Issues > Boards, click the board name dropdown, and click the pencil beside the board. Add Labels to Display Fields and save. The labels now appear on board cards.
-
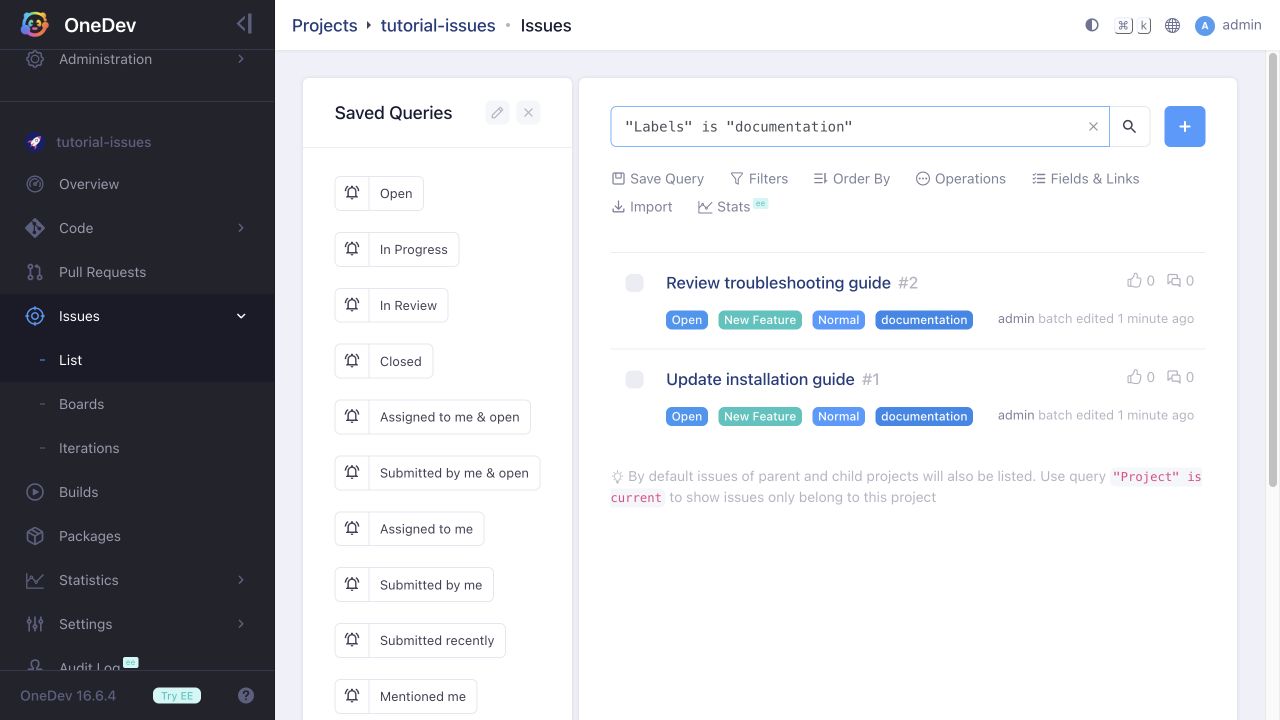
Query labels like any other custom field. For example, enter
"Labels" is "documentation"in Query/order issues and press Enter. This matches issues containing that label, including issues with additional labels. Press Escape to dismiss query suggestions if they cover the results.