Working with Workspaces
OneDev workspaces provide a way to review and write code directly on the server from your browser, with full terminal access. Community edition runs workspaces on the OneDev server, either in a preconfigured container or through a shell. Enterprise edition extends this with workspace provisioners that run on agents or as Kubernetes pods, which helps offload resource usage from the server and scale workspace capacity. You do not need to clone the source code or set up a development environment locally. You can start a workspace from any branch, tag, or commit in the browser, then use terminal tools to edit code, run builds, or work with AI coding agents such as OpenCode, Claude Code, or Codex. Your workspace remains active even if you close the browser and reopen it later.
Workspace Spec
To use workspaces, we first need to define workspace specs. For demonstration purposes, create an empty project and switch to its Settings / Workspace Specs section:
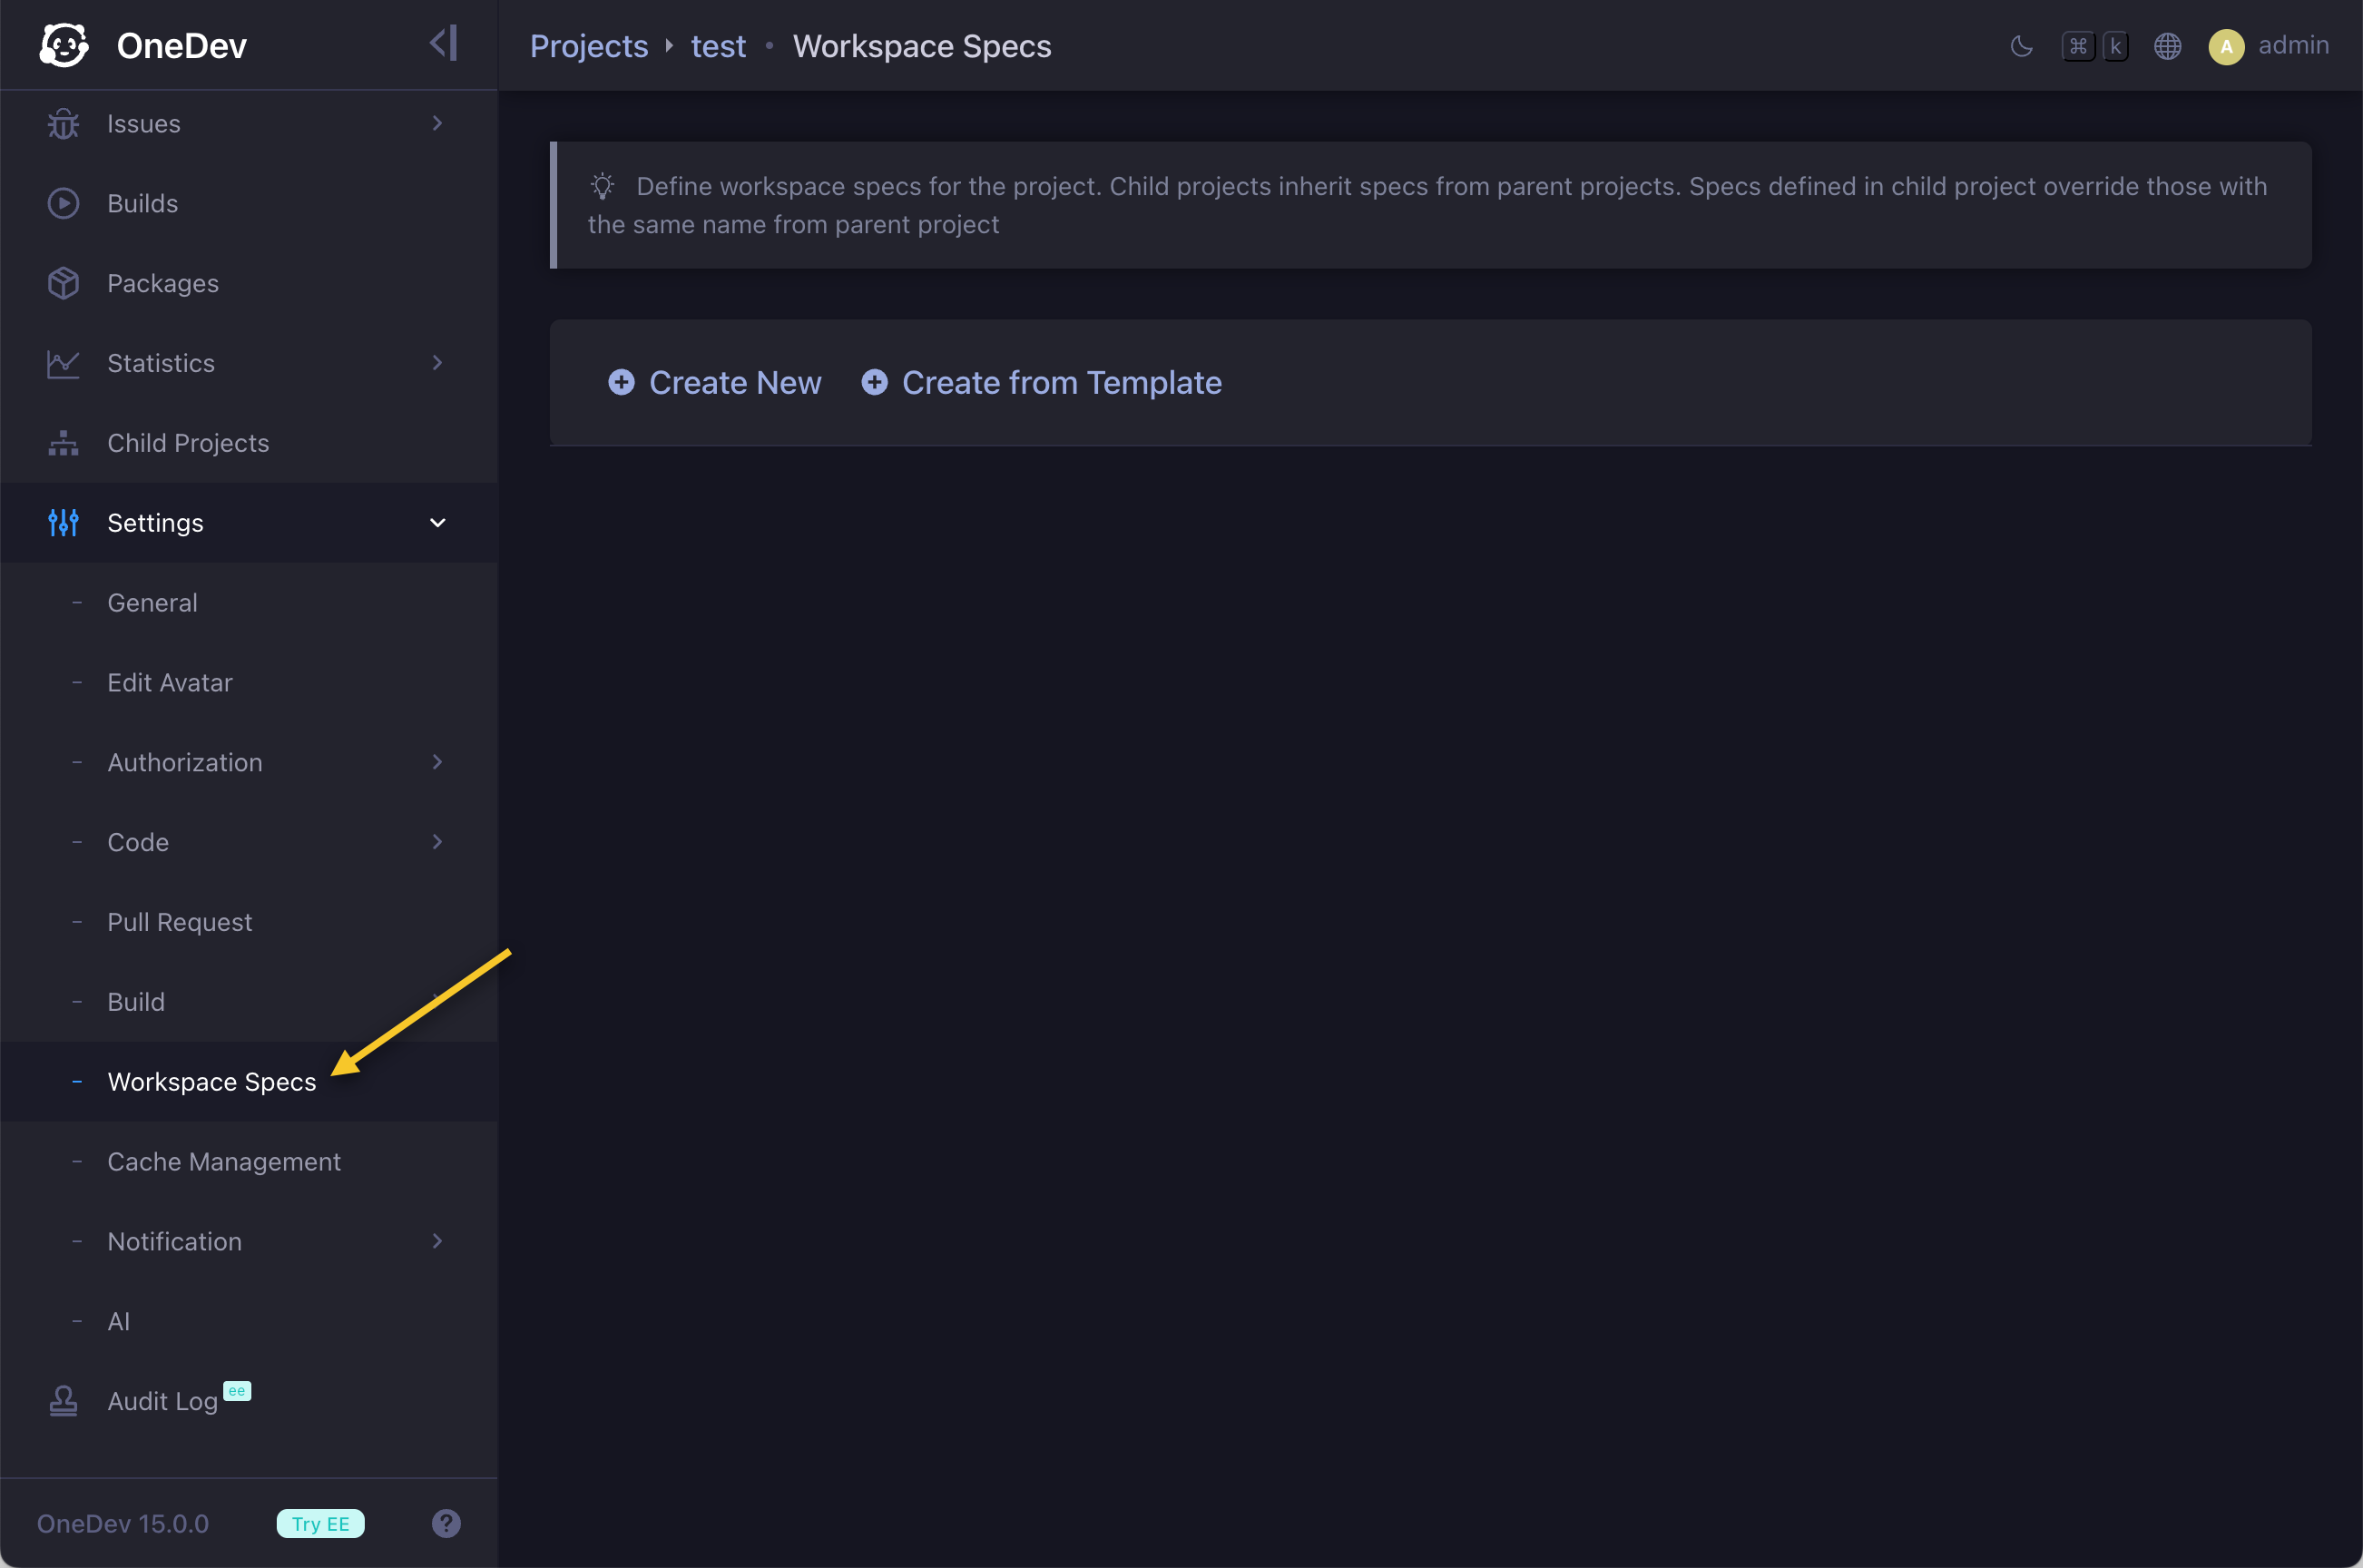
Workspace specs define environments of workspaces. A project can define multiple workspace specs, and specs with the same name in child projects override those in parent projects.
For this tutorial, we will create spec from a template. Select the OpenCode in Container template, give it a name, and create the spec. The resulting spec has the following settings preconfigured:
Image
The spec enables the Run in Container option and uses the 1dev/opencode container image. This is a minimal image with OpenCode and the required tools installed. You may need to customize it to install your own tools and set up your development environment.
Shell
This spec uses Bash as the default shell. Setup commands and shortcut commands will run with specified shell.
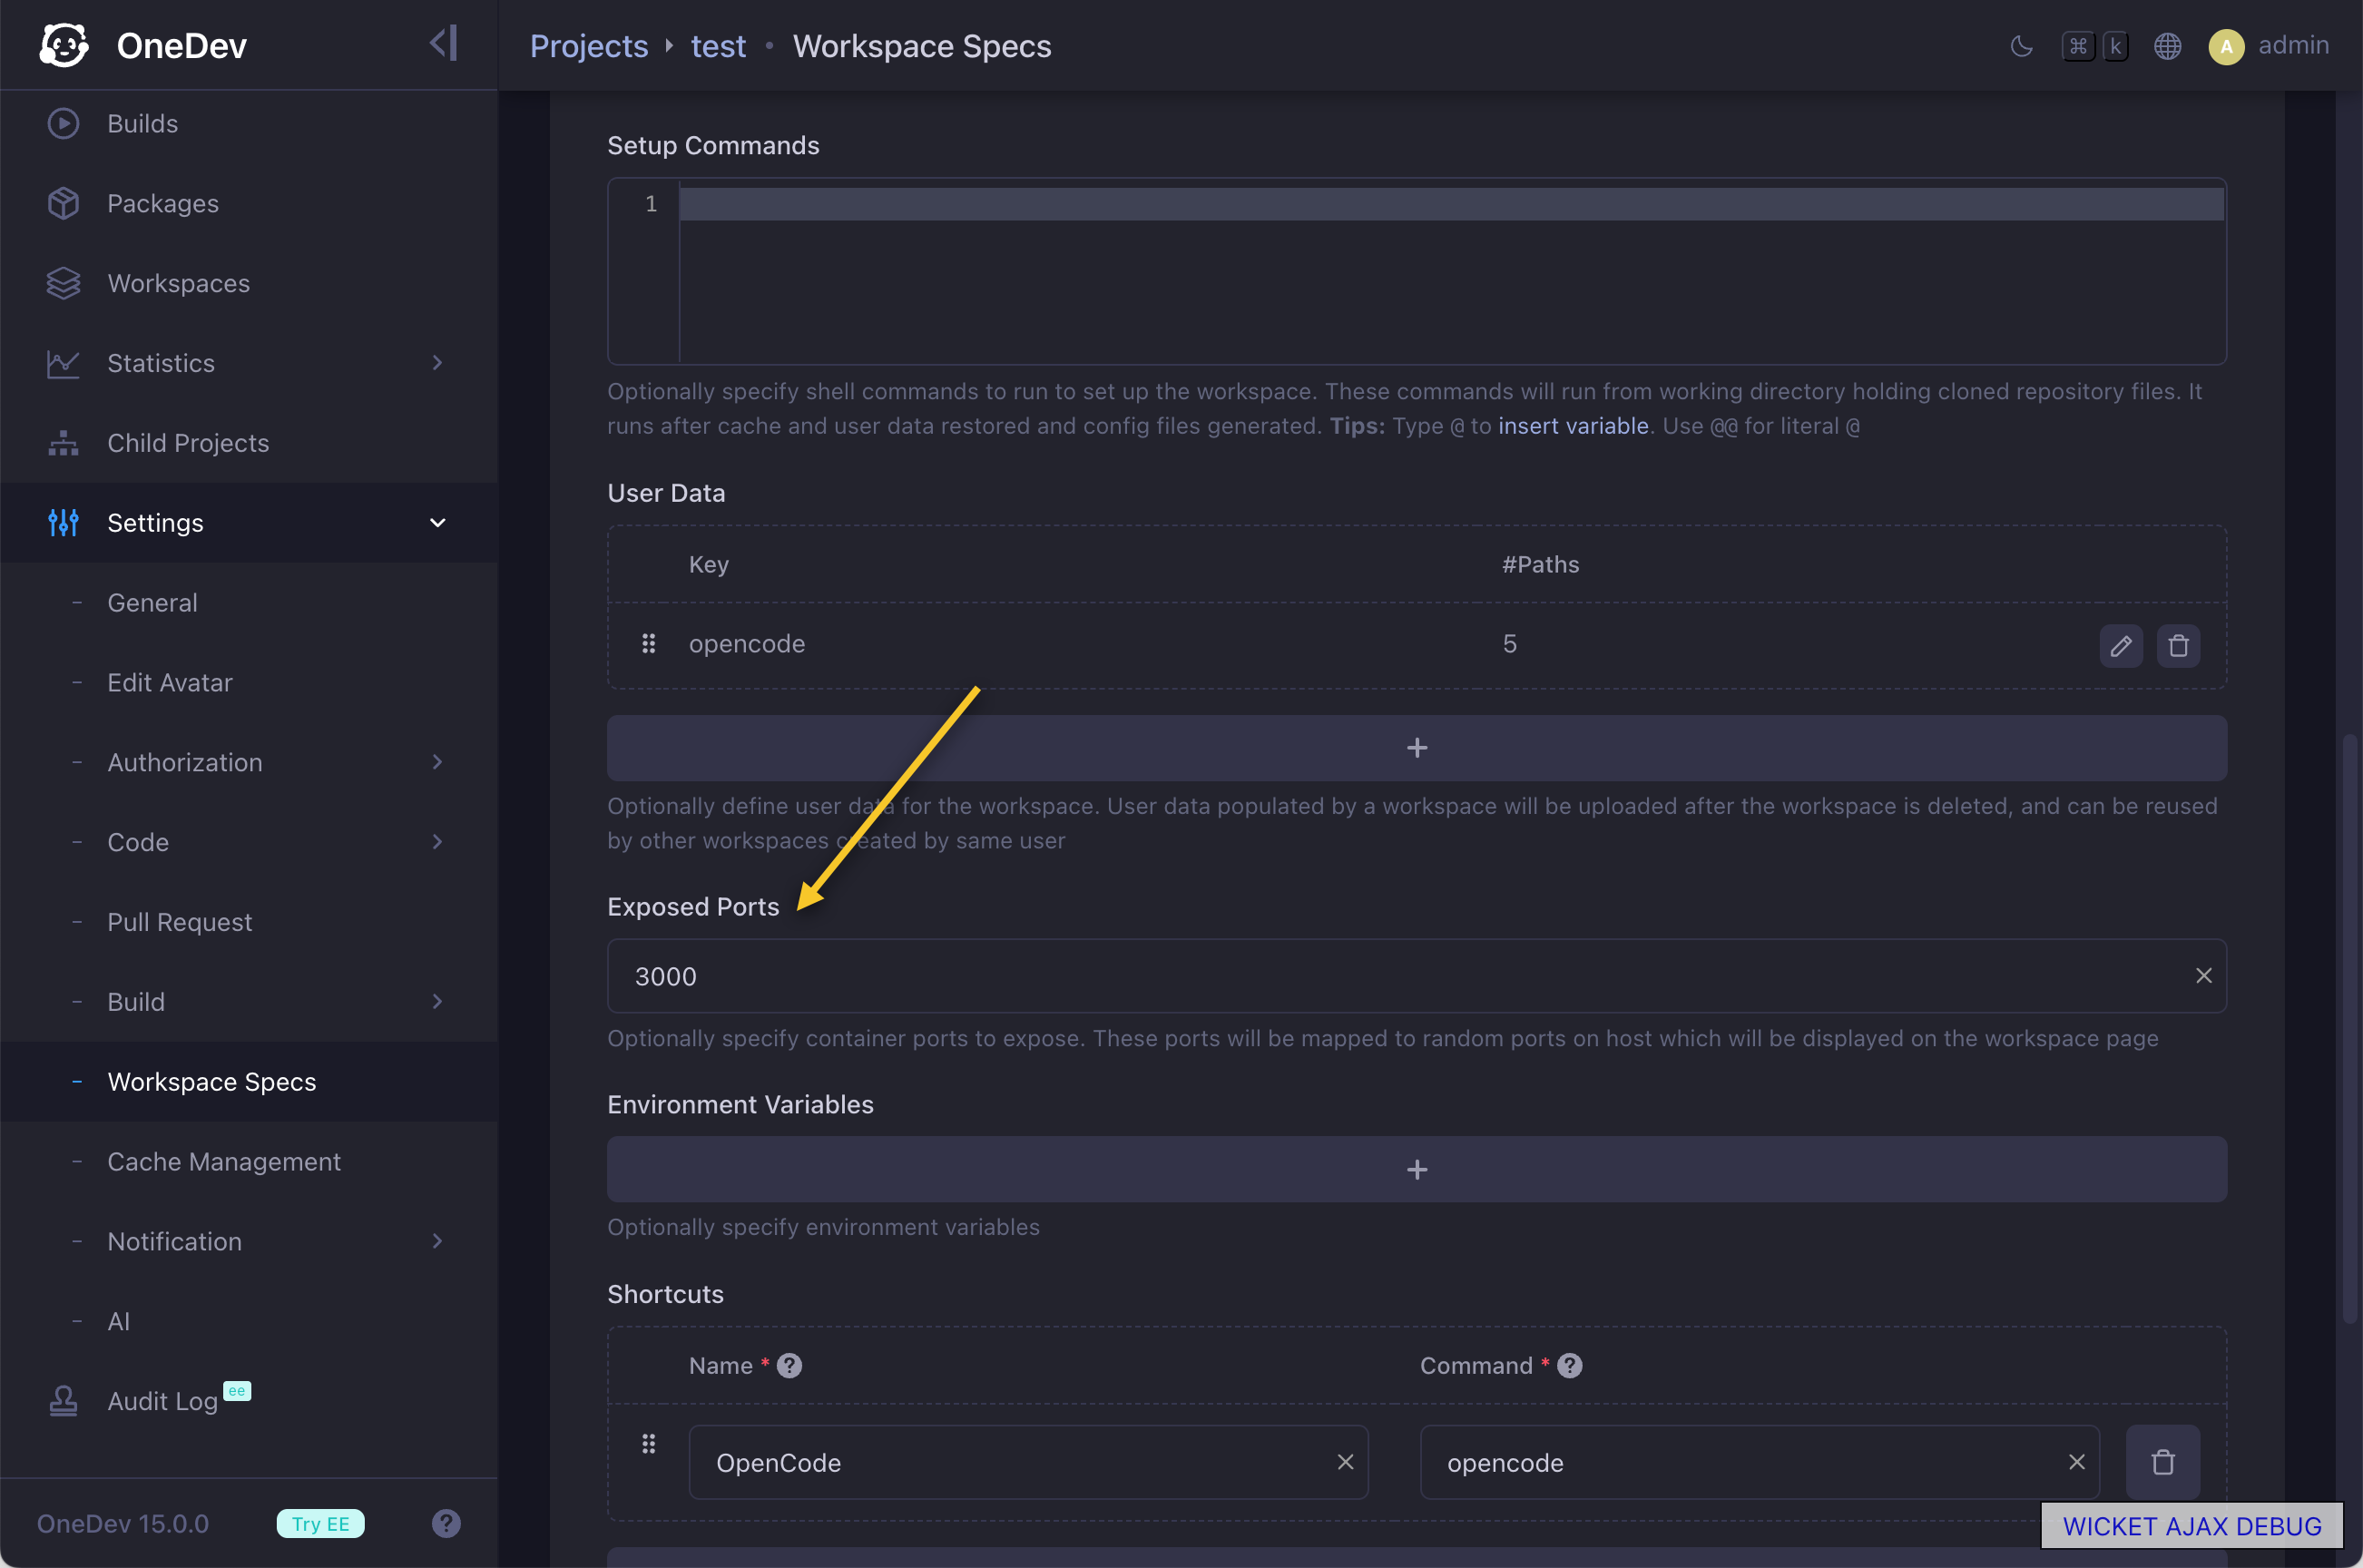
User Data
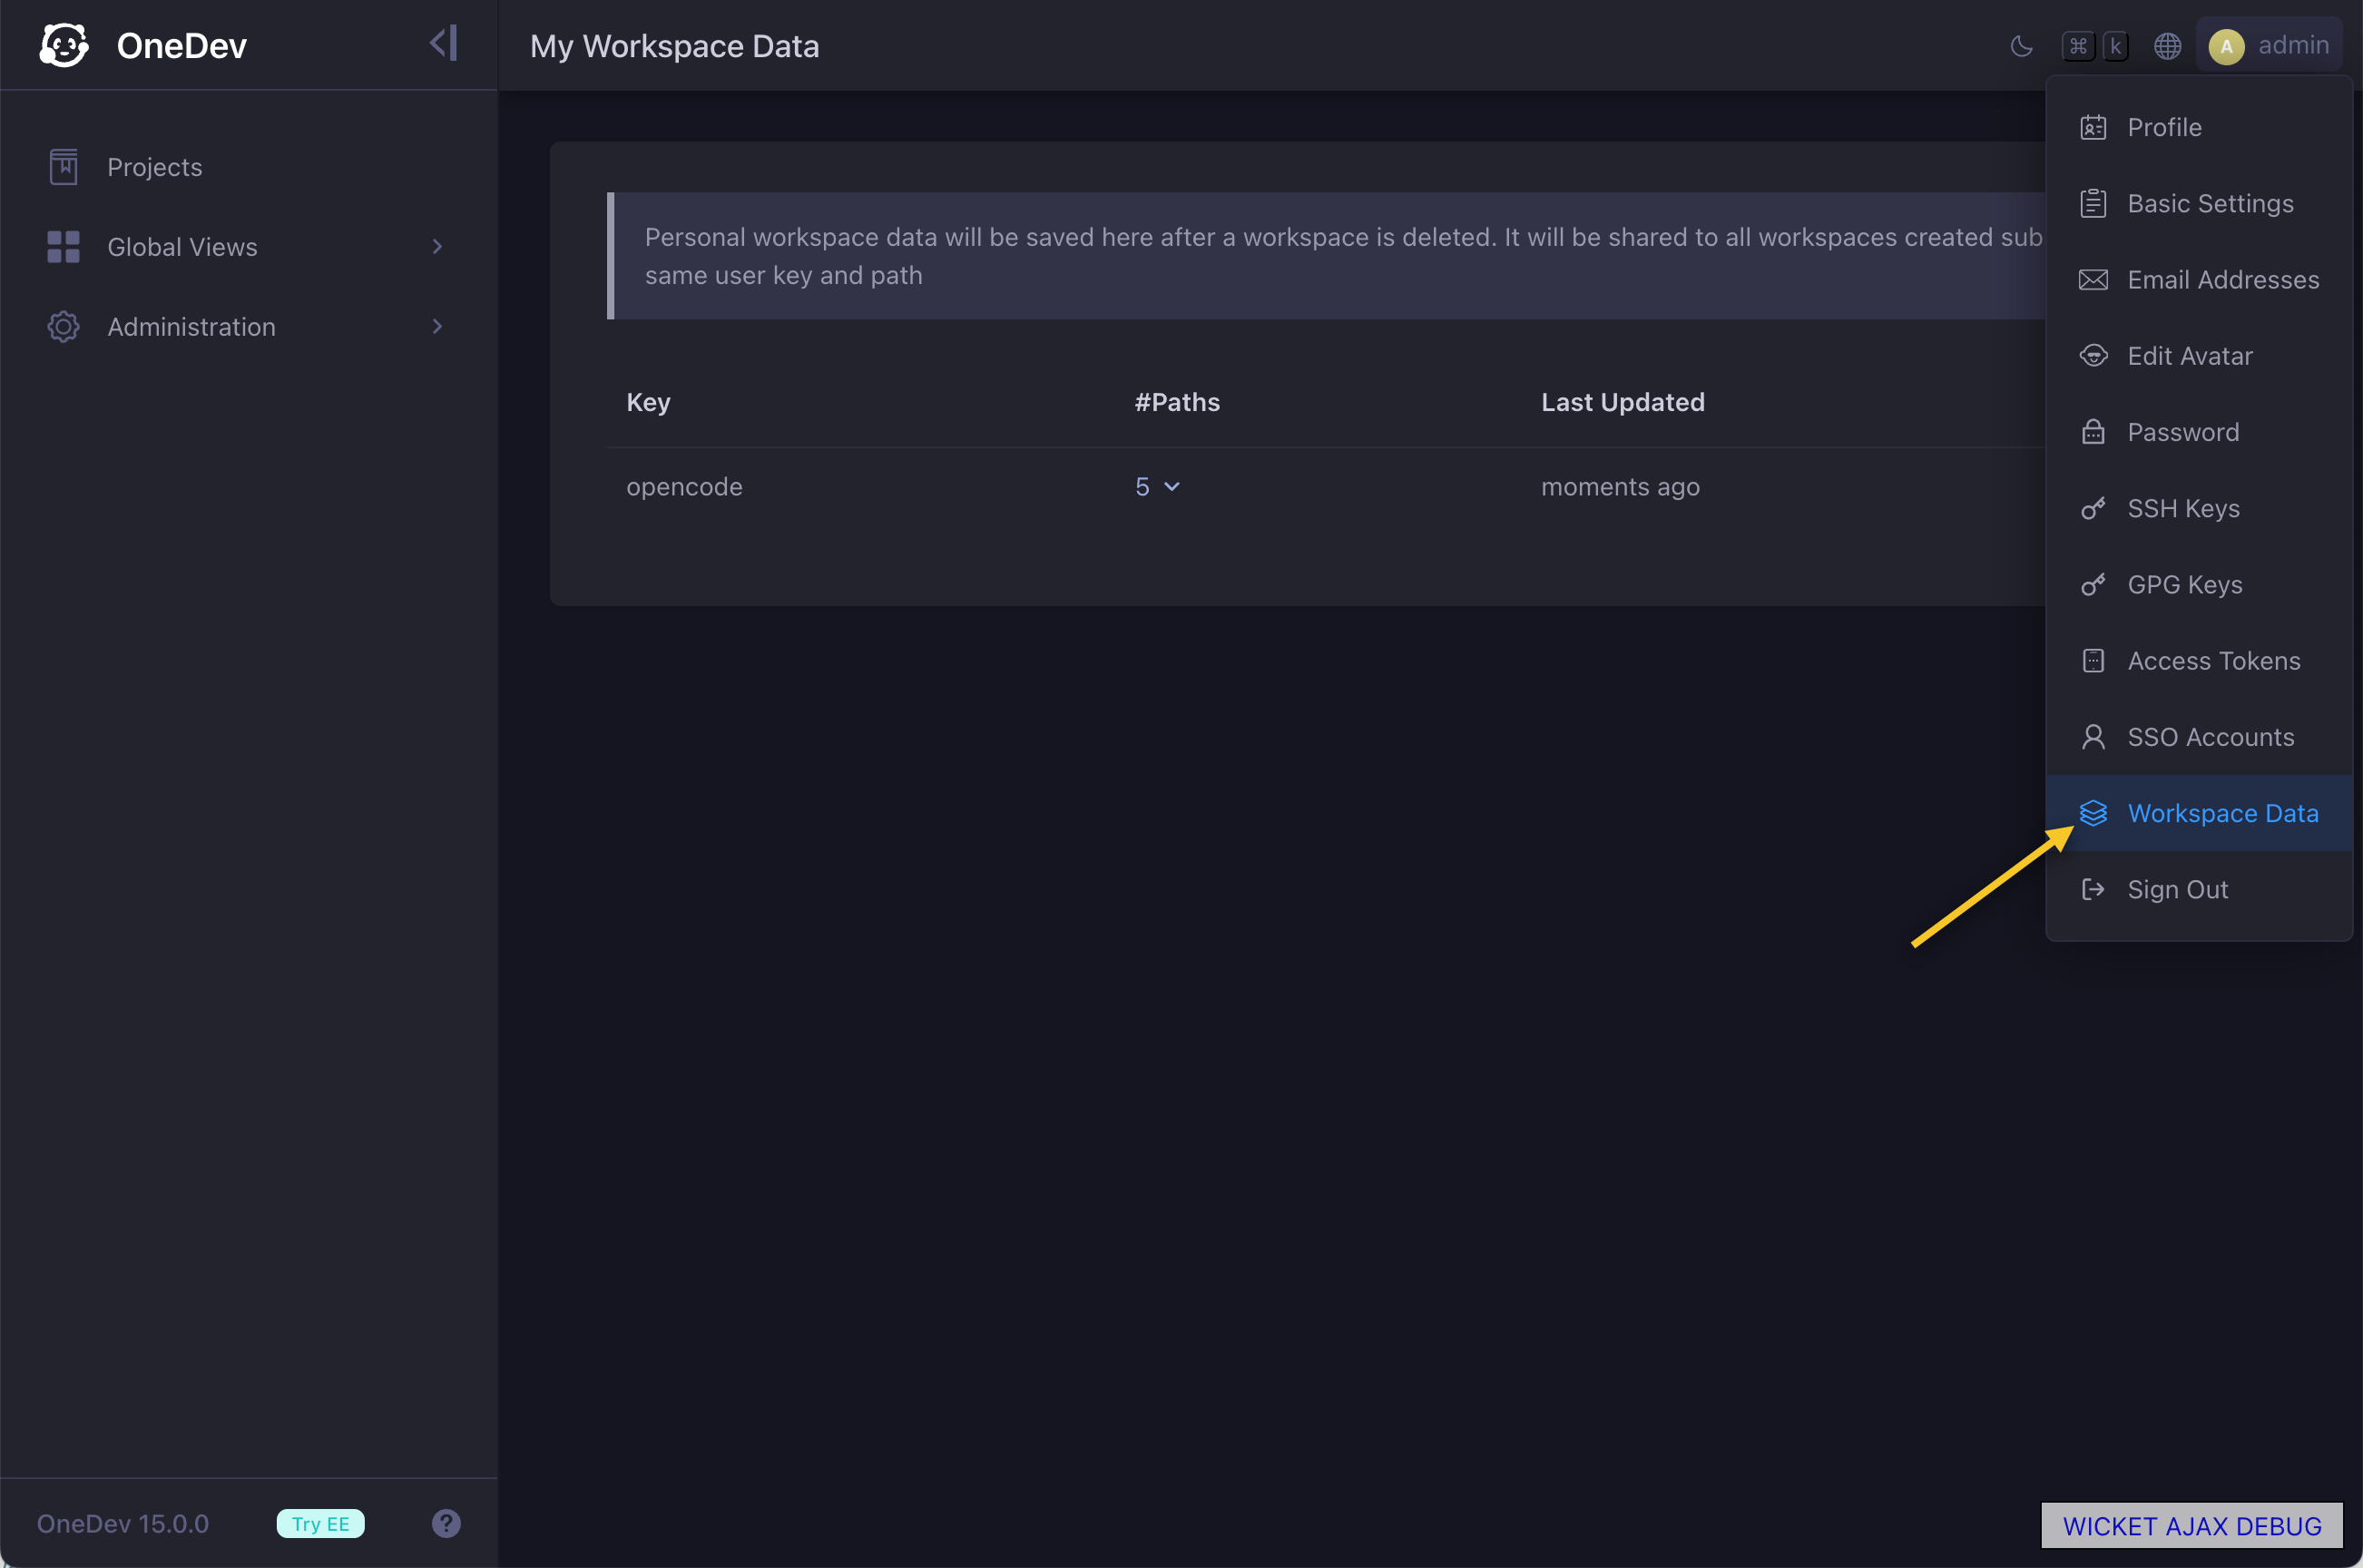
This tells OneDev which user-specific data should be persisted after using the workspace. User data will ONLY BE SAVED after the workspace is deleted. Subsequent workspaces created by the same user can then reuse it via the same key and path.
Shortcuts
Shortcuts define commands for quick access in the workspace. OneDev also runs the first shortcut command automatically when the workspace is created. If no shortcut commands are defined, OneDev simply opens a terminal running specified shell above after creating the workspace.
Run As
This is defined in the More Settings section, and tells OneDev which user ID and group ID to use when running the workspace container.
Exposed Ports
This setting is not preconfigured actually. Since this tutorial starts a dev server on port 3000, define the port by editing the generated spec:
Task Automation
Workspace specs can optionally enable task automation. This lets AI users perform assigned work headlessly in a workspace. When issue or PR is assigned to AI user, it will create workspace to run command specified in task automation with provided prompt.
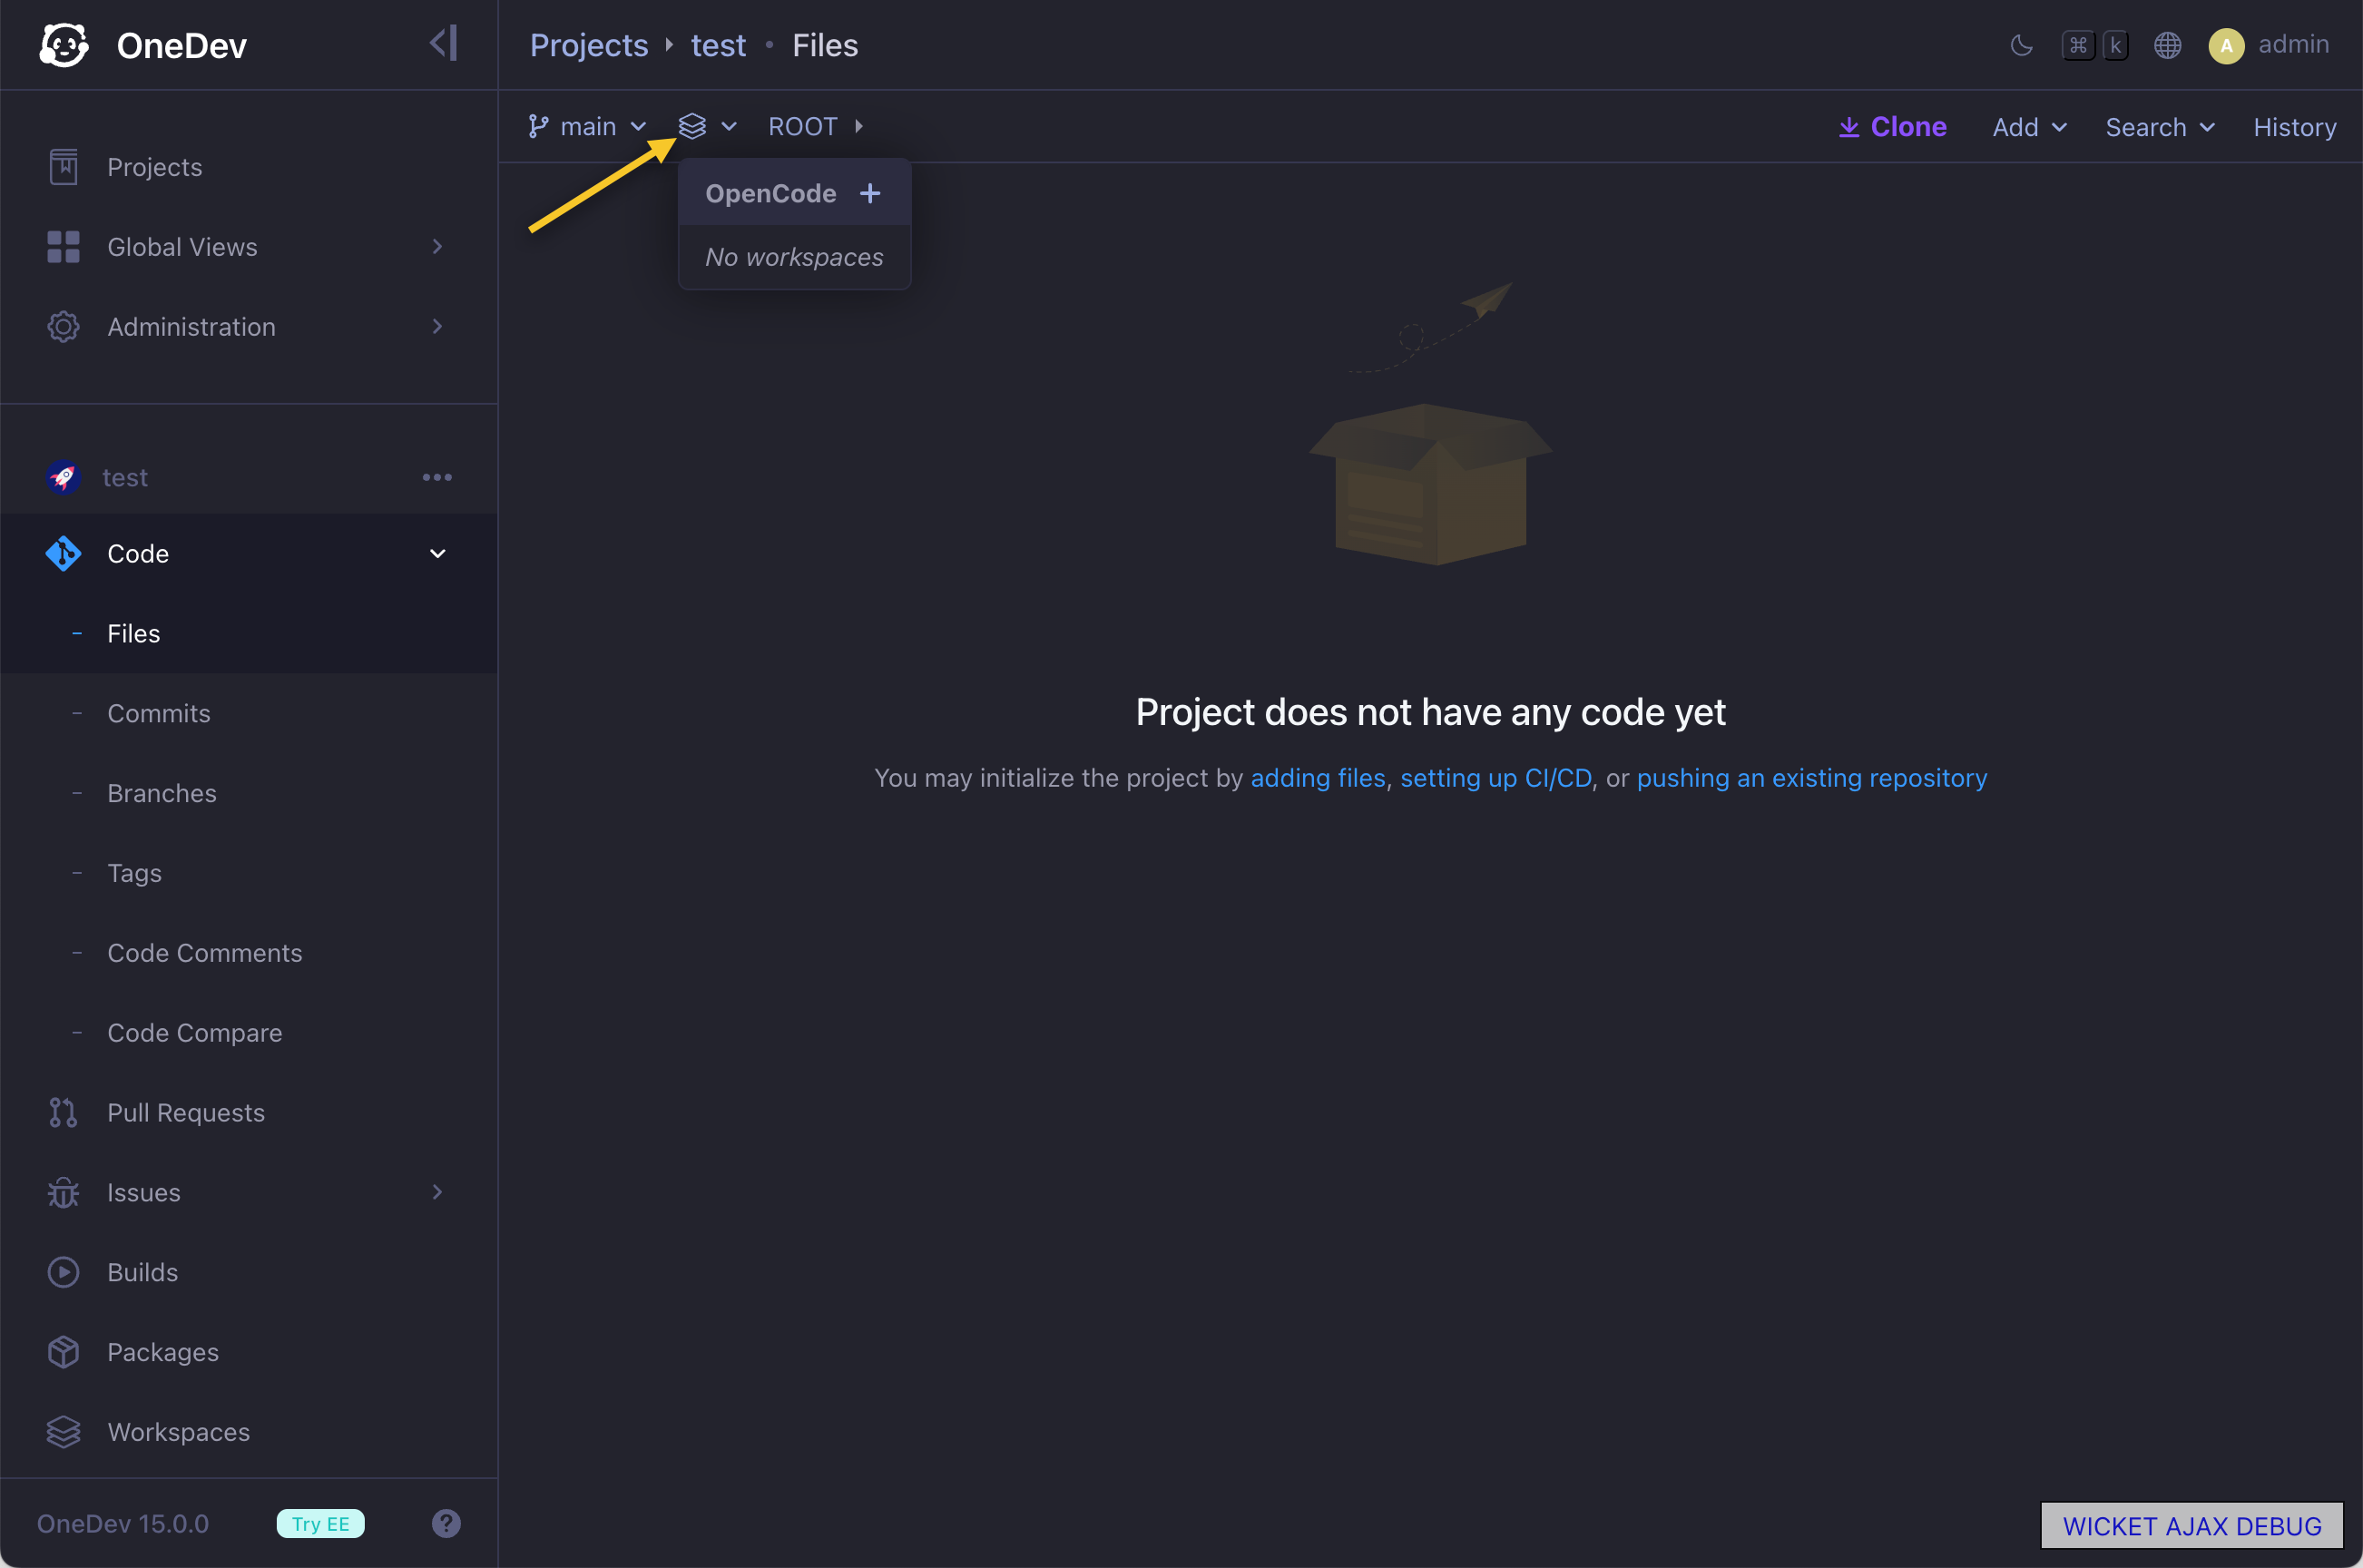
Create Workspaces
Workspace specs can be created from scratch or from built-in templates. Templates preconfigure popular coding agents, the tod CLI, and companion skills for workflows such as working on issues or pull requests, editing or verifying build specs. After specs are defined, any user with the create workspace permission for the project can create workspaces on any branch, tag, or commit:
Create a workspace from the spec above. OneDev will start to provision the workspace and show the workspace detail page afterwards:
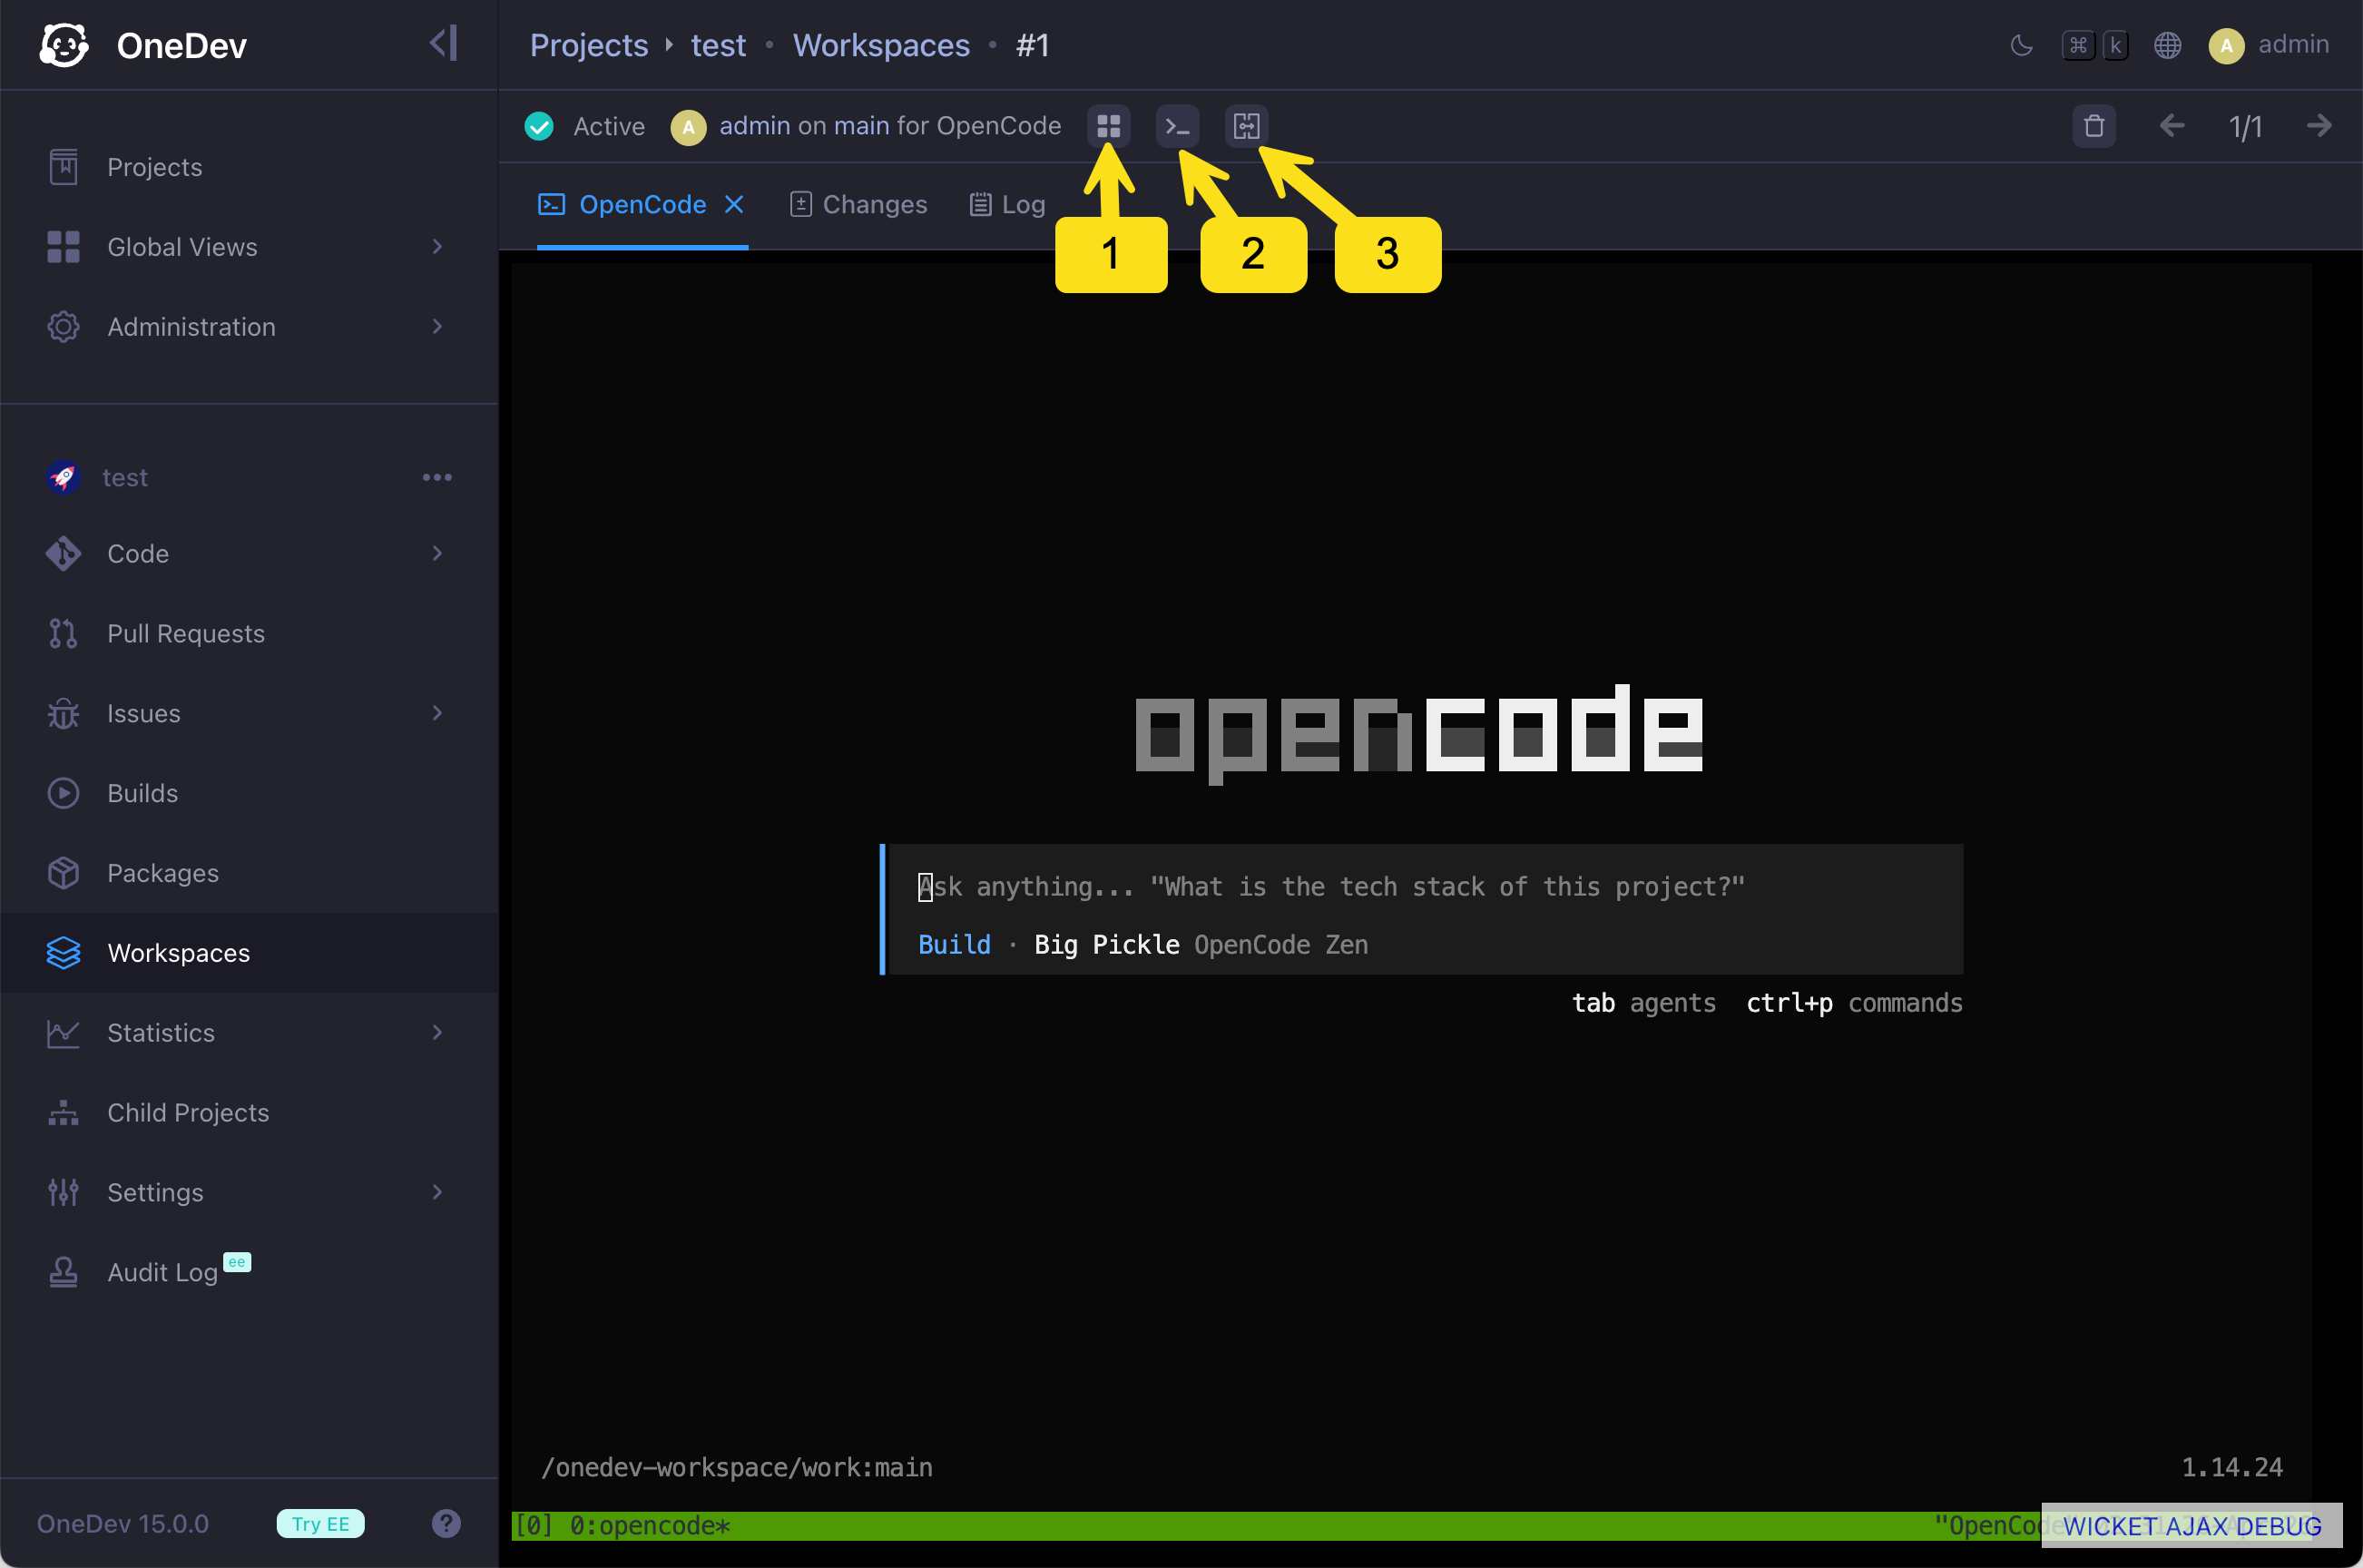
In this screenshot, you can:
- List all defined shortcuts with access links
- Create a new terminal tab
- List all defined container ports with access links
Let's run an example prompt:
Install Node.js via nvm and create an example Next.js project
We need to install Node.js because the minimal OpenCode image does not include it. For a production environment, customize the image to include the development tools you need.
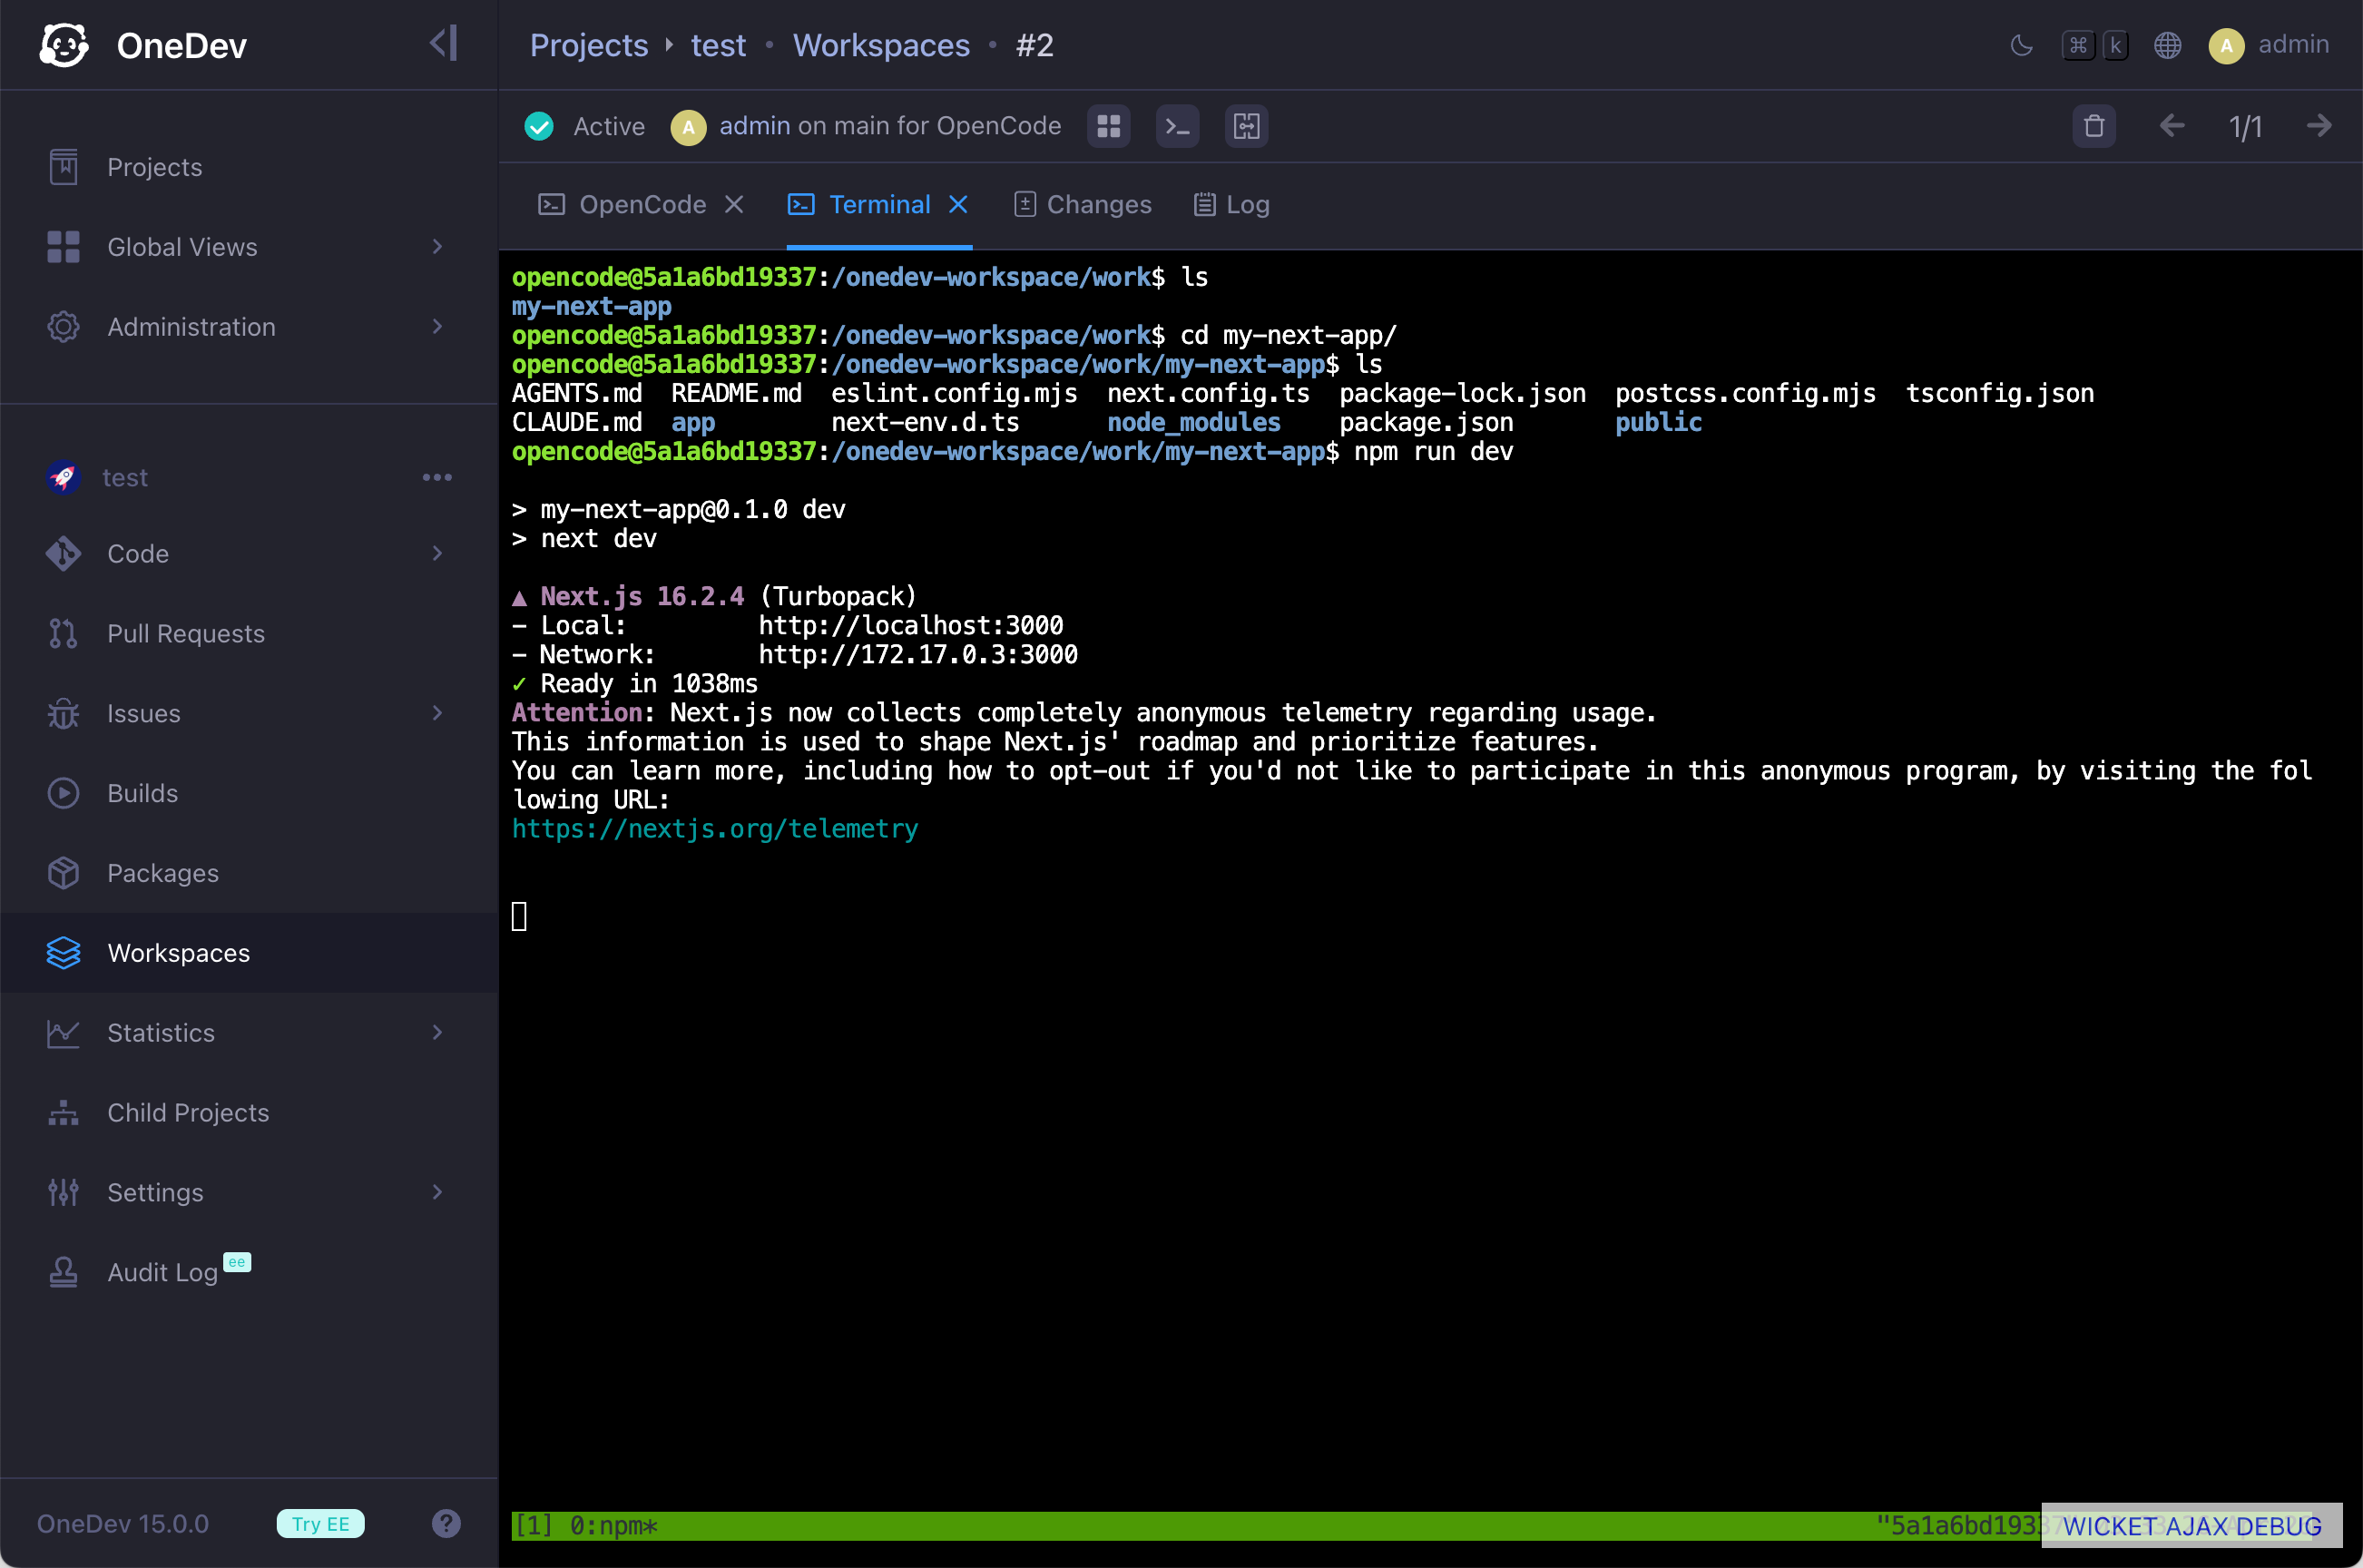
After executing this prompt, Node.js should be installed and an example Next.js project should be created. Open a new terminal tab and run npm run dev to start the dev server on port 3000:
You can also define a shortcut to start the dev server. One benefit of using a shortcut is that the terminal tab can use your chosen shortcut name.
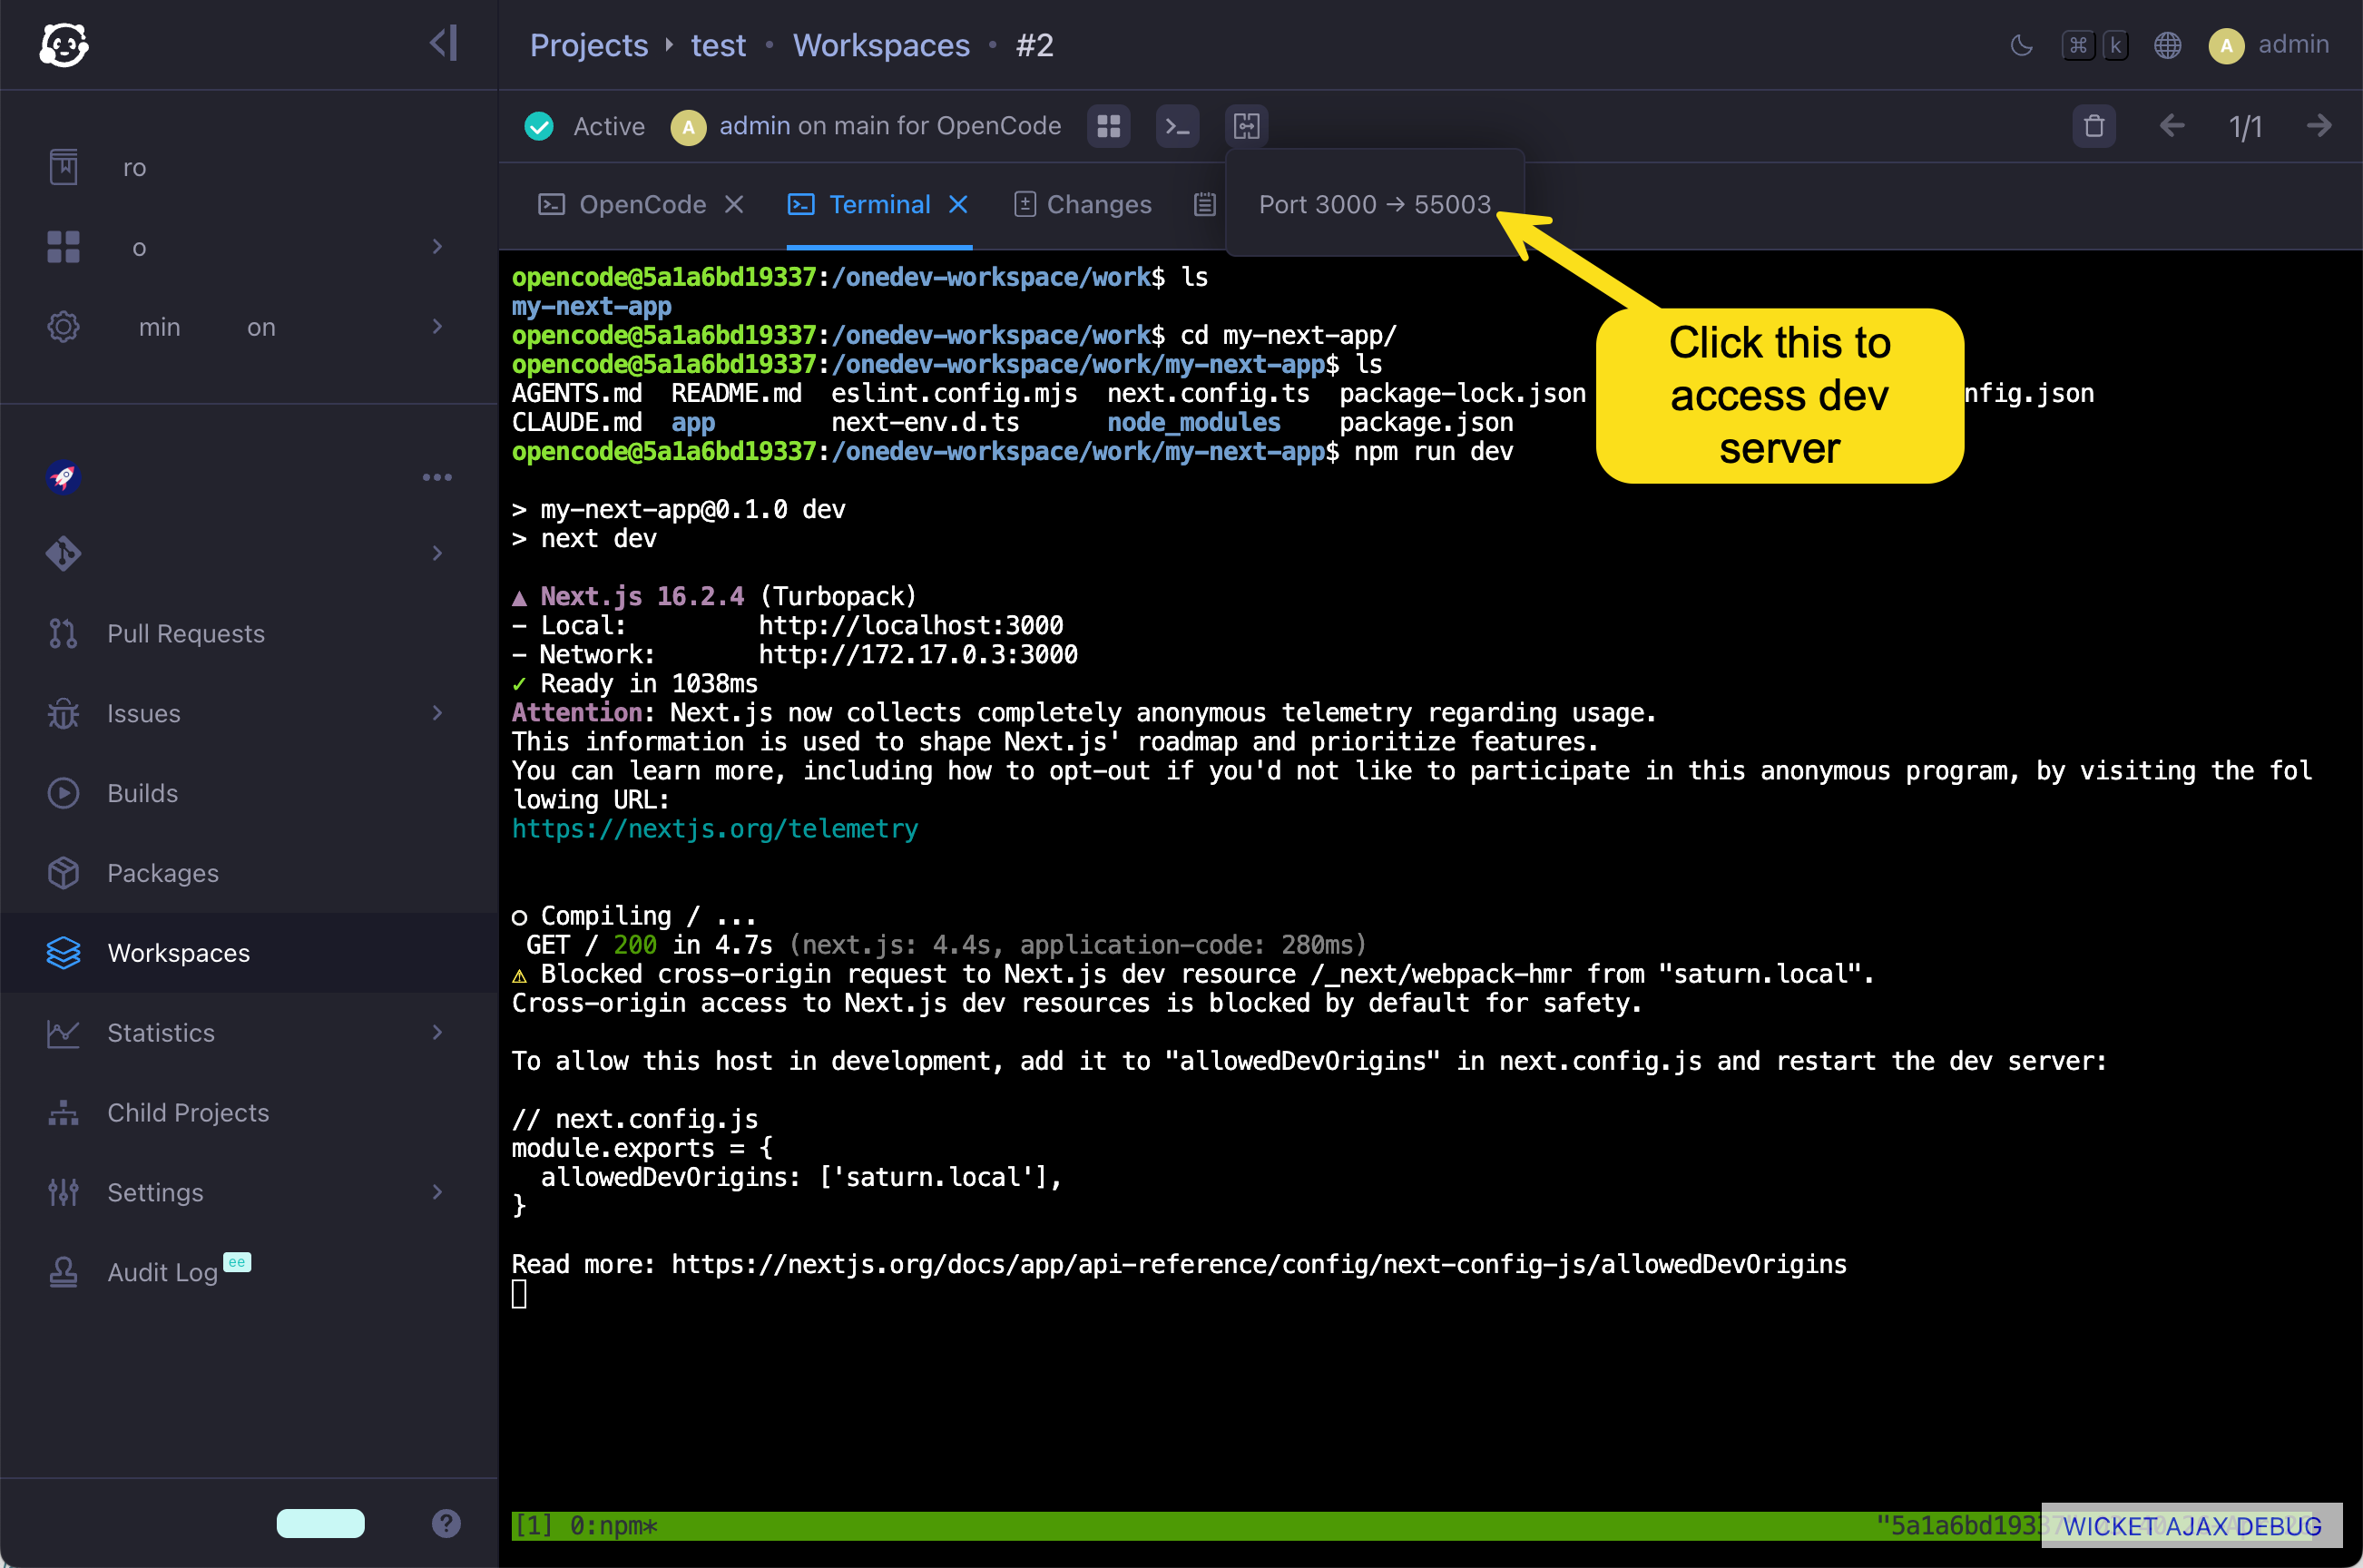
Now you can access the dev server from the port mapping dropdown menu:
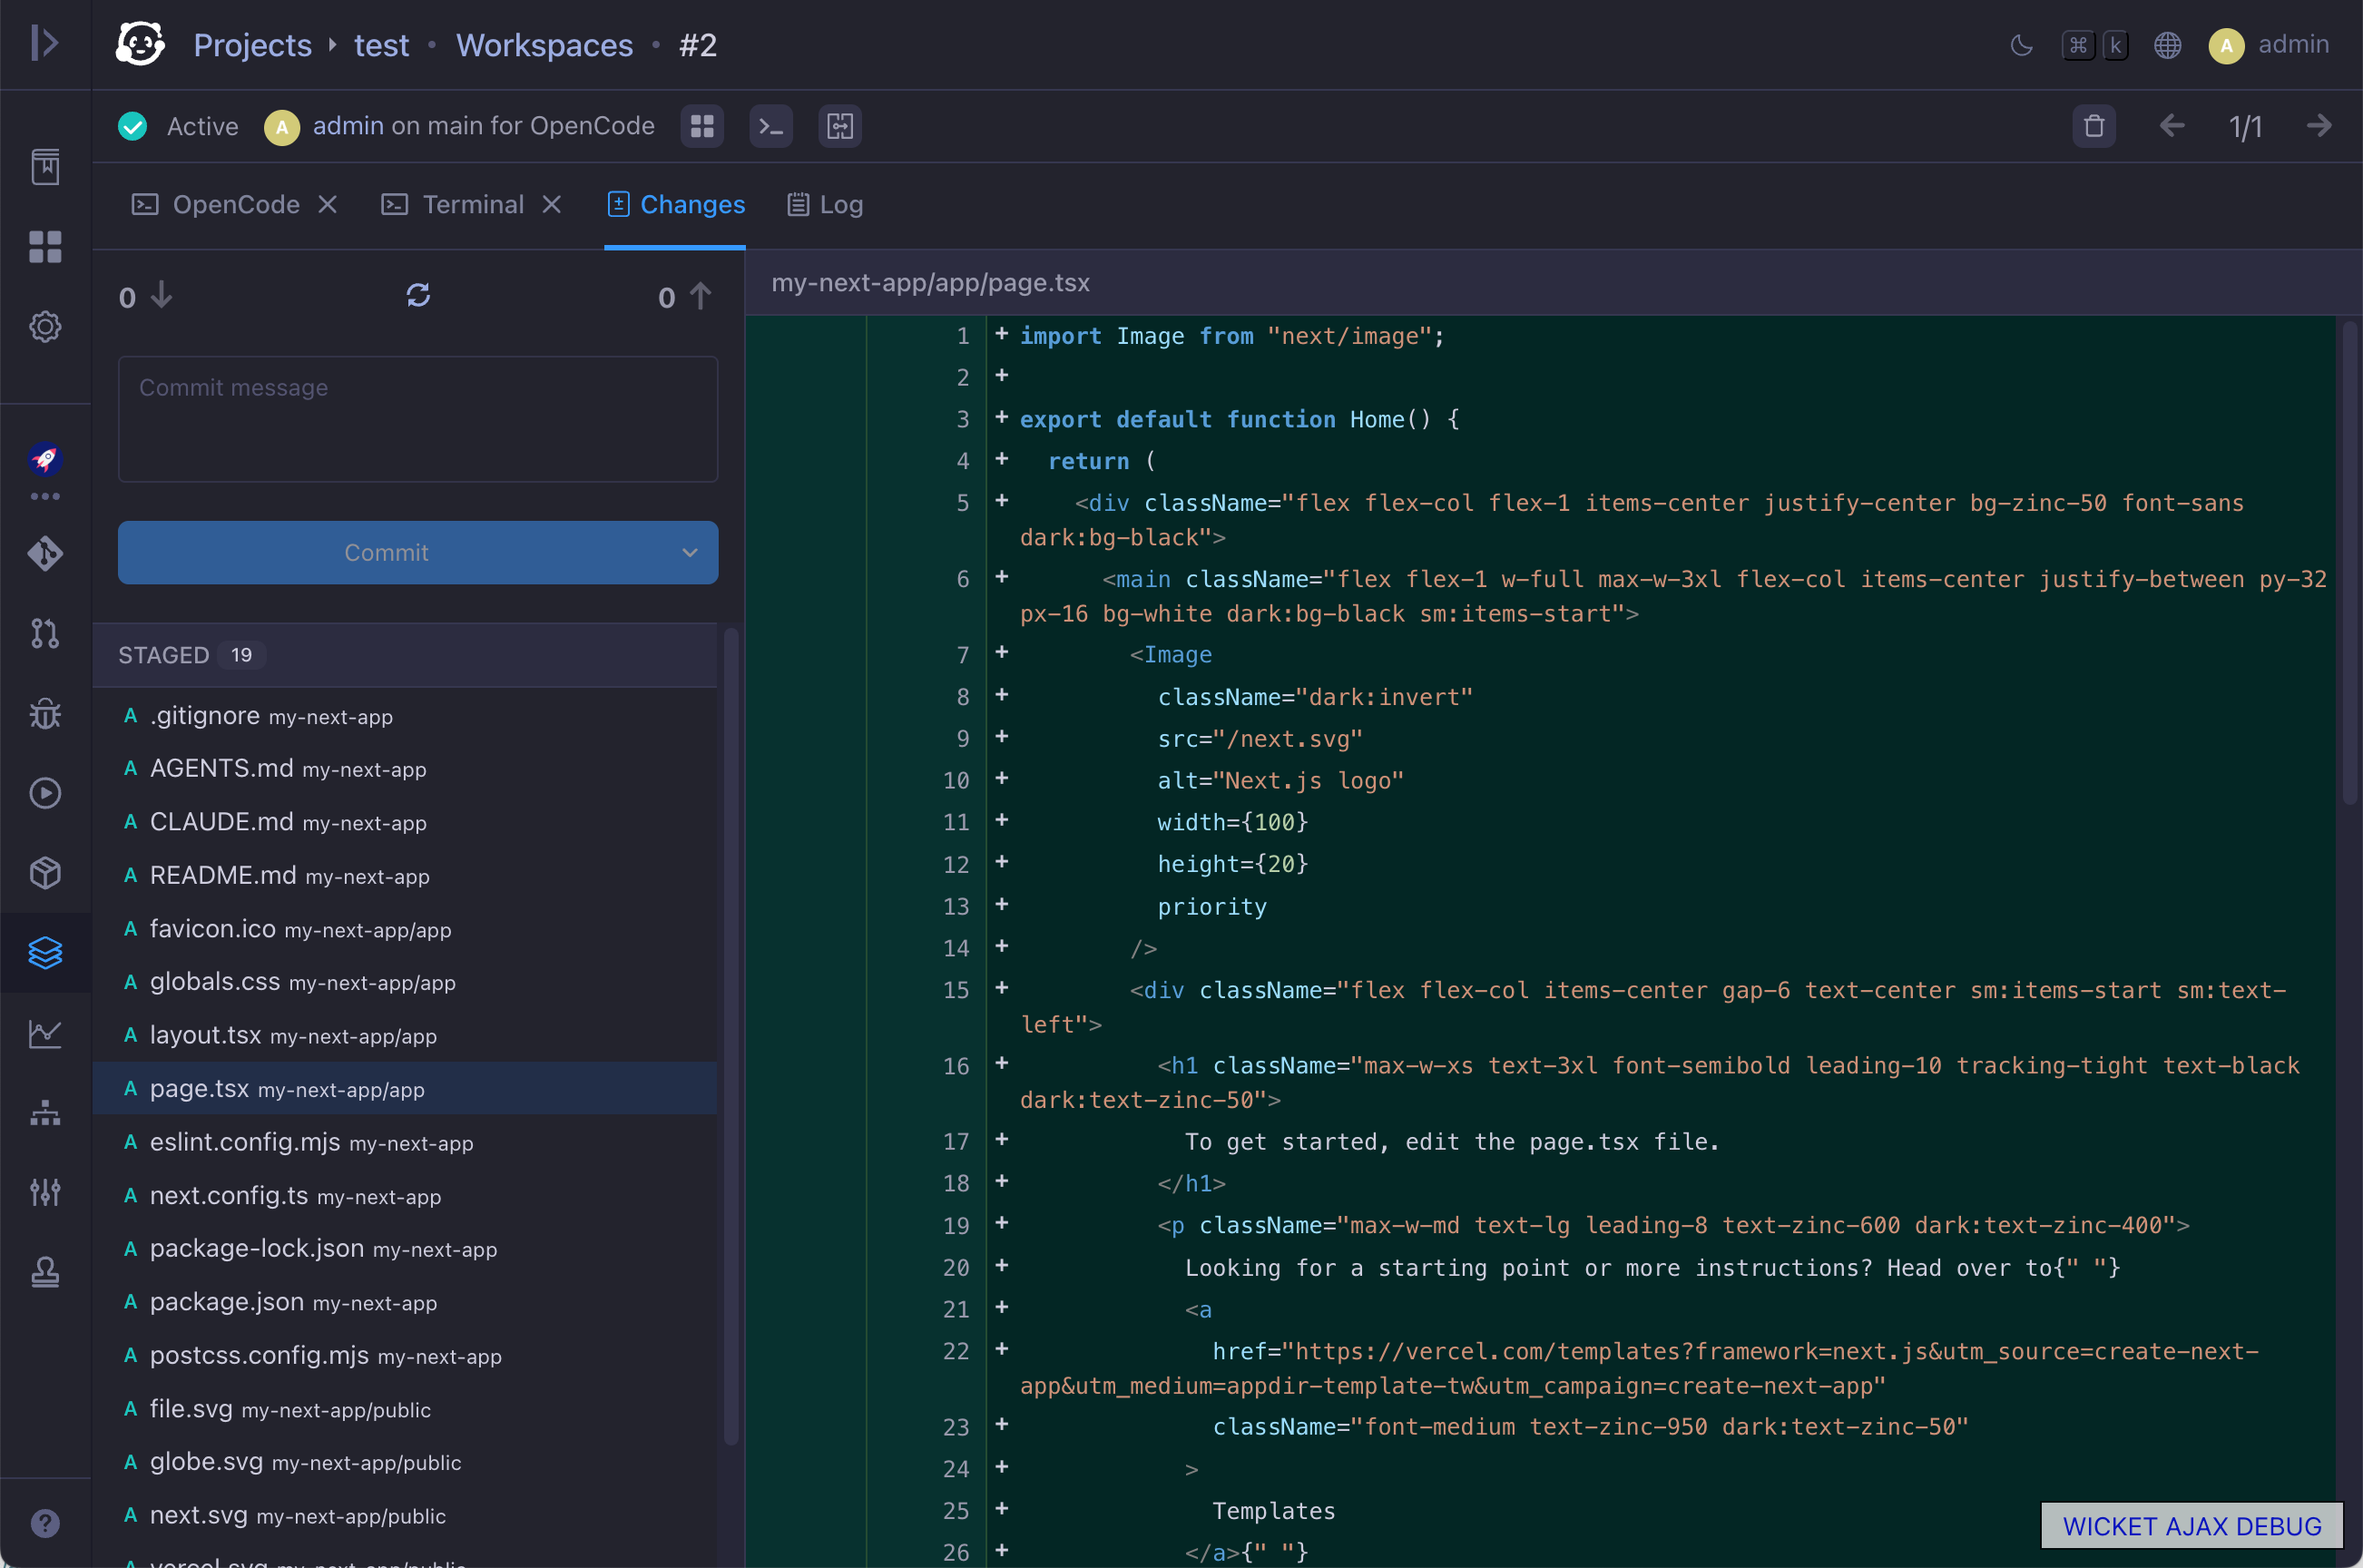
The changes tab displays all changed files, with options to stage, commit, and push them to the repository:
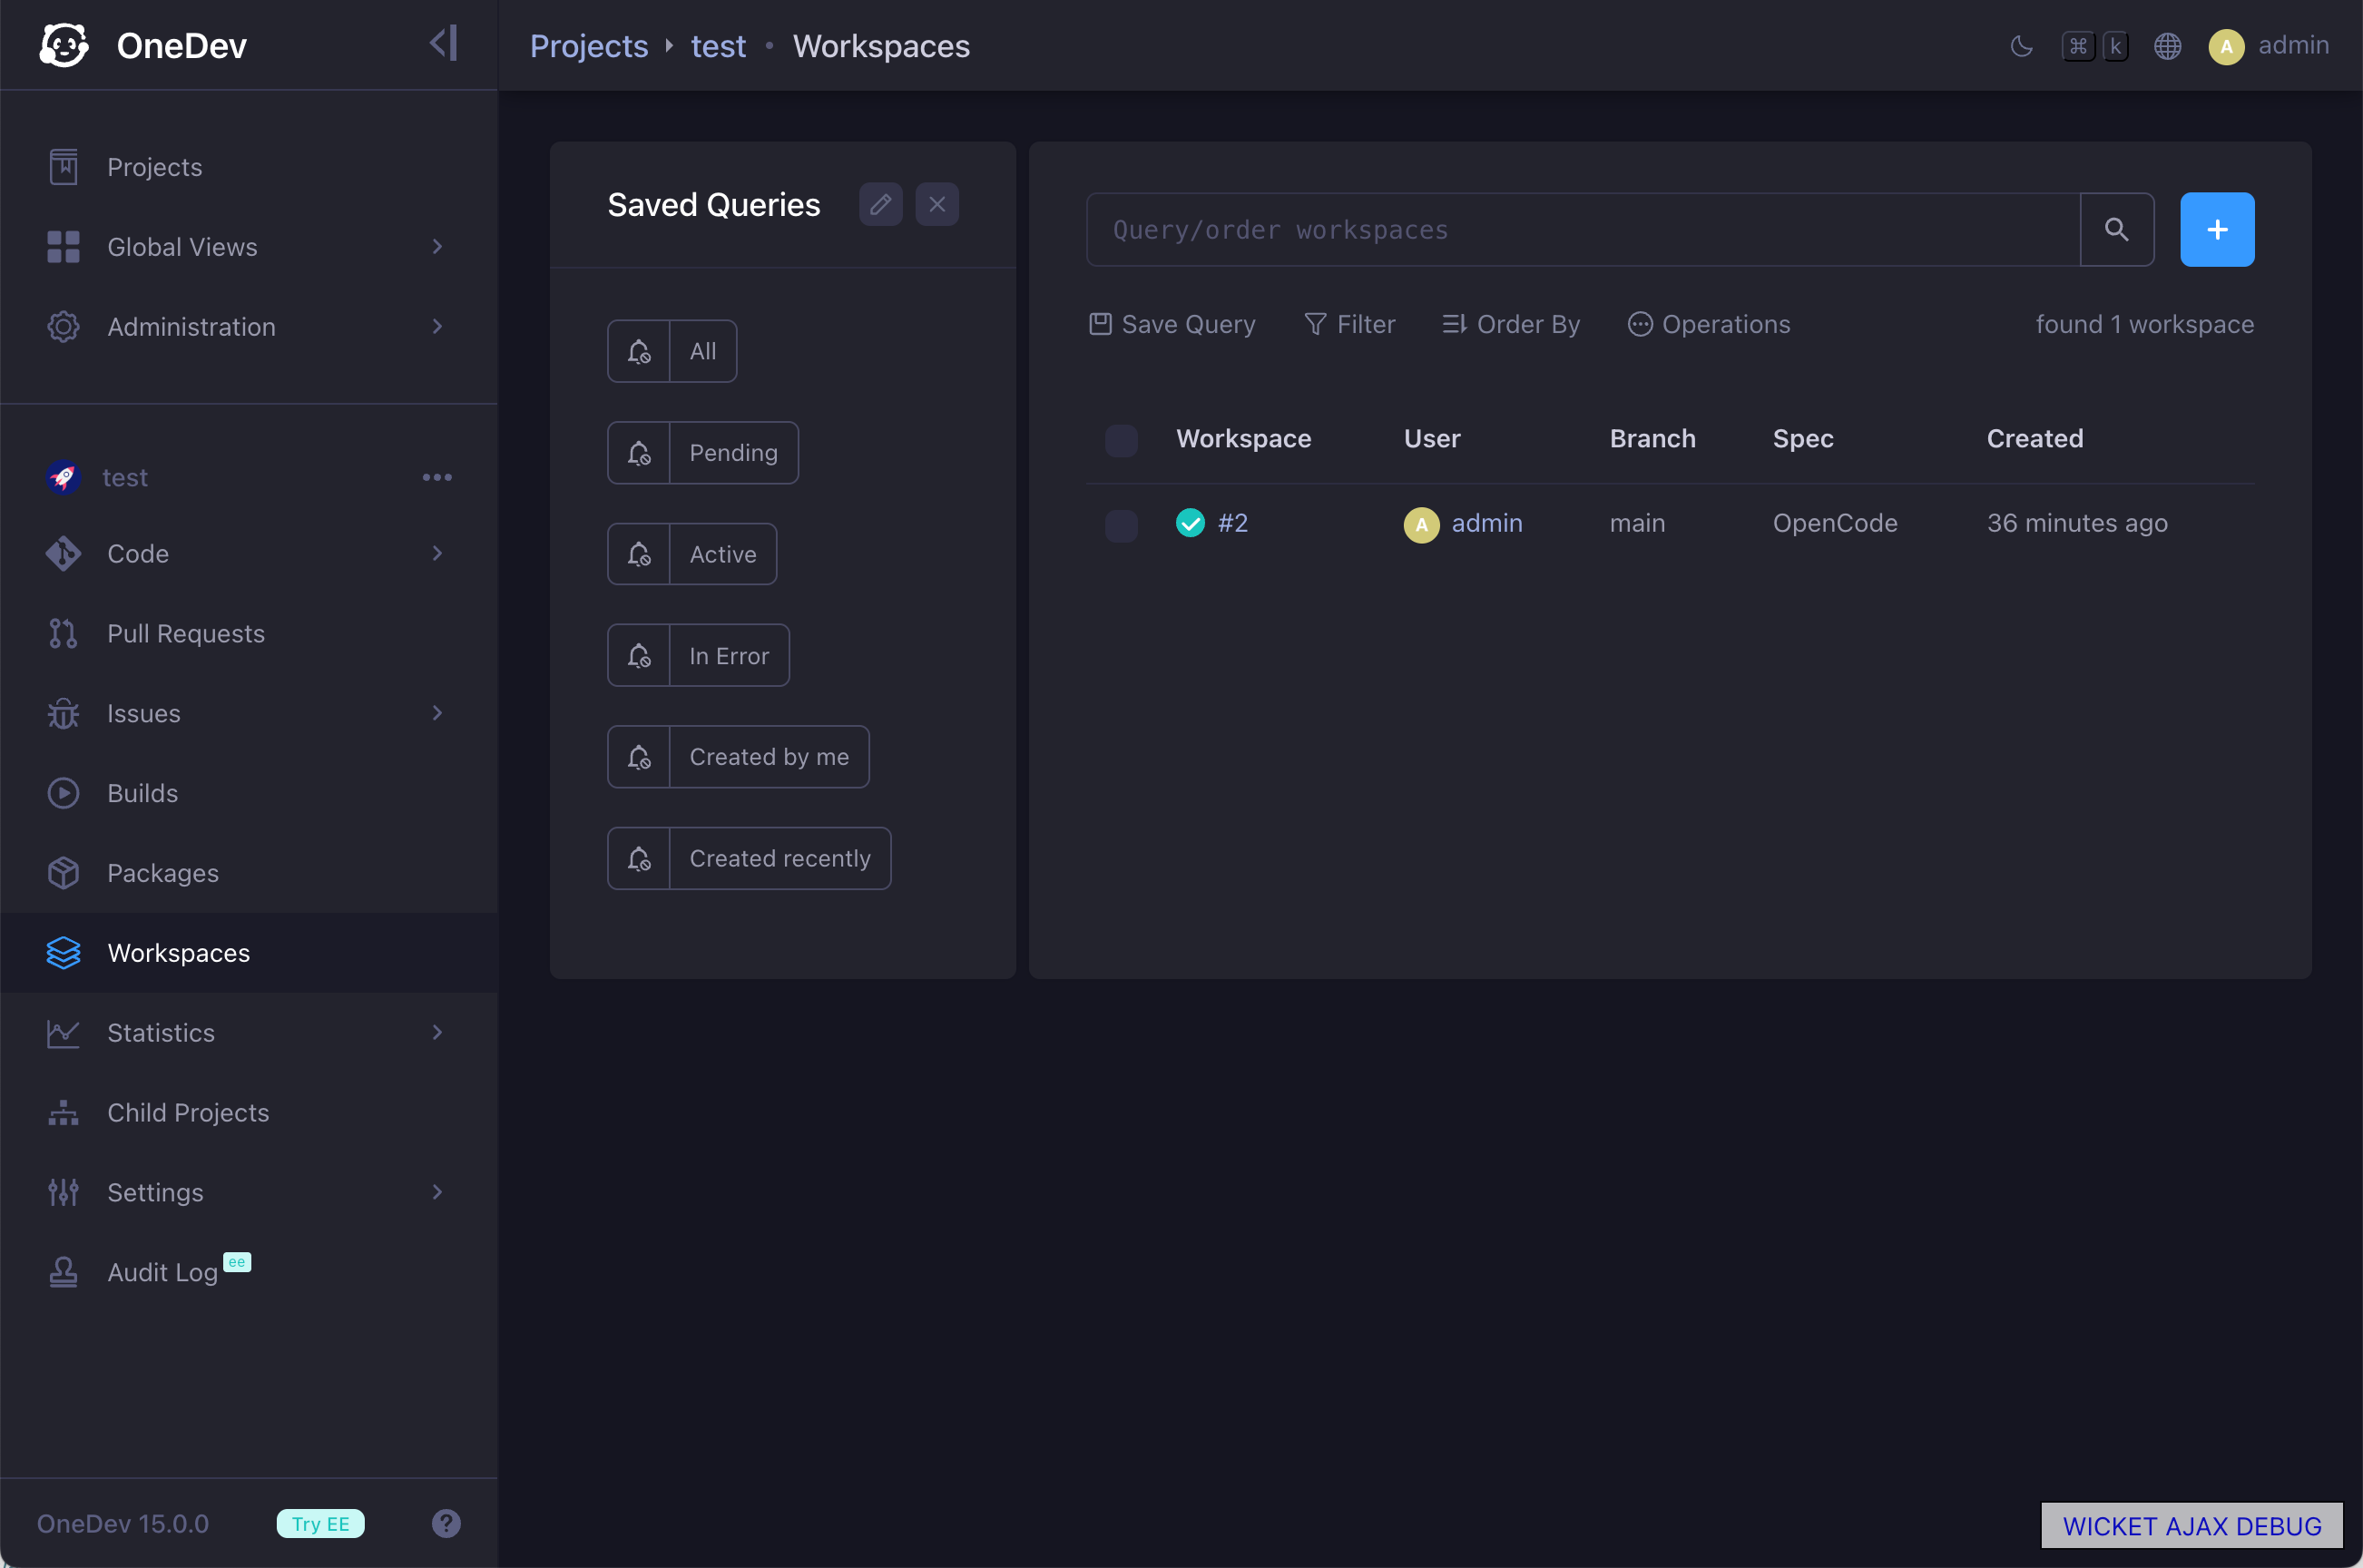
You can access an existing workspace from its associated branch, as shown above, or from the workspaces page:
Finally, delete the workspace after finishing your work so that user data can be saved and reused by other workspaces. You can check your user data from the workspace data page:
Shell-Based Workspaces
In the example above, workspaces run inside containers. This provides an isolated and secure environment, and is the recommended setup for teams. You can also run workspaces directly on the OneDev server or an agent machine by turning off the Run in Container option in the corresponding spec and using a shell provisioner.
Shell-based workspaces are useful if your development environment cannot run inside container, such as iOS, Windows native, or hardware-dependent development. Because shell-based workspaces run with the same privileges as the OneDev server or agent process, they should only be enabled for trusted projects.
Enterprise edition also offers remote shell and remote docker provisioners to run workspaces on agents, and a Kubernetes provisioner to run workspaces as pods in a cluster. See the section below for details.
Workspace Provisioners
Workspace provisioners define where and how workspaces are run. They also configure security, resource limits, concurrency, and other common workspace settings. They can be managed from the Administration menu:
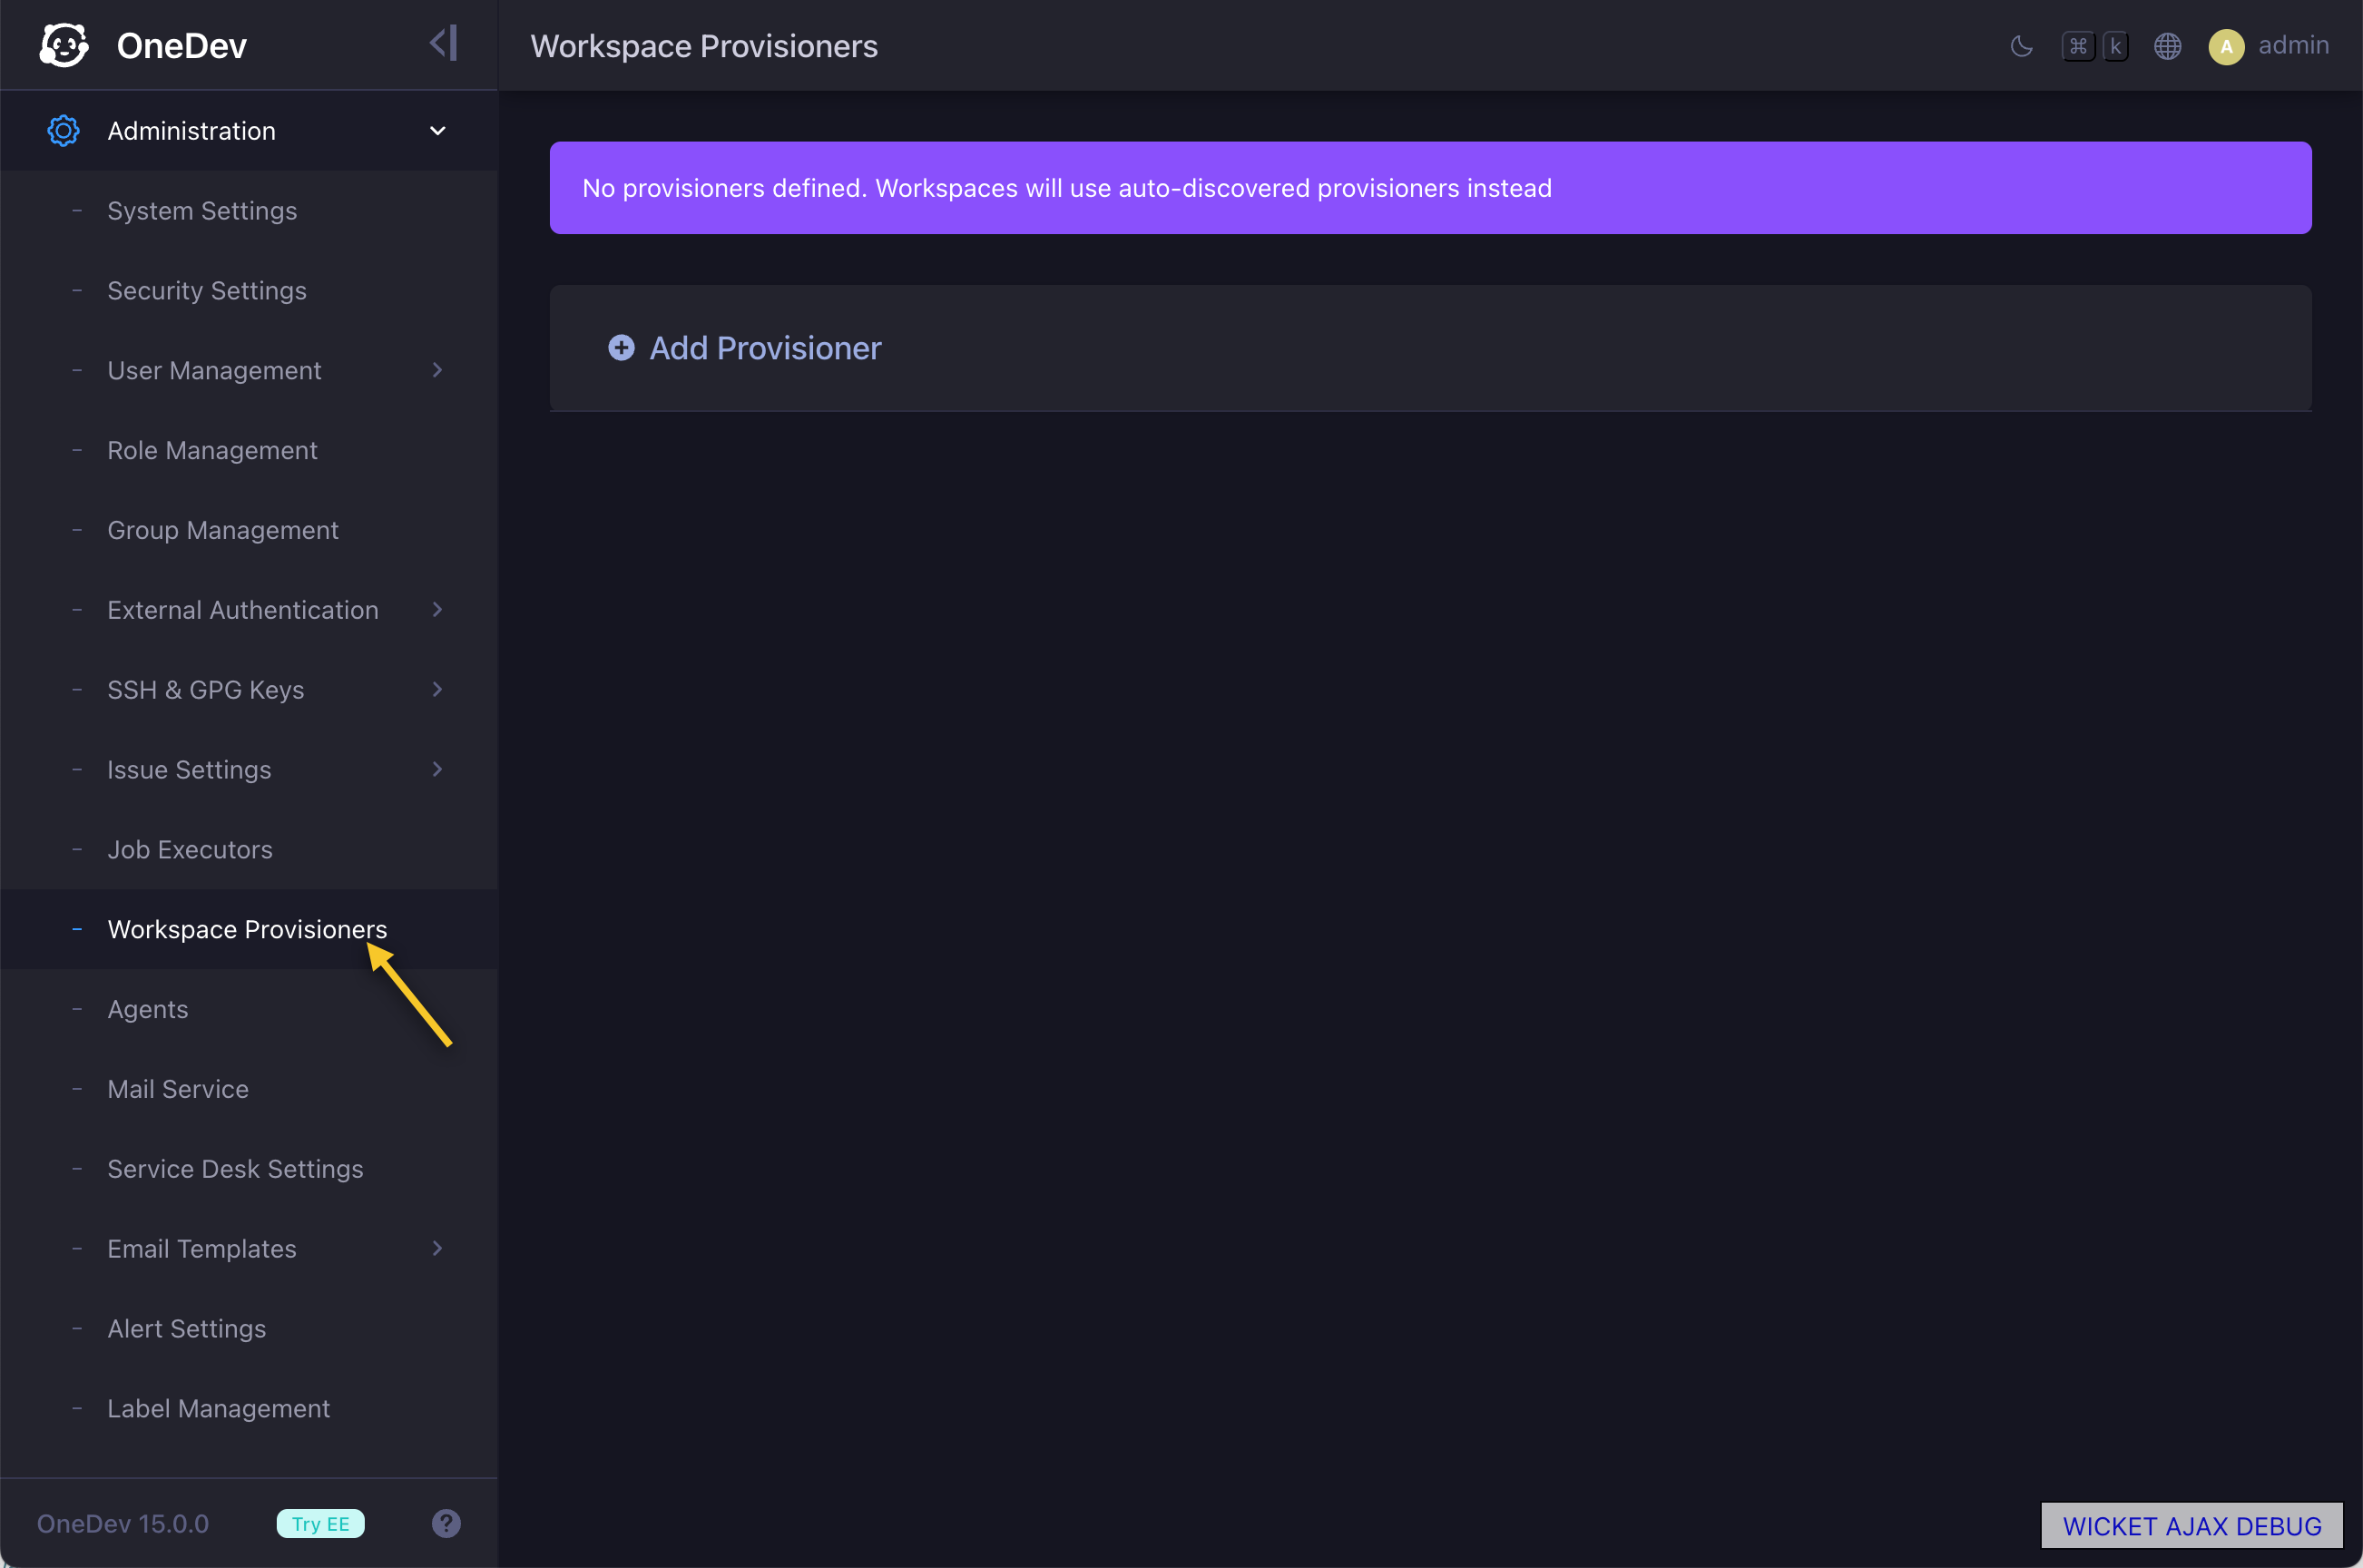
OneDev ships with the following provisioners:
- Server Docker Provisioner (community edition) — Creates workspaces inside Docker containers on the OneDev server. This is the default when no provisioners are defined.
- Server Shell Provisioner (community edition) — Creates workspaces with the server's shell facility. Requires tmux to be installed on the OneDev server.
- Remote Docker Provisioner (enterprise edition) — Creates workspaces inside Docker containers on remote machines via agents.
- Remote Shell Provisioner (enterprise edition) — Creates workspaces with remote agents' shell facility. Requires tmux to be installed on matched agents.
- Kubernetes Provisioner (enterprise edition) — Creates workspaces as pods inside a Kubernetes cluster.
Remote docker, remote shell, and Kubernetes provisioners require an enterprise subscription. Switch to menu item Administration / Subscription Management, request a trial subscription key, and install it into OneDev if you do not have an active subscription yet.
If a workspace spec does not specify a provisioner, OneDev uses the first provisioner applicable to the project, as determined by the provisioner's applicable projects setting. If the spec specifies a provisioner, OneDev uses that provisioner as long as it applies to the project.