Working with Packages
OneDev has built-in package registries for Docker, NPM, NuGet, Maven, PyPI, RubyGems, Cargo and Helm.
Compared to using a standalone package registry, the integrated package registries have below benefits:
- Sharing the same account and permission system with OneDev
- High availability and scalability for package storage (available in EE edition)
- Flexible package query like other parts of OneDev
- Subscribe to package query to get notifications of new packages
- Access published packages from CI/CD build directly
- Generate change log automatically for packages published via CI/CD
Enable Project Package Management
To publish packages under a project, Settings → General → Package Management must be enabled:
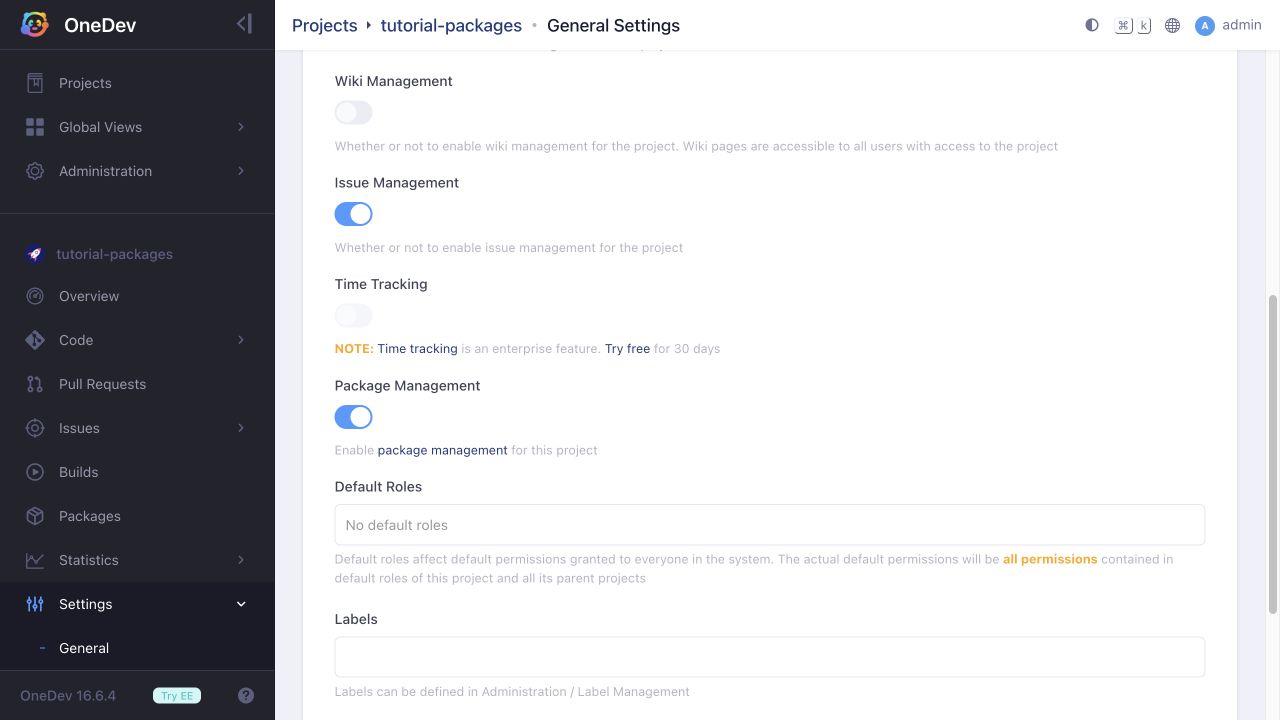
Once enabled, the packages menu item will be available (for all users with package read permission) displaying published packages of the project:
Use the package type queries to narrow the list, for example to NPM packages.
Permission to Access and Publish Packages
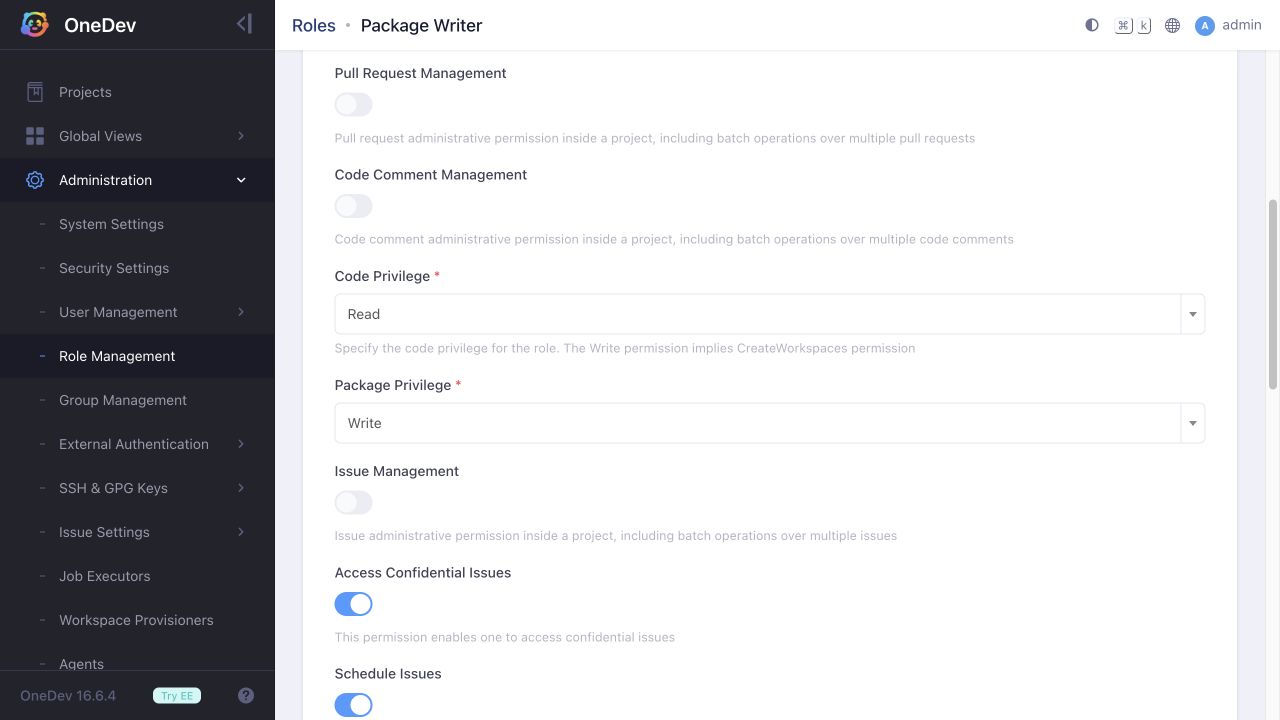
Package read permission is required to access packages of a project, and write permission is required to publish packages to a project. Configure Package Privilege in Administration → Role Management, then authorize the user or group with that role on the destination project. Access tokens must also have the required project permissions:
Publish Packages
While it is possible to publish packages outside of OneDev, we highly recommend to publish packages in your CI/CD job to automate things. Also packages published via CI/CD job will be linked with build, code and issues automatically for cross reference.
Push Container Images
The Build Image (Buildx) step is disabled by default. Turn on Enable Buildx Image Build in the relevant Docker executor’s Security Settings. If no executors are defined, OneDev uses an auto-discovered executor with this option disabled; add an executor explicitly. See Enable Image Build in the Executor for setup instructions.
Add a Build Image (Buildx) step, select Push to container registry, and set the destination tags. Under More Settings → Registry Logins, select a job secret containing an access token with package write permission:
- !BuildImageStep
  name: Publish image
  output: !RegistryOutput
    tags: '@server@/my-project/my-image:@build_number@'
  registryLogins:
  - registryUrl: '@server_url@'
    userName: '@job_token@'
    passwordSecret: package-token
  condition: SUCCESSFUL
Replace my-project/my-image with the destination project path and image repository. @server@ expands to the configured OneDev server host and port without the URL scheme; @server_url@ includes the scheme. The job token associates the package with the publishing build. See Working with Container Image for the full workflow and HTTP registry setup.
Deploy Maven Artifacts
Any project can be used as maven artifact repository as long as package management is enabled for the project. To deploy artifacts to a project:
-
Add repository information in pom.xml like below:
<repositories><repository><id>onedev</id><url>https://onedev.example.com/my-project/~maven</url></repository></repositories><distributionManagement><repository><id>onedev</id><url>https://onedev.example.com/my-project/~maven</url></repository><snapshotRepository><id>onedev</id><url>https://onedev.example.com/my-project/~maven</url></snapshotRepository></distributionManagement>Replace
https://onedev.example.comandmy-projectwith your server URL and destination project path. Therepositoriessection is for consuming artifacts;distributionManagementselects deployment destinations. Keep the repository ID consistent withsettings.xml. -
Add below to $HOME/.m2/settings.xml if you want to deploy from command line
<settings><servers><server><id>onedev</id><!-- Make sure the account has package write permission over the project --><username>onedev_account_name</username><password>onedev_password_or_access_token</password></server></servers></settings> -
For CI/CD job, it is more convenient to use a custom settings.xml, for instance via below code in a command step:
cat << 'EOF' > settings.xml<settings><servers><server><id>onedev</id><!-- Use job token as user name so that OneDev can know which build is deploying packages --><username>@job_token@</username><!-- Job secret 'access-token' should be defined in project build setting as an access token with package write permission --><password>@secret:access-token@</password></server></servers></settings>EOFmvn --settings settings.xml clean deploy
Publish NPM Packages
Any project can be used as NPM package registry as long as package management is enabled for the project. To publish packages to a project:
-
From the package directory, configure the registry and token. Replace the example host, project path, and scope with yours, and set
ONEDEV_ACCESS_TOKENto a token with package write permission:npm config set --location=project @myscope:registry https://onedev.example.com/my-project/~npm/npm config set --location=project -- '//onedev.example.com/my-project/~npm/:_authToken' "$ONEDEV_ACCESS_TOKEN"npm publishThis writes credentials to the project's
.npmrc. Keep that file out of version control. Thenameinpackage.jsonshould use the configured scope, for example@myscope/my-package. -
In a CI/CD command step, use the job token with the job secret to associate publication with the build:
# Escape a literal @ as @@ in interpolated job commandsnpm config set --location=project @@myscope:registry https://onedev.example.com/my-project/~npm/npm config set --location=project -- '//onedev.example.com/my-project/~npm/:_authToken' "@job_token@:@secret:package-token@"npm publishDefine the
package-tokensecret in Settings → Build → Job Secrets, authorize it for the job's commit, and give its token package write permission on the destination project. See Working with NPM for installation and package queries.
Access Published Packages
Published packages will be listed as shown below:
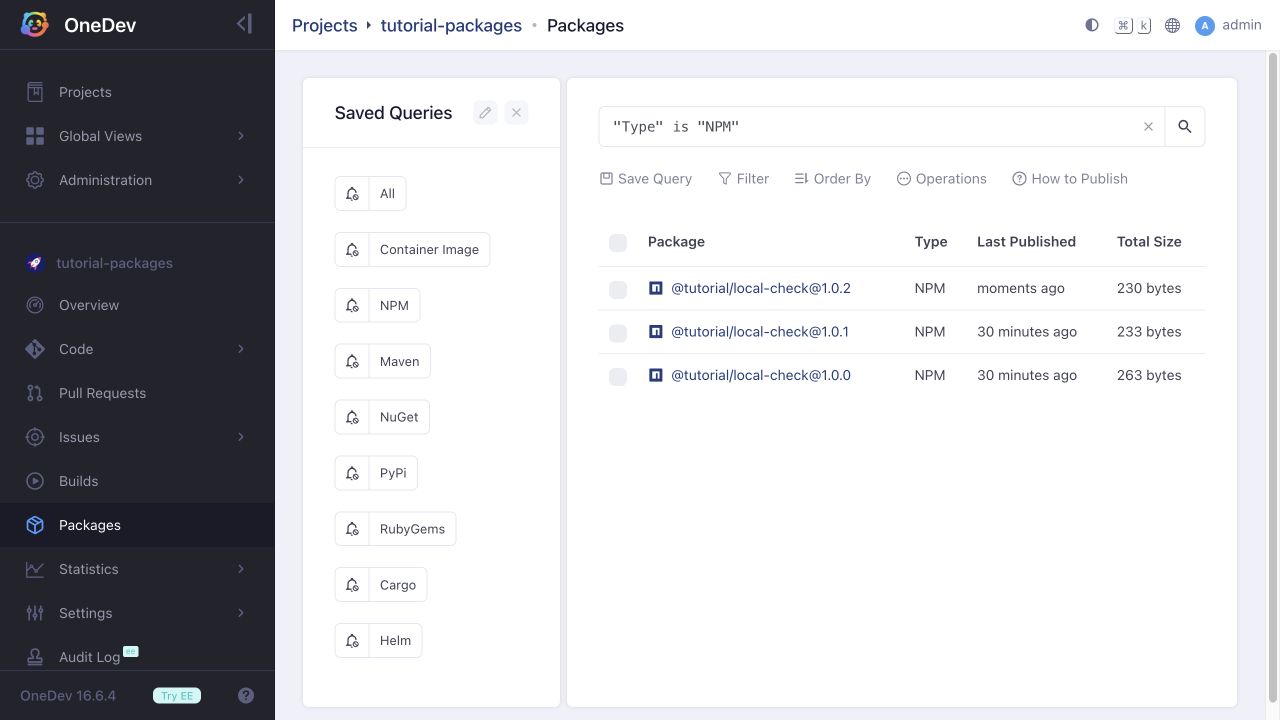
From here, you may query/subscribe interesting packages, or select a package to view its detailed information:
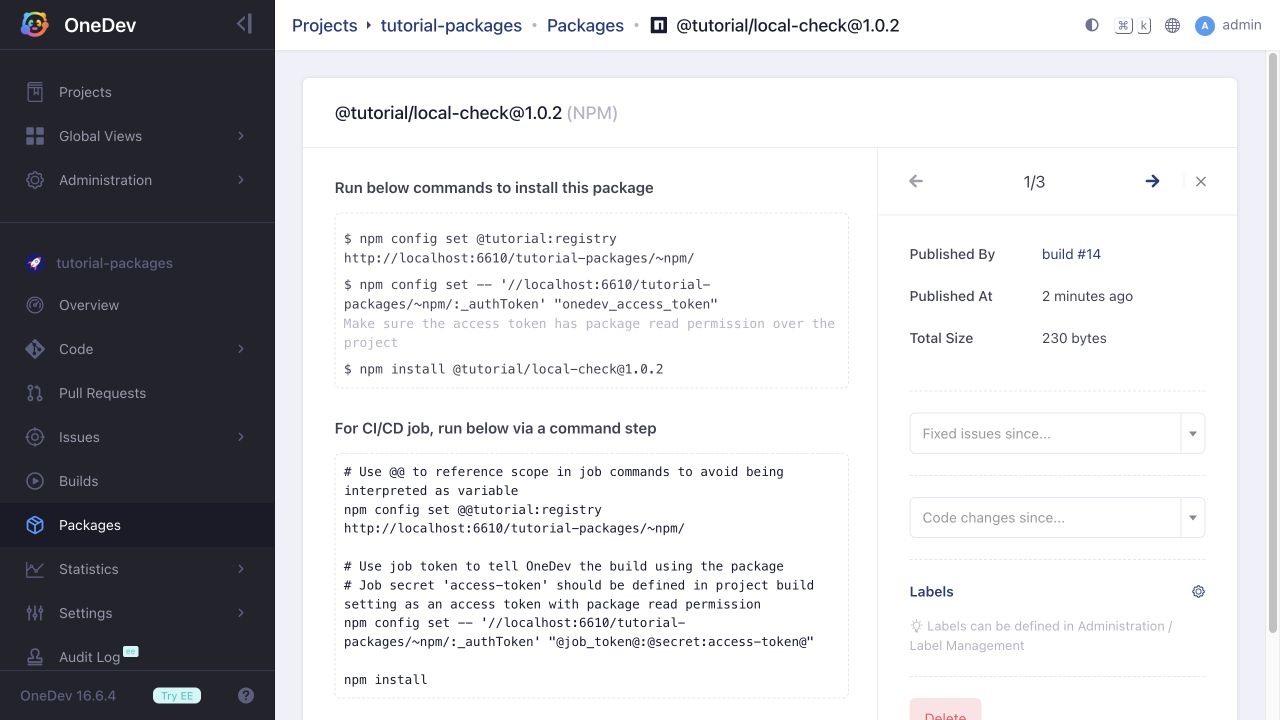
For packages published by CI/CD, open the metadata sidebar using the … control if it is hidden. Published By links to the publishing build. Fixed issues since… and Code changes since… let you select an eligible previous package version and compare the commits of their publishing builds. A version published only from the command line has no publishing build to compare.
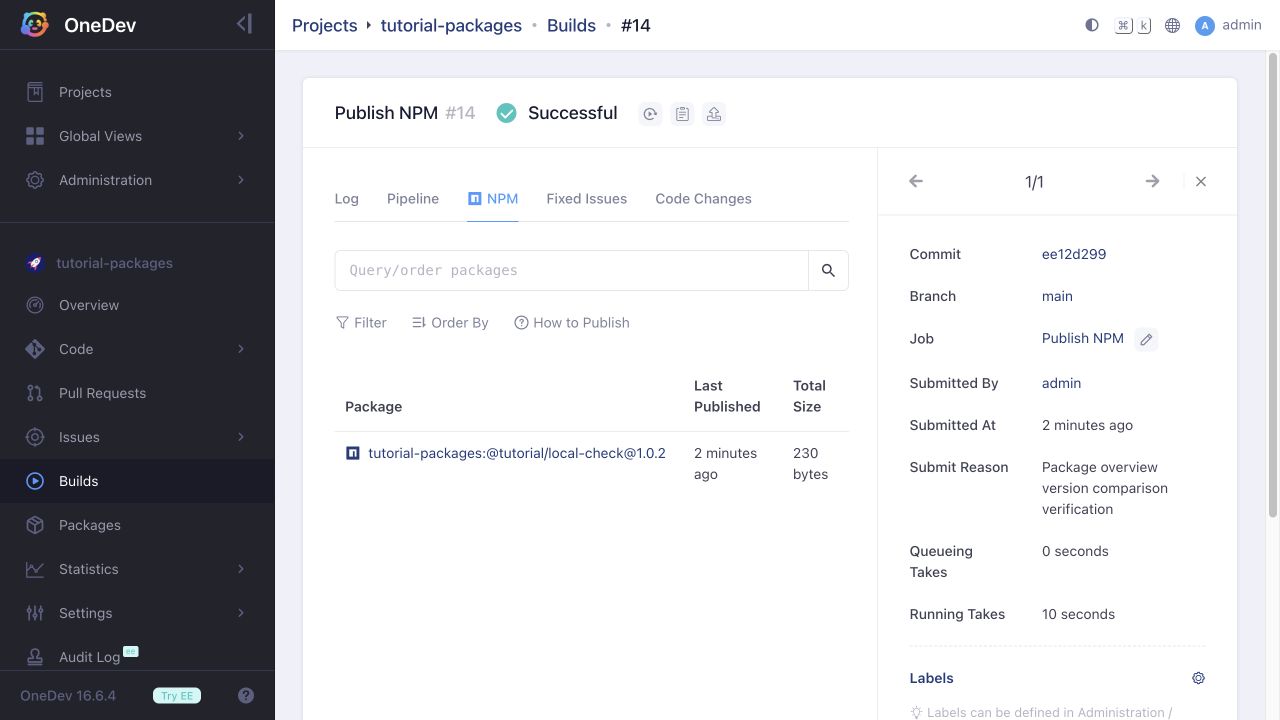
The publishing build also has a tab for each package type it published: