Quickstart
-
Run below command on Linux/Mac to start OneDev in docker mode:
docker run -it --rm -v /var/run/docker.sock:/var/run/docker.sock -v $(pwd)/onedev:/opt/onedev -p 6610:6610 -p 6611:6611 1dev/serverIf you want to try on Windows machine, please follow the bare metal installation guide
-
Point your browser to http://localhost:6610 to set up OneDev, and then create a project with name my-app
-
Run below command from your terminal to create a react application:
npx create-react-app my-app -
Change into directory my-app, and run below command to push code to OneDev:
git remote add origin http://localhost:6610/my-app
git push origin main:main
When prompted for authentication, input administrator user name and password specified above
-
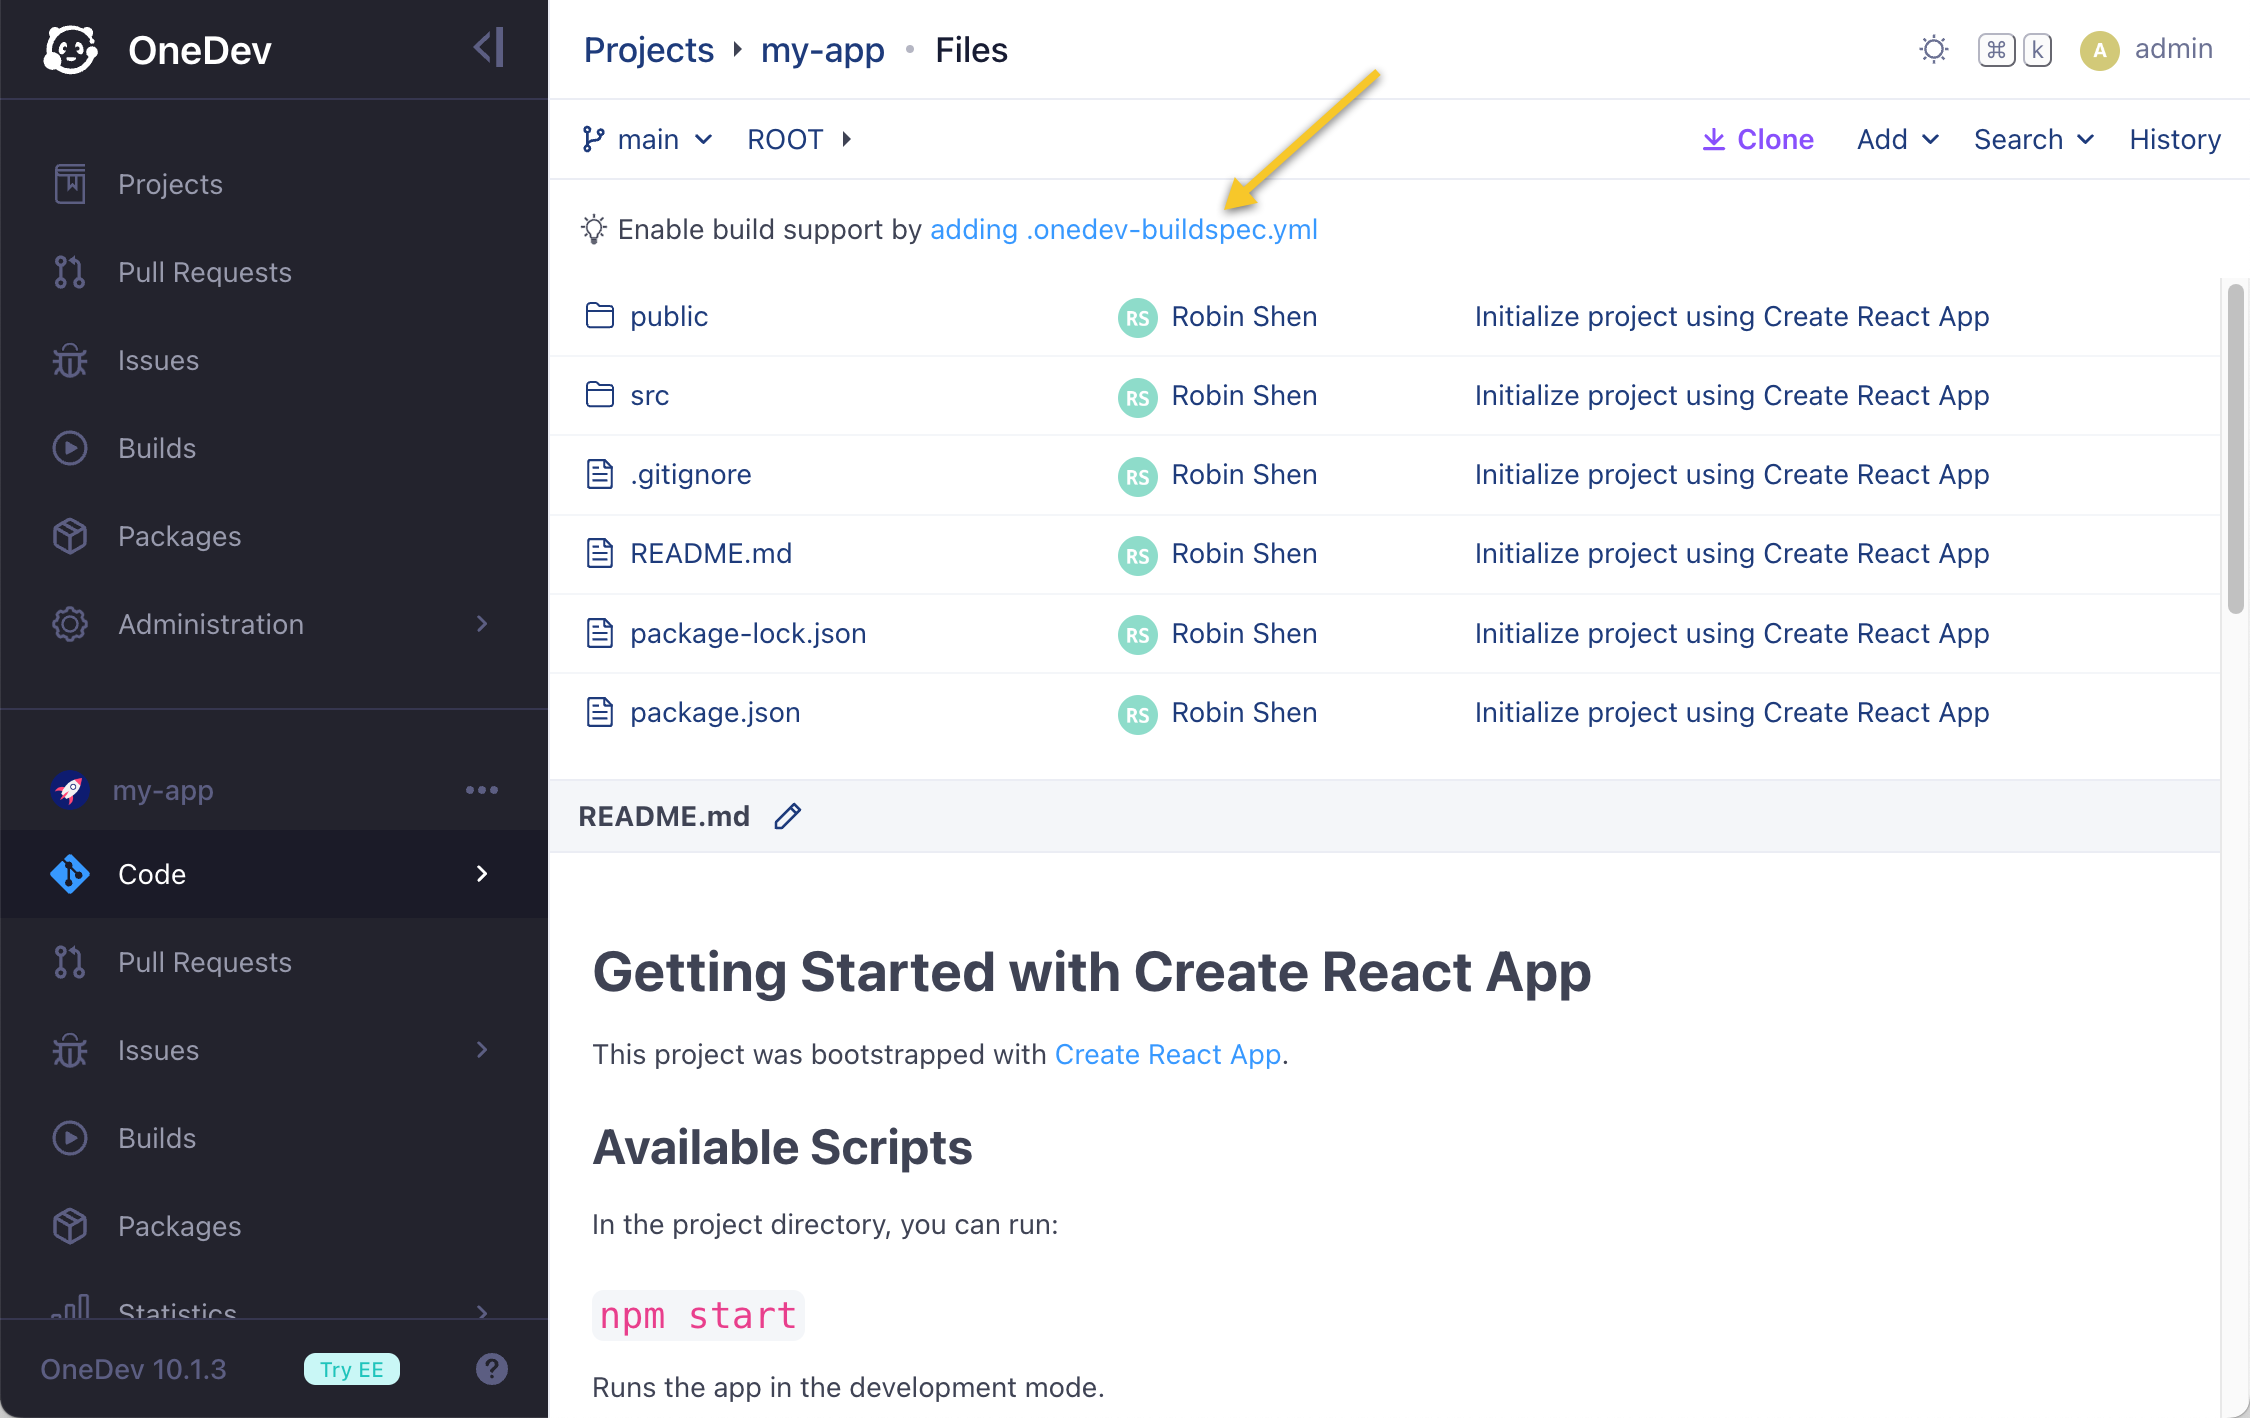
Navigate to the OneDev project, click link adding .onedev-buildspec.yml to bring up the GUI to set up CI/CD
-
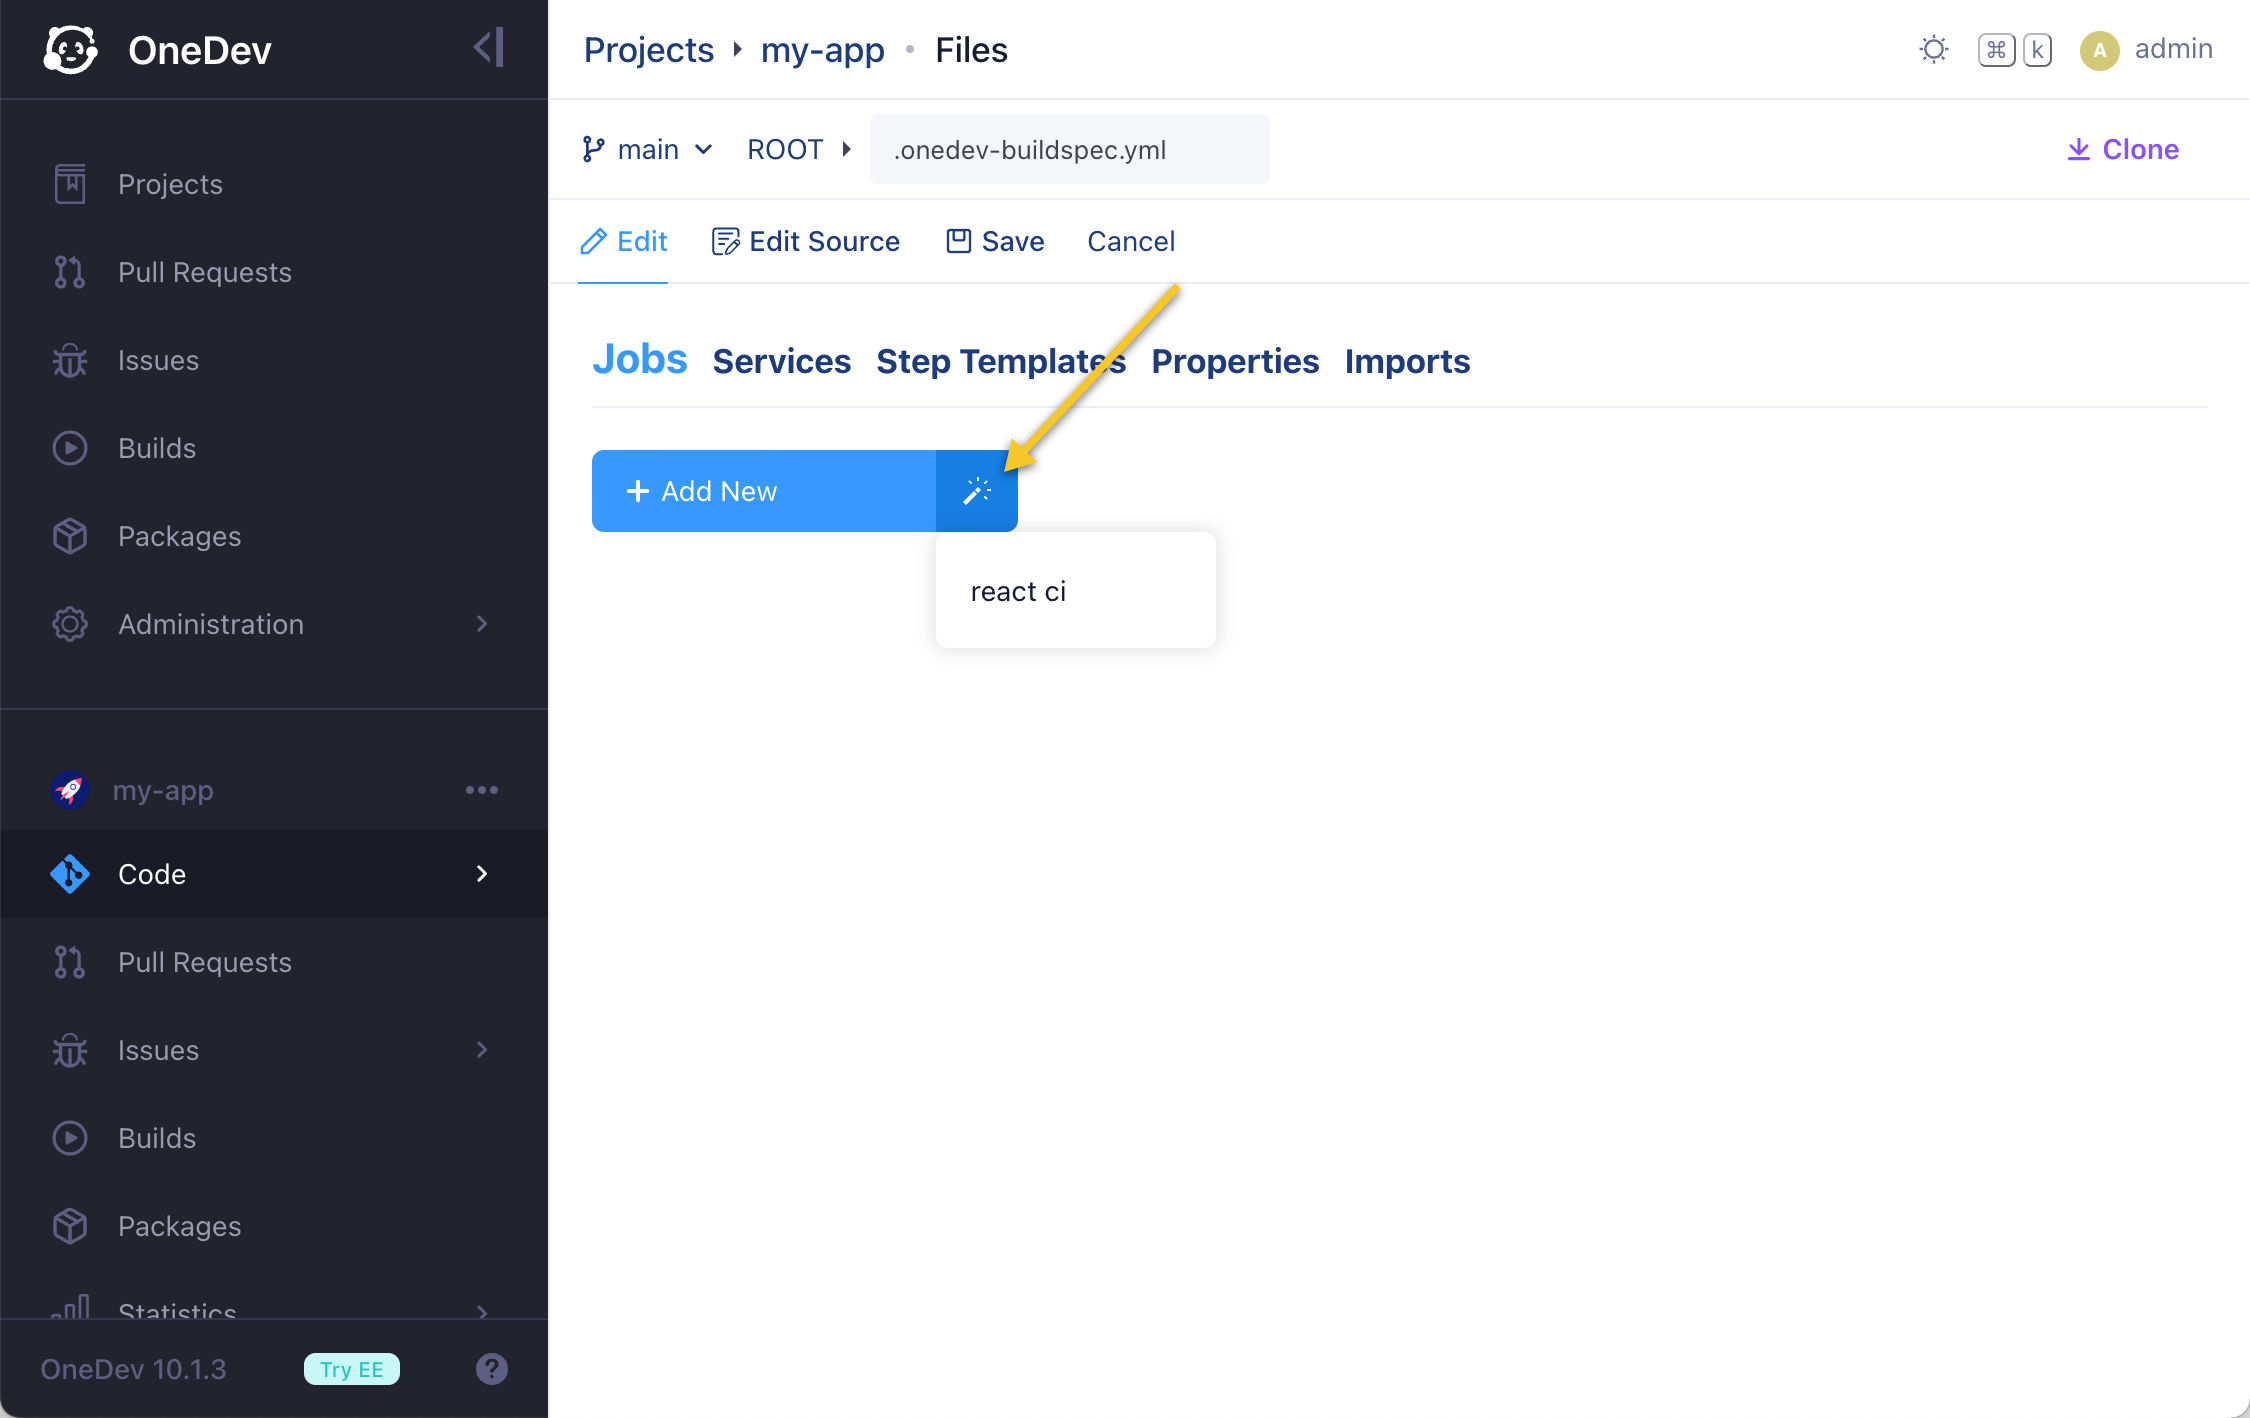
For typical projects, OneDev suggests default CI/CD job templates like below:
-
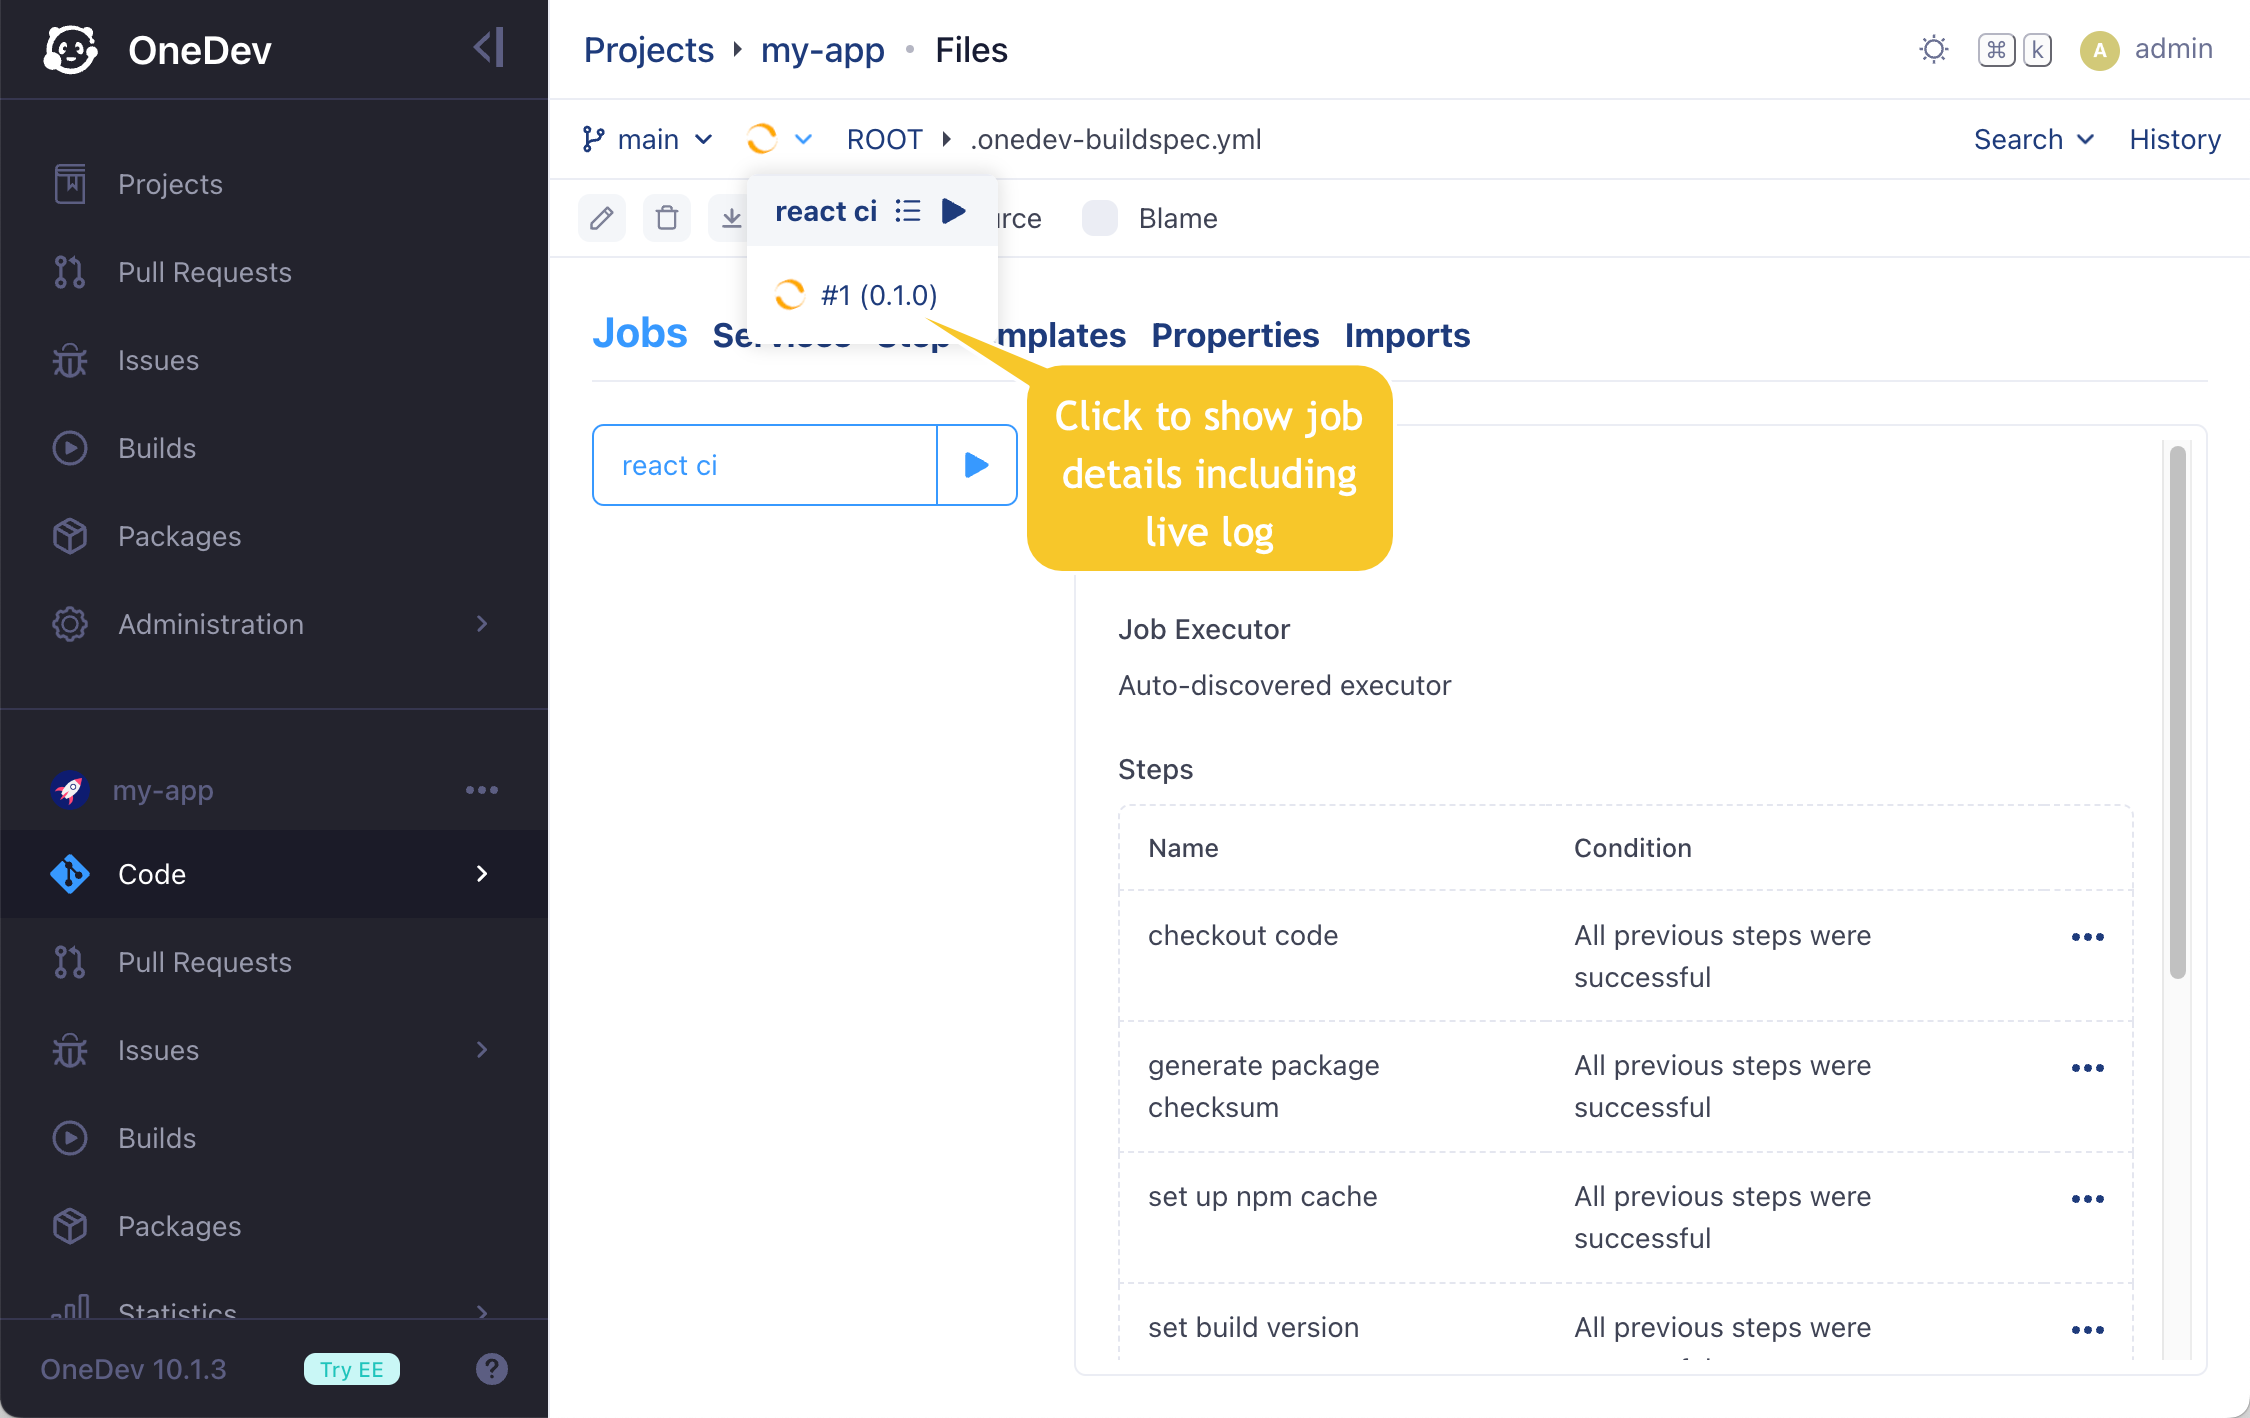
Just use the default template, and save the build spec. Now you will see that a CI build is running:
-
Congrats! You've finished the quickstart. Continue to check some tutorials if you are interested.