Development Environment Setup
IntelliJ Based Setup
Make sure you have JDK 11 installed and available as default JDK in system path
Make sure you have Maven 3.6.3 or higher installed
Install IntelliJ community/ultimate edition
Clone OneDev source code into a directory. Assume it is
~/Projects/onedev/server:$ git clone https://code.onedev.io/onedev/server ~/Projects/onedev/serverRun below command to install OneDev into local Maven repository:
$ cd ~/Projects/onedev/server
$ mvn clean install -Pce
Start IntelliJ and open the folder
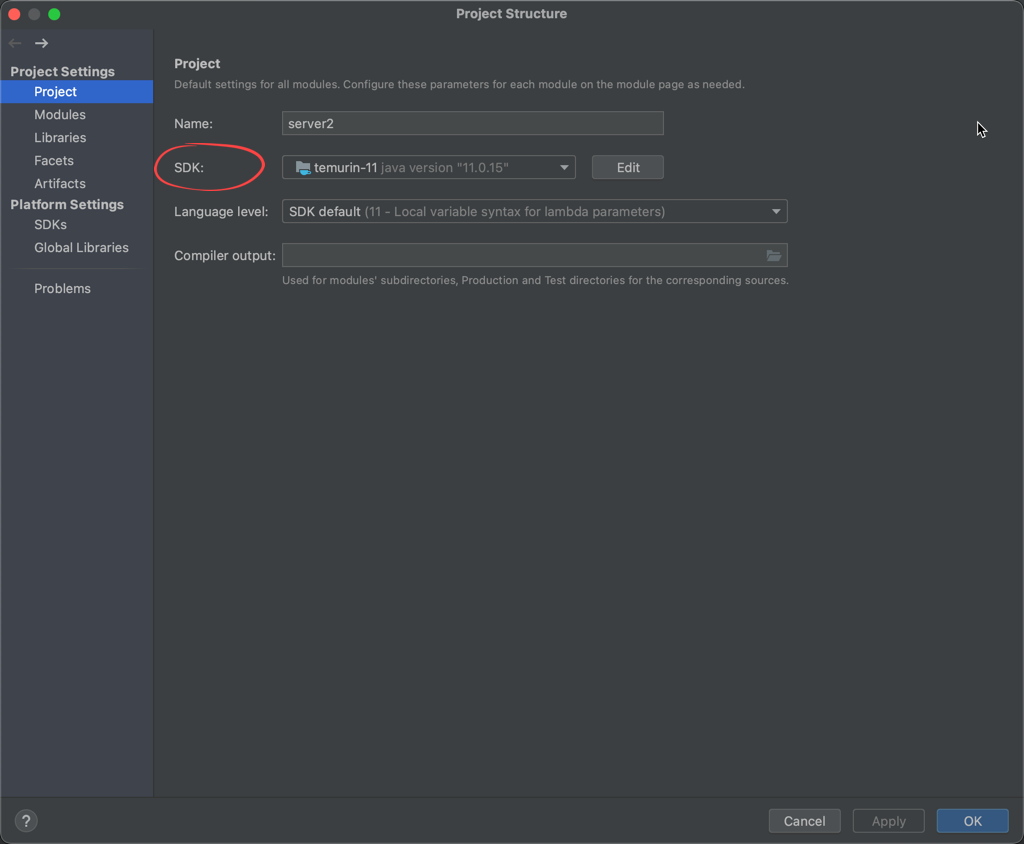
~/Projects/onedev/server. IntelliJ should prompt you whether or to trust folder~/Projects/onedev. Trust it and IntelliJ should open it as a maven project with multiple modulesOpen project setting to check if Java sdk is 11. Normally IntelliJ can detect your JDK 11 installation automatically. In case it does not, manually specify the location

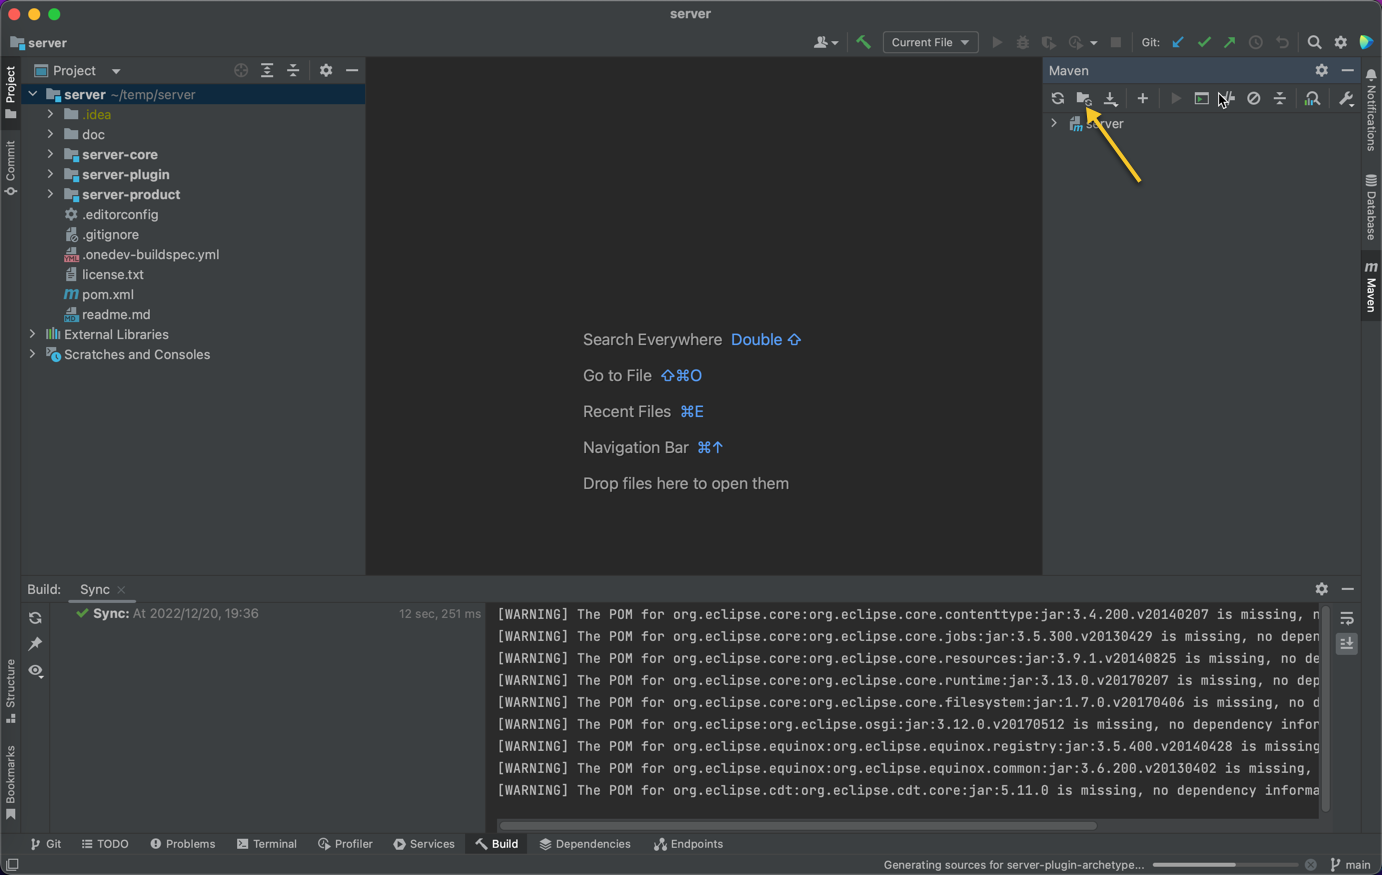
Open the maven tool window, and hit the
generate source and update folder for all projectsicon like below:
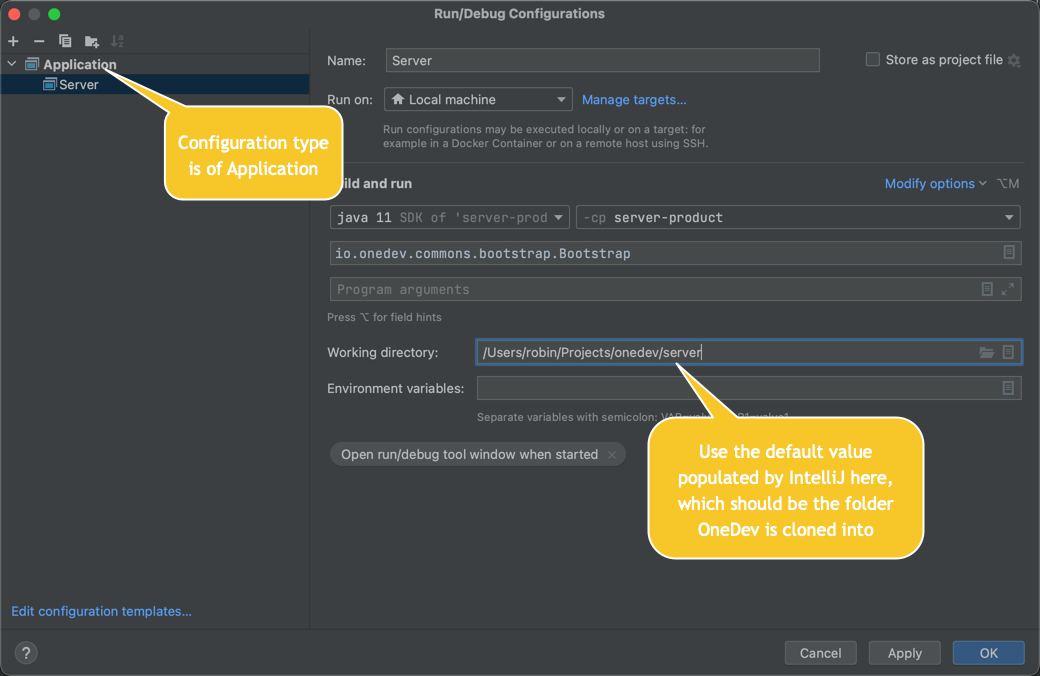
Create a configuration to run OneDev like below:

Now you can run/debug OneDev via created configuration above
Each time you reload/sync projects with POM (for instance when add extra dependencies to POM), you need to click the
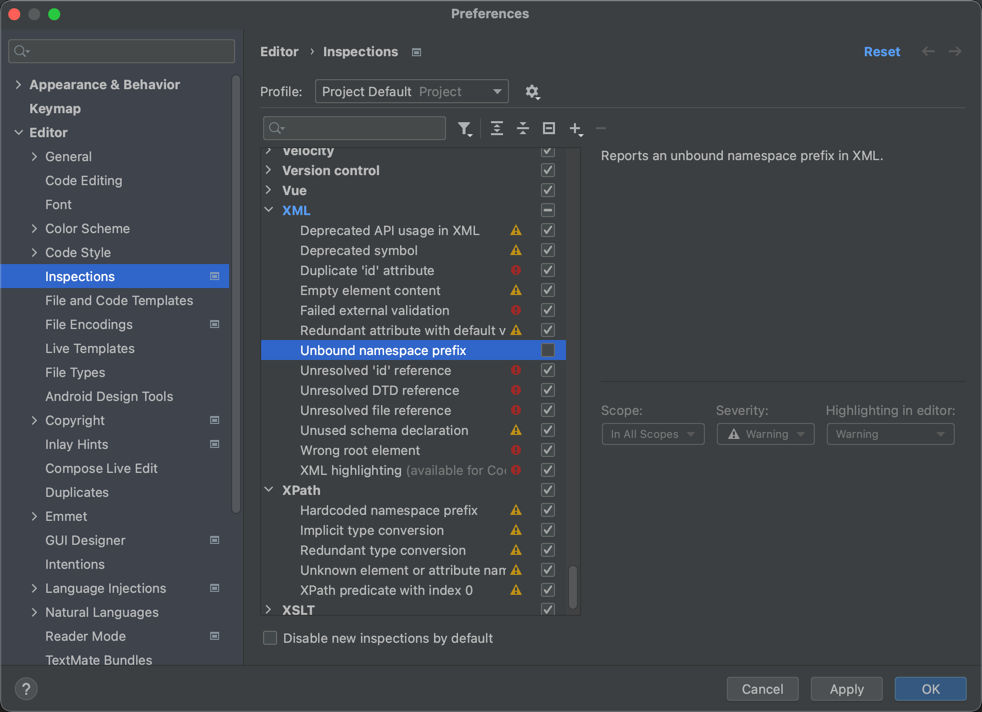
generate sources and update folders for all projectsicon as shown above.OneDev uses Apache Wicket as web framework, and its html tags are unknown to IntelliJ. To prevent IntelliJ from complaining about this, consider turn off the
unbound namespace prefixcheck like below:
CLI Based Setup
If you don't want to use Eclipse for any reason it is also possible to compile/run OneDev via CLI:
Make sure you have JDK 11 installed
Make sure you have Maven version 3.6.3 or higher installed
Make sure you have Git version 2.11.1 or higher installed
Clone OneDev source code
git clone https://code.onedev.io/onedev/server onedev-serverRun maven install from
./onedev-servercd onedev-server
mvn install -PceRun the Boostrap class from
./server-productcd server-product
mvn exec:java -Dexec.mainClass="io.onedev.commons.bootstrap.Bootstrap"